DIY Seat Cowl (with pics)
Forum rules
Please can you post items for sale or wanted in the correct For Sale section. Items / bikes for sale here will be removed without warning. Reasons for this are in the FAQ. Thanks
Please can you post items for sale or wanted in the correct For Sale section. Items / bikes for sale here will be removed without warning. Reasons for this are in the FAQ. Thanks
-
neilwilson
- Settled in member
- Posts: 36
- Joined: Thu Aug 26, 2010 8:57 pm
- Bike owned: CBR400RR-L NC29 and Bandit 600
- Location: Sunderland
DIY Seat Cowl (with pics)
Hey people, after sitting around bored this morning nursing a small self inflicted hangover i decided i would get to work creating a diy seat cowl on my spare rear fairing for my NC29.
This method is certainly not tried and tested and would not recommend people follow it. I am a complete NOVICE when it comes to bodywork.
I am not posting looking for gratitude just proud of what i managed to complete so far...
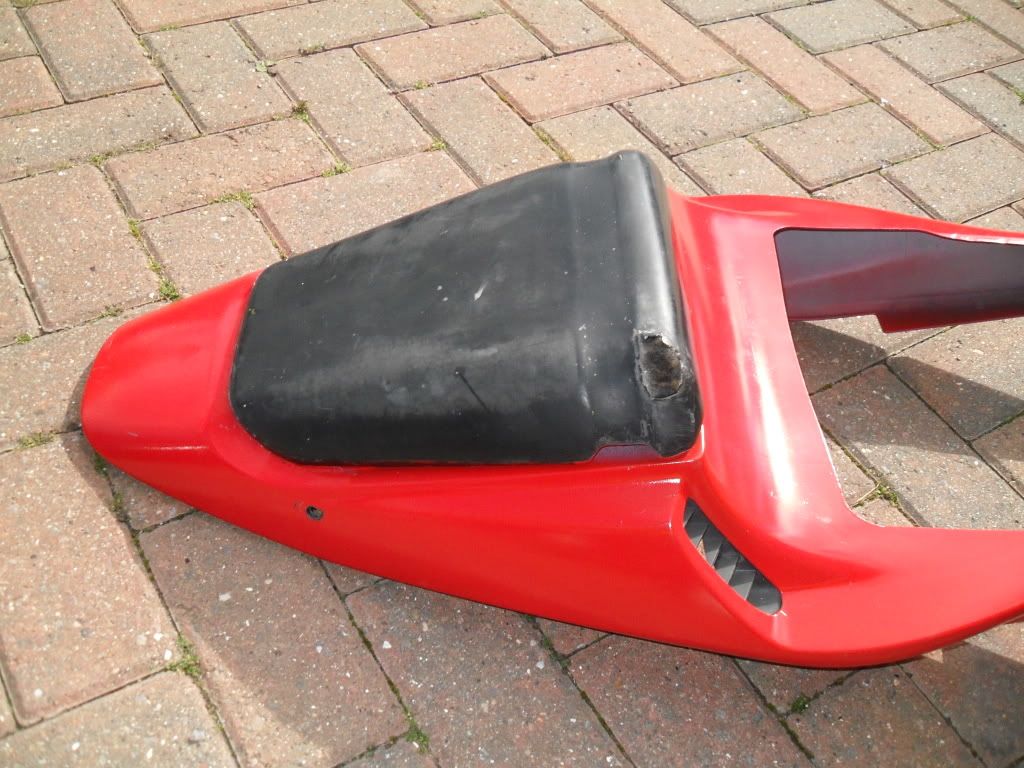
Spare rear fairing with seat attached.
First of all i had to remove the rear seat and strip it of it covering. All i done was simply pick the staples from the underneath.
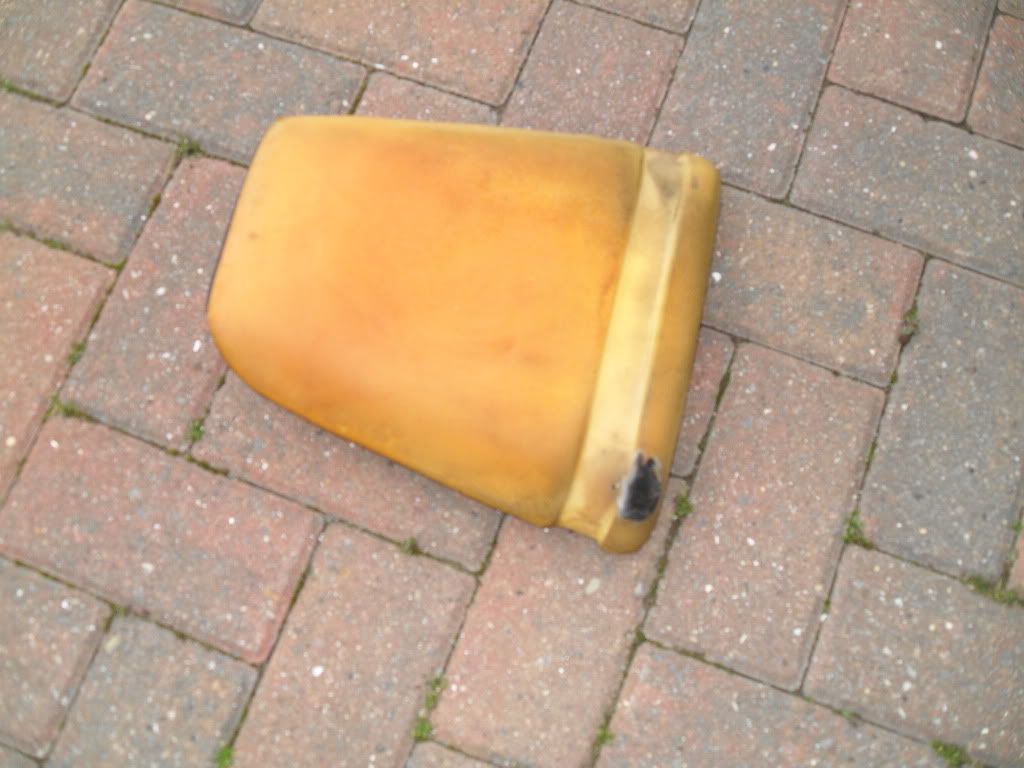
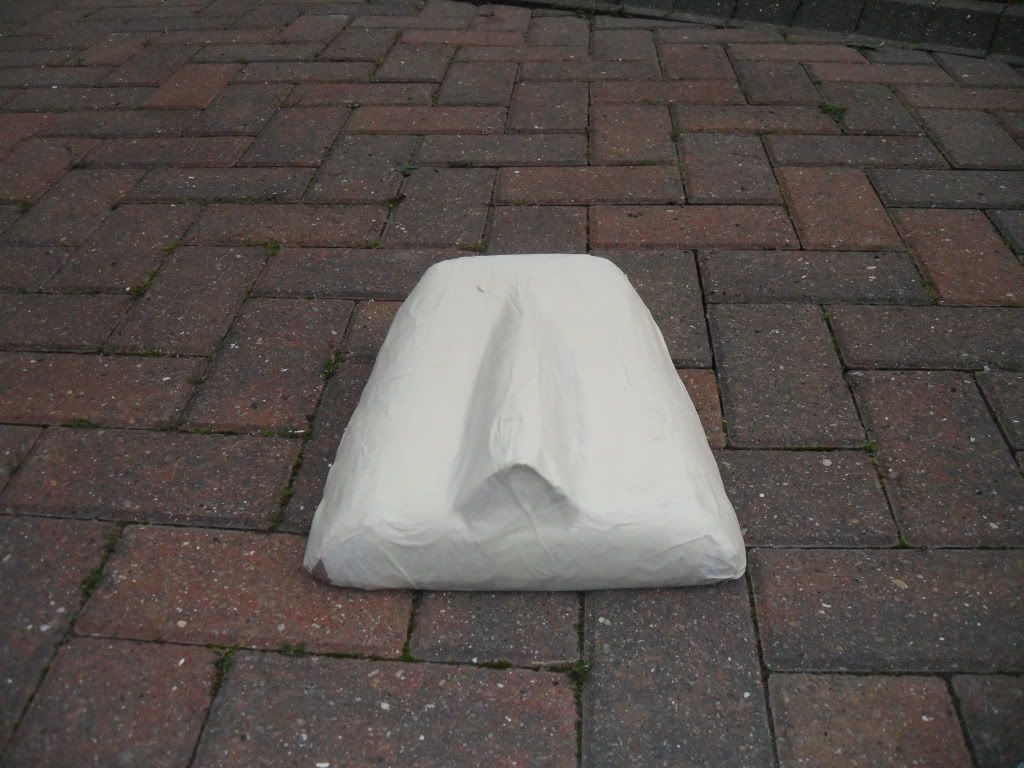
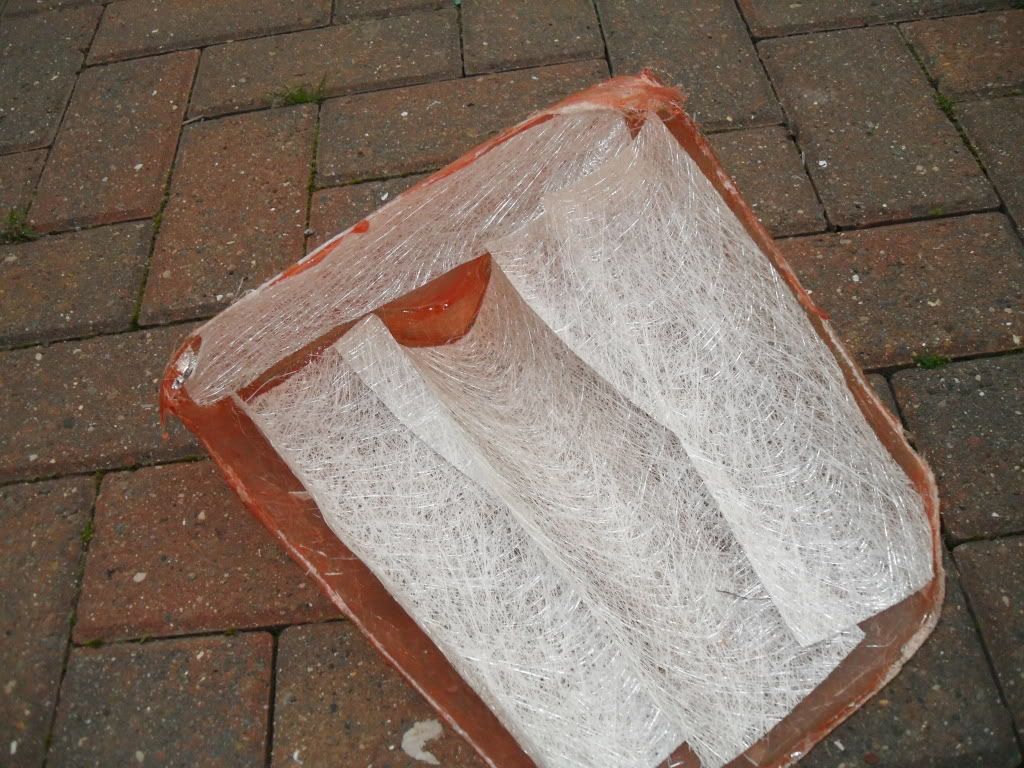
Then i completely covered the foam seat cushion with masking tape and formed a 'bulge' in the centre, taking care to ensure it was perfectly central. At this point there was aload of creases in the tape, if i were to do this again i would of take care to get the all smooth.
Next i covered the masking tape covered seat foam with glass fibre sheeting and soaked with resin. This was quite time consuming and very very messy!
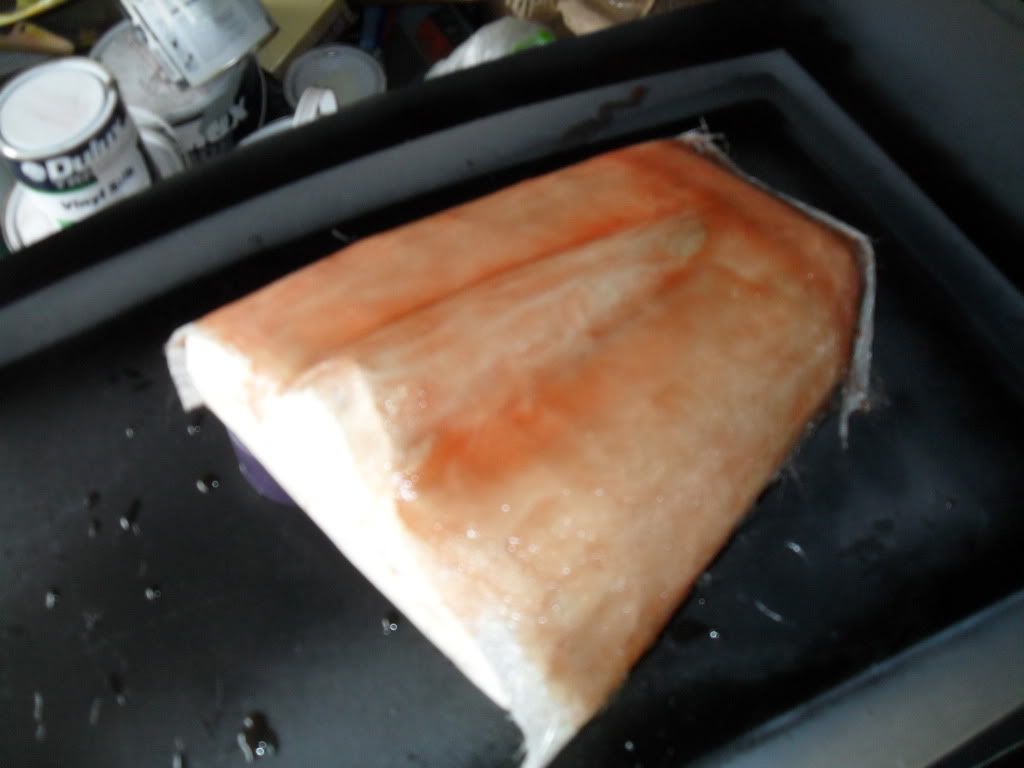
Once dried (approx 2 hours in my case) i had to gently prise the fibreglass mould from the foam seat.
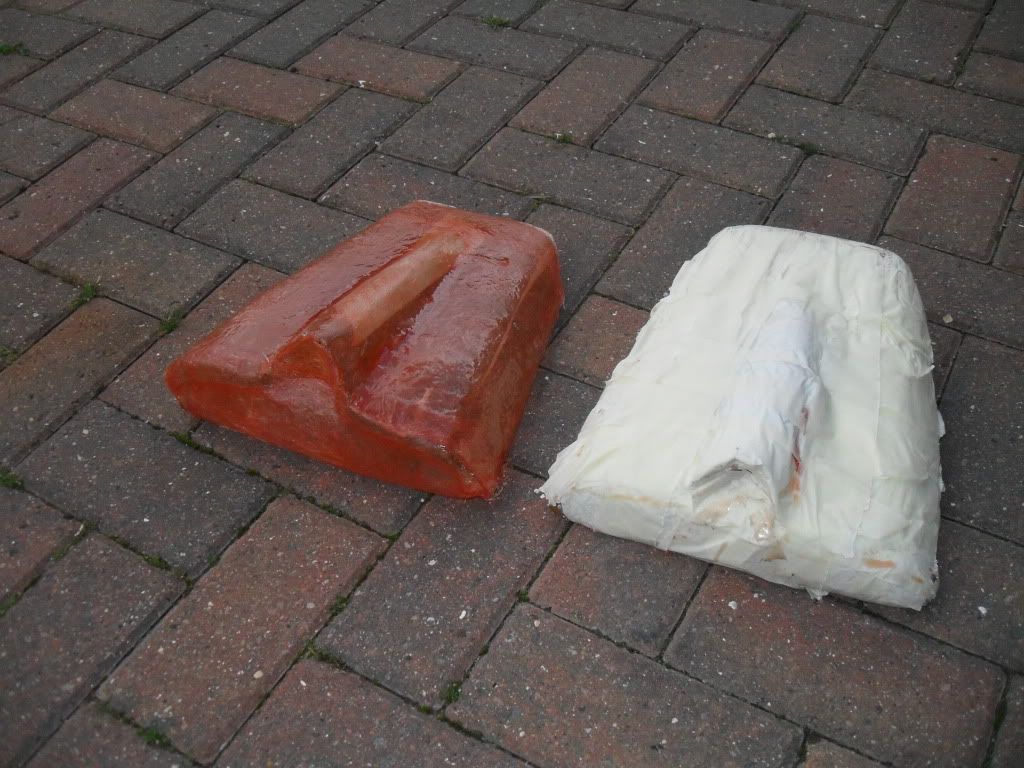
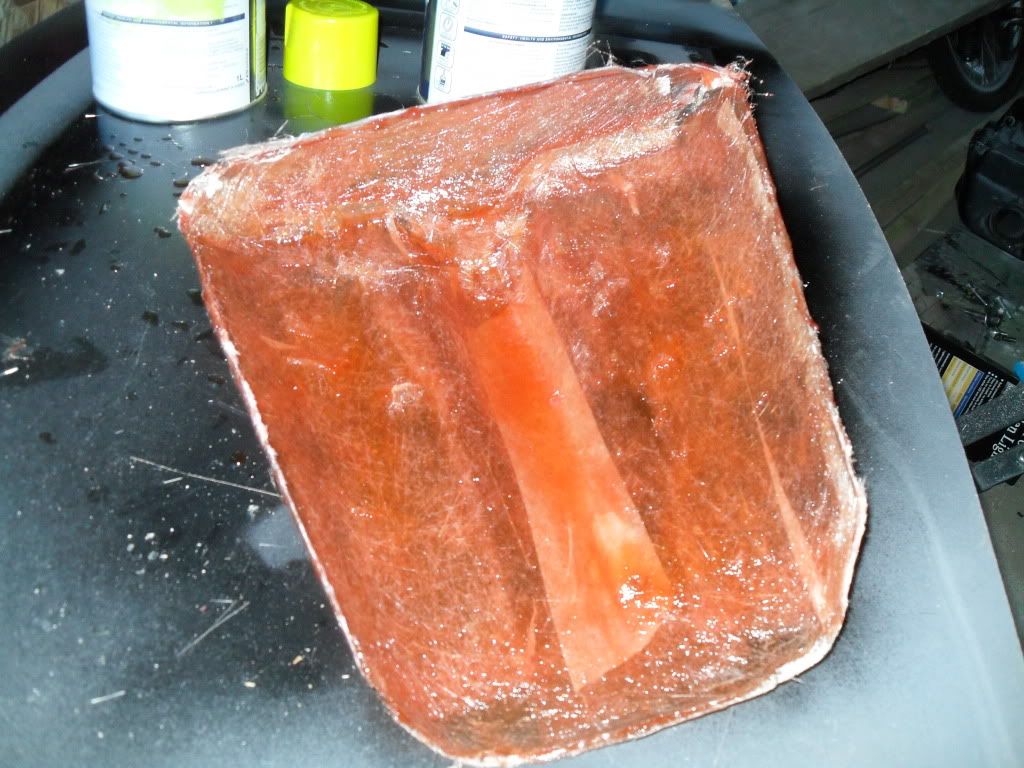
Once removed i then filled the inside with plenty more of fibregass sheeting and soaked once again with resin.
Once dried the edges needed trimming slightly, i just used a dremmel but im sure any sort of cutting instrument would of worked.
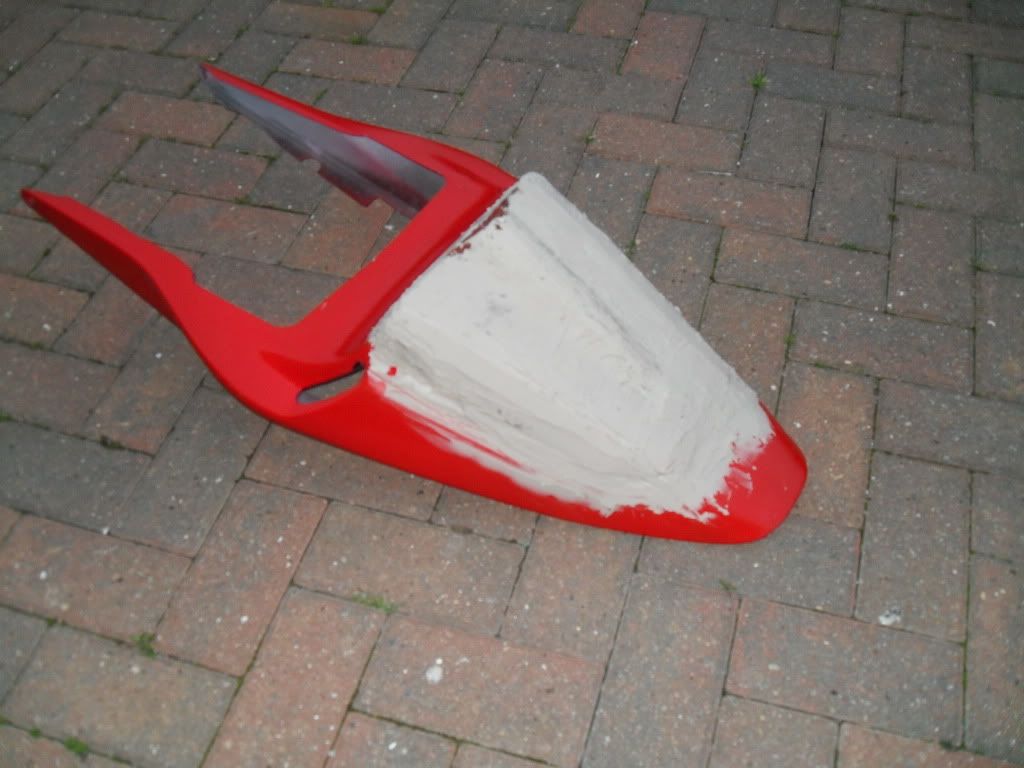
Next i them laid the mould onto the rear fairing and fibreglassed in place from the inside. At this point i was slightly concerned with the way it fit against the fairing but that was ok once filled.
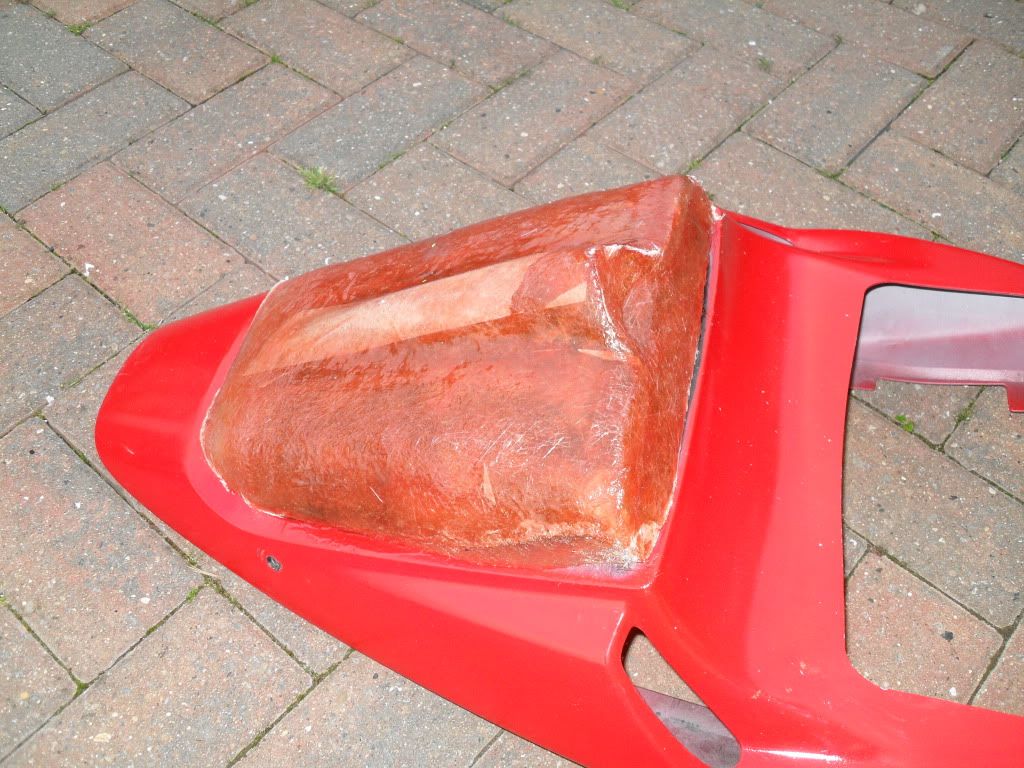
Now it was starting to take shape the next thing was to cover with filler ready to be shaped and sanded.
At this point now i am going to leave it overnight before sanding starts. I will update post in due course.
PS. Fibreglass and filler fumes work a treat for a hangover
This method is certainly not tried and tested and would not recommend people follow it. I am a complete NOVICE when it comes to bodywork.
I am not posting looking for gratitude just proud of what i managed to complete so far...
Spare rear fairing with seat attached.
First of all i had to remove the rear seat and strip it of it covering. All i done was simply pick the staples from the underneath.
Then i completely covered the foam seat cushion with masking tape and formed a 'bulge' in the centre, taking care to ensure it was perfectly central. At this point there was aload of creases in the tape, if i were to do this again i would of take care to get the all smooth.
Next i covered the masking tape covered seat foam with glass fibre sheeting and soaked with resin. This was quite time consuming and very very messy!
Once dried (approx 2 hours in my case) i had to gently prise the fibreglass mould from the foam seat.
Once removed i then filled the inside with plenty more of fibregass sheeting and soaked once again with resin.
Once dried the edges needed trimming slightly, i just used a dremmel but im sure any sort of cutting instrument would of worked.
Next i them laid the mould onto the rear fairing and fibreglassed in place from the inside. At this point i was slightly concerned with the way it fit against the fairing but that was ok once filled.
Now it was starting to take shape the next thing was to cover with filler ready to be shaped and sanded.
At this point now i am going to leave it overnight before sanding starts. I will update post in due course.
PS. Fibreglass and filler fumes work a treat for a hangover
-
Sligeach

- Site Supporter

- Posts: 690
- Joined: Wed Apr 30, 2008 4:02 pm
- Bike owned: '90 NC30 - '12 Stripe R
- Location: Sutton, Surrey
- Contact:
Re: DIY Seat Cowl (with pics)
not bad lad. its nice to see DIY at work with nice pics and description, keep it up 
the forum user formerly known as declangaelic
-
DK-Tandy
- Familiar Member
- Posts: 482
- Joined: Thu Aug 19, 2010 1:52 am
- Bike owned: CBR400RR NC23
- Location: West Bromwich UK
- Contact:
Re: DIY Seat Cowl (with pics)
so all in all, how much do you reckon it would cost to produce something like this?
£20?
£20?
-
Benneyboy@1984
- Settled in member
- Posts: 22
- Joined: Fri Nov 26, 2010 11:08 pm
- Bike owned: cbr400 nc 23 aero Project
- Location: Sidmouth .devon
Re: DIY Seat Cowl (with pics)
its a good little thread this bud , well done to ya (i don't mean that in a sarcastic way either lol) , i am going to try something simulair myslef when i get the nc 23 subframe re mounted,
-
CBR Monkey

- Site Supporter
- Posts: 46
- Joined: Sun Dec 13, 2009 5:01 pm
- Bike owned: CBR900RR, Honda CB400/4, NC29
- Location: Sevenoaks
Re: DIY Seat Cowl (with pics)
Any pics of the finished cowl?
-
thunderace

- Site Supporter
- Posts: 1584
- Joined: Fri Sep 10, 2010 9:03 pm
- Bike owned: R6, YZF600R
- Location: Blackburn, Lancs.
Re: DIY Seat Cowl (with pics)
Copy cat 
Conventional wisdom says to know your limits. To know your limits you need to find them first. Finding your limits generally involves getting in over your head and hoping you live long enough to benefit from the experience. That's the fun part.
-
BillingCBR

- Site Supporter
- Posts: 1043
- Joined: Sat Oct 10, 2009 10:36 pm
- Bike owned: '88 NC23, NC30, '98 R1, NC35
Re: DIY Seat Cowl (with pics)
Would be if it hadn't been started in August 
'89 CBR400RRJ and '91 VFR400R NC30 project
Neosophist - The NC30 doesn't go very well when it's on fire
Neosophist - The NC30 doesn't go very well when it's on fire