Post race-bingle NC30 rebuild - pic thread
Forum rules
Please can you post items for sale or wanted in the correct For Sale section. Items / bikes for sale here will be removed without warning. Reasons for this are in the FAQ. Thanks
Please can you post items for sale or wanted in the correct For Sale section. Items / bikes for sale here will be removed without warning. Reasons for this are in the FAQ. Thanks
-
StrayAlien
- Familiar Member
- Posts: 361
- Joined: Sun Jan 15, 2012 9:27 am
- Bike owned: NC30, Dukes, Hog
- Location: Melbourne, Straya
Re: Post race-bingle NC30 rebuild - pic thread
Thank mate. Racing is interclub racing with Preston MCC. The NC30 qualifies for Period 6 classic racing, so I'll likely give that a go next year as well. :-) If I ever get the darn bike back together!
-
StrayAlien
- Familiar Member
- Posts: 361
- Joined: Sun Jan 15, 2012 9:27 am
- Bike owned: NC30, Dukes, Hog
- Location: Melbourne, Straya
Re: Post race-bingle NC30 rebuild - pic thread
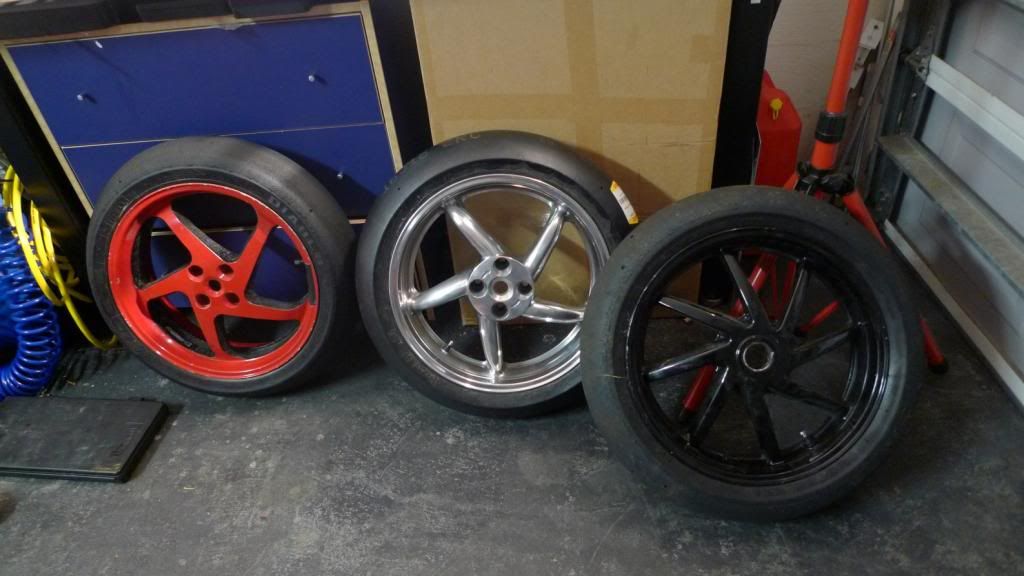
I thought I'd weight wheels. The two VFR750 wheels have the same model Pirelli Superbike slick tyre on, although one is quite worn, so that is almost an apples vs apples test. The RVF wheel has a Metzler motard slick on ... so not quite an even test, but here we go.
Wheels:
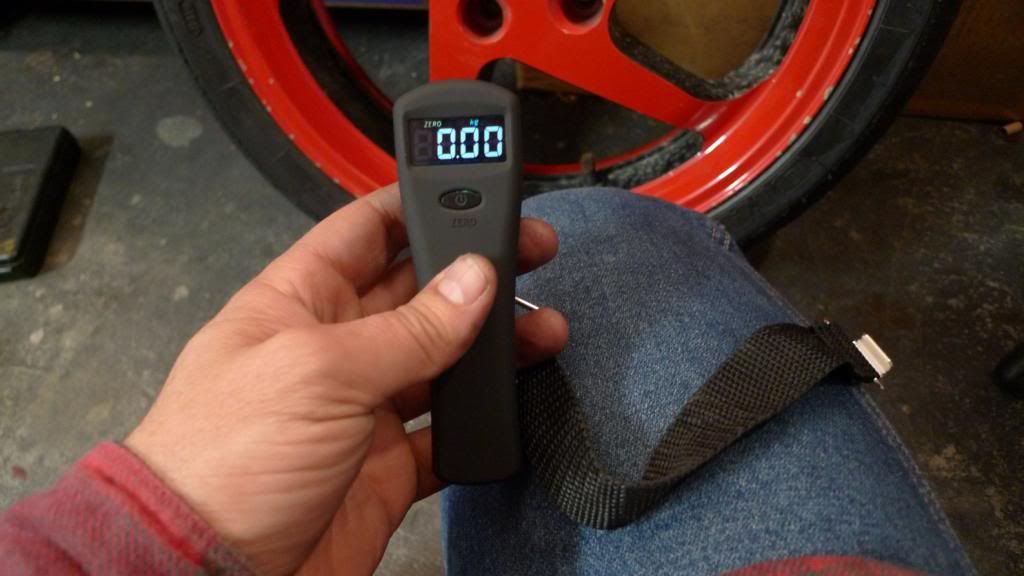
And the funky hand held scales with a strap:
VFR750 5.5" rim:
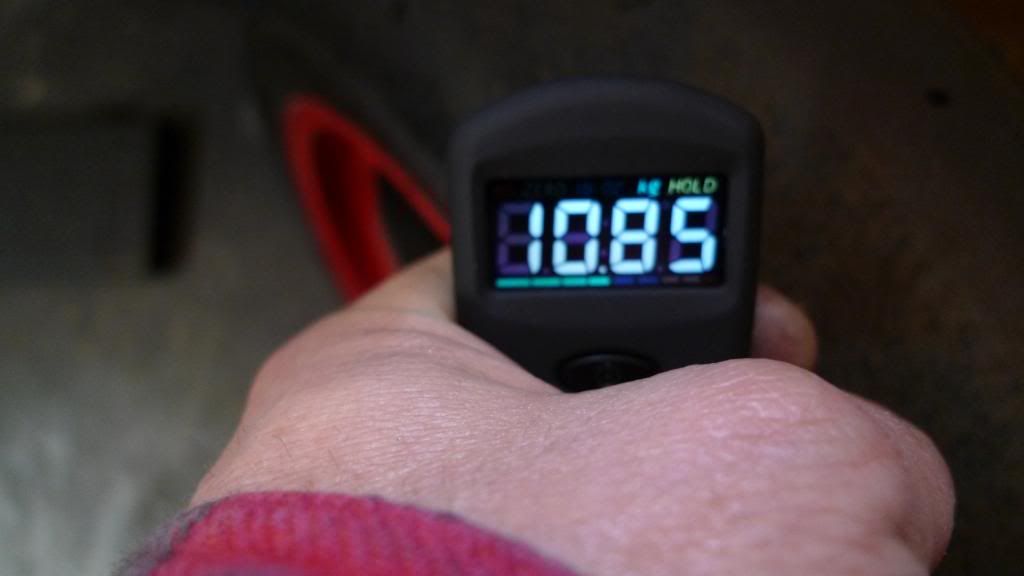
VFR750 5.0" rim:
The tyre on the 5.5" rim is pretty worn, and the 5" one is unused, so that is pretty even I think.
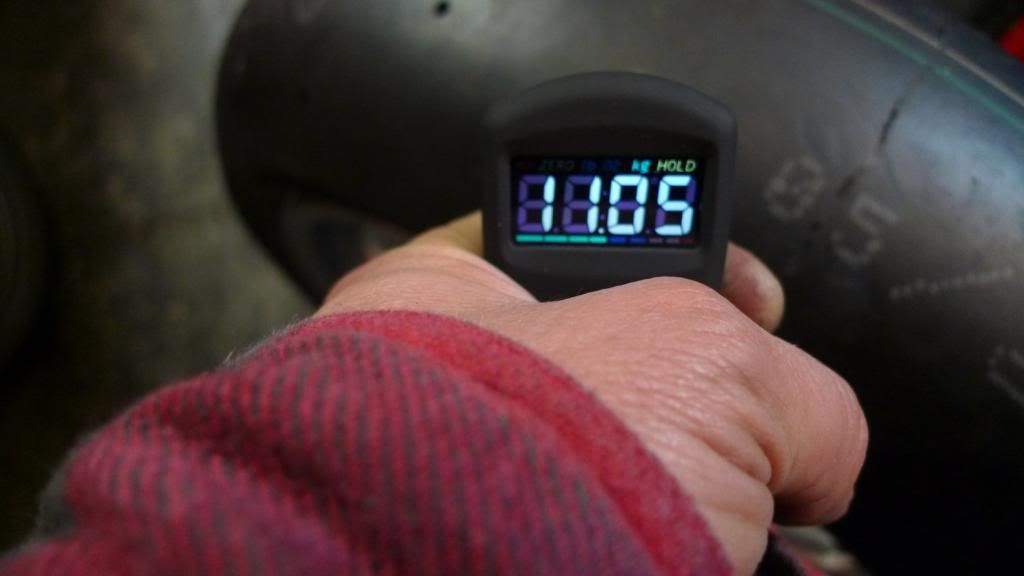
The RVF rim is lighter at:
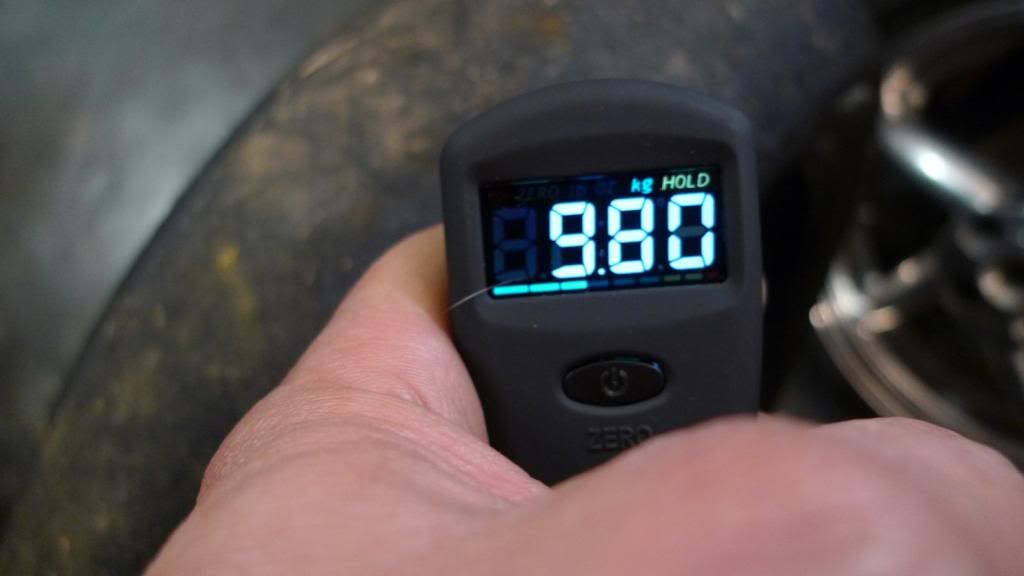
But, like I said, it has a different tyre and the weight between those can vary markedly. But according to this mini-test, the RVF is about a kilo lighter.
Wheels:

And the funky hand held scales with a strap:

VFR750 5.5" rim:

VFR750 5.0" rim:

The tyre on the 5.5" rim is pretty worn, and the 5" one is unused, so that is pretty even I think.
The RVF rim is lighter at:

But, like I said, it has a different tyre and the weight between those can vary markedly. But according to this mini-test, the RVF is about a kilo lighter.
Last edited by StrayAlien on Sun Nov 03, 2013 8:05 am, edited 1 time in total.
-
StrayAlien
- Familiar Member
- Posts: 361
- Joined: Sun Jan 15, 2012 9:27 am
- Bike owned: NC30, Dukes, Hog
- Location: Melbourne, Straya
Re: Post race-bingle NC30 rebuild - pic thread
Back onto the carbs - determined to get the bike started this weekend. This is the fourth weekend to give it a go. First weekend was a no go as I needed a new starter motor. Second weekend it started but ran very very badly - my sonicly cleaned carbs had seized.
I got a replacement set of carbs and they were complete junk - they looked like they'd been at the bottom of the ocean for 5 years - but I got another set during the week and last weekend gave them a go 'as they are' on the bike - it still ran like crap ... I was pretty worried at that stage that I might not have screwed something up with the heads and had poor compression or something.
So, I set about stripping and cleaning the 3rd set of carbs. They were not in good nick either. I got them sonically cleaned for $30 but with a workshop that only uses water and truck wash basically. NO acid ....
So this weekend is finish off the rebuild of the 3rd carbs, set float heights and get things back into the bike for another start test.
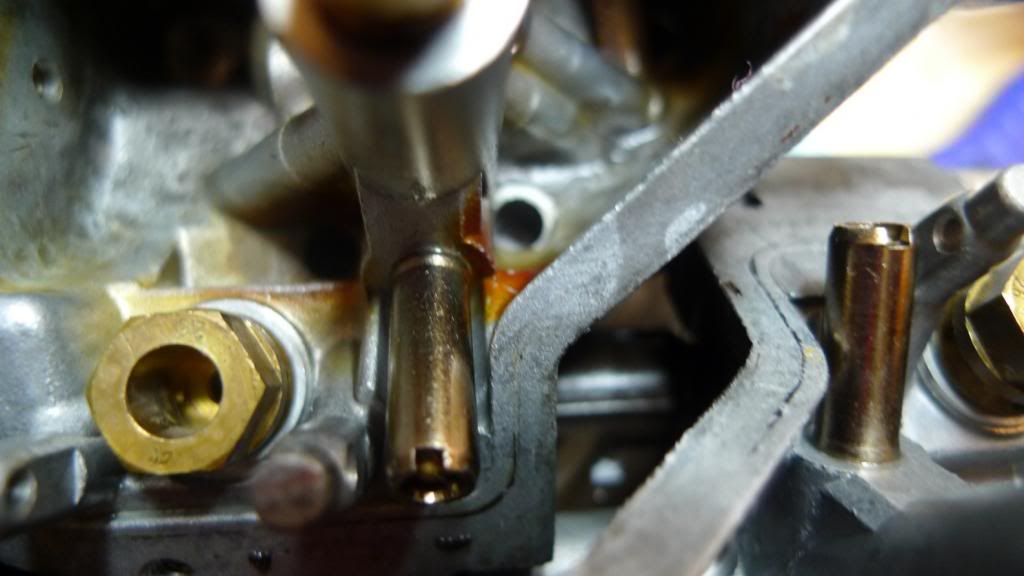
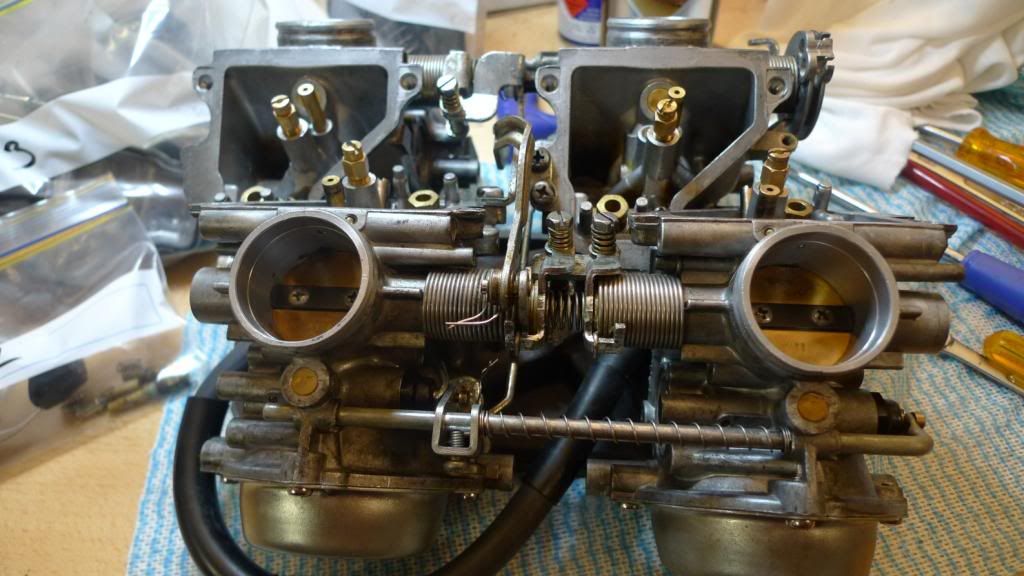
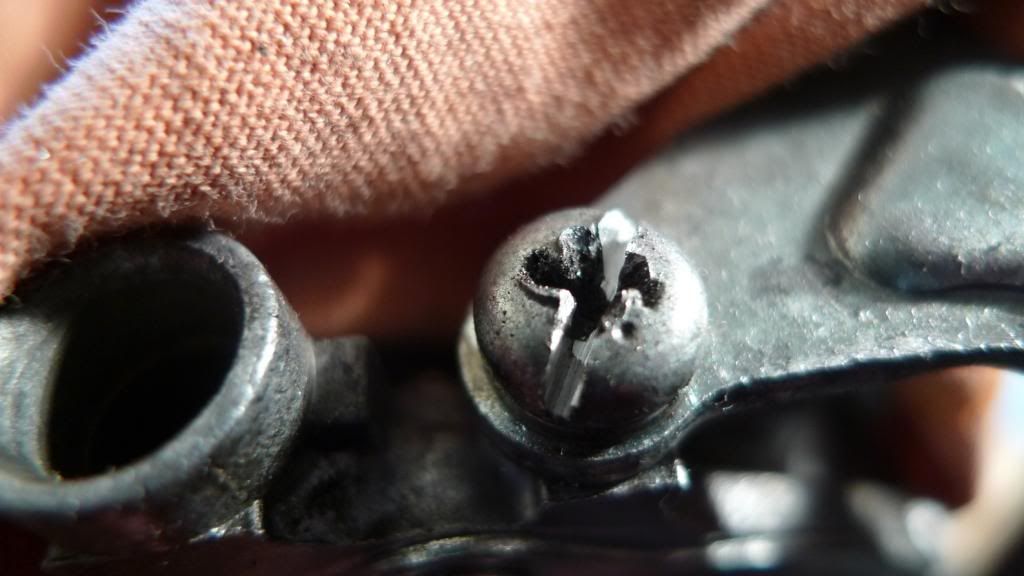
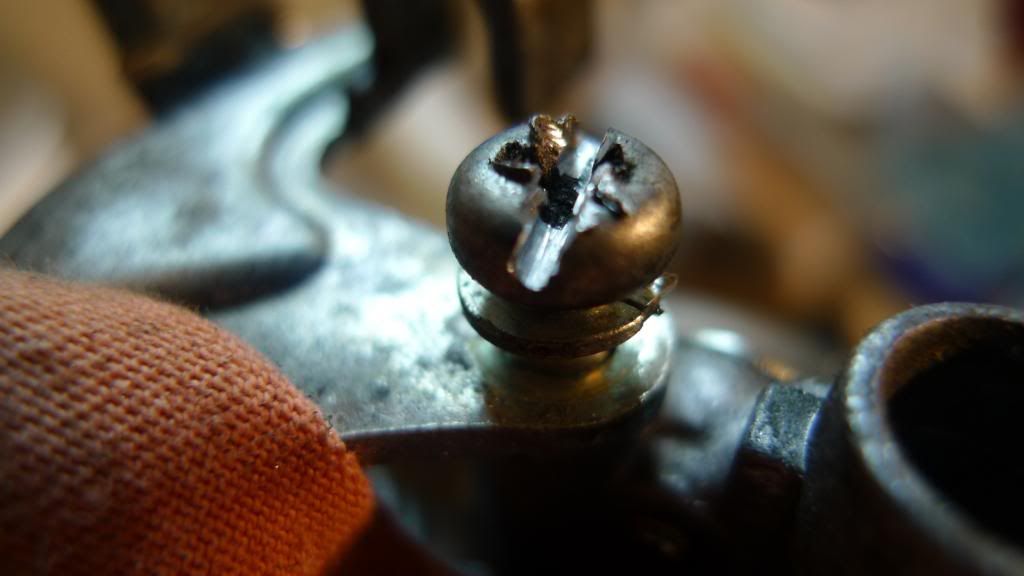
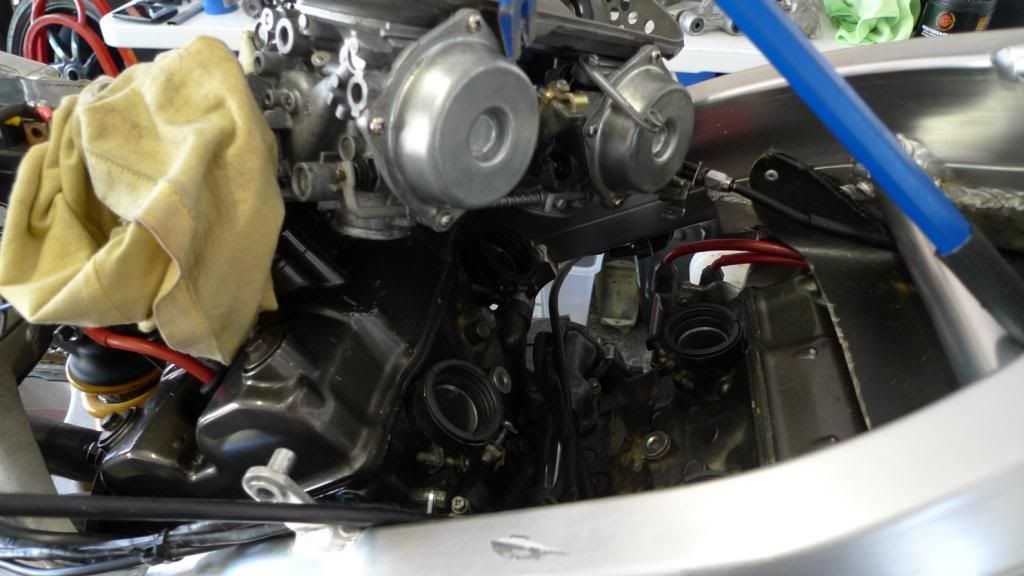
After the latest sonic clean and my dremel scrubbing they were not too bad, but still not quite as good condition as my original set - stuff like this upsets me ... :
And they have a motley look, but, I have given them light coat of oil to protect them:

I don't know whether to be concerned by this stain or not, but the passages around the stain seem clear and I can blow air through them:
Getting them together:
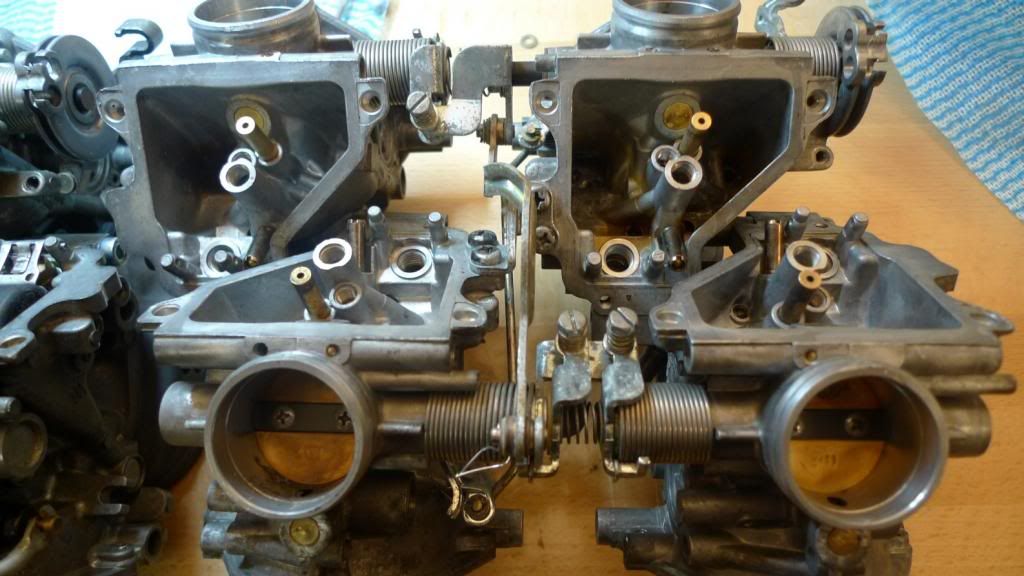
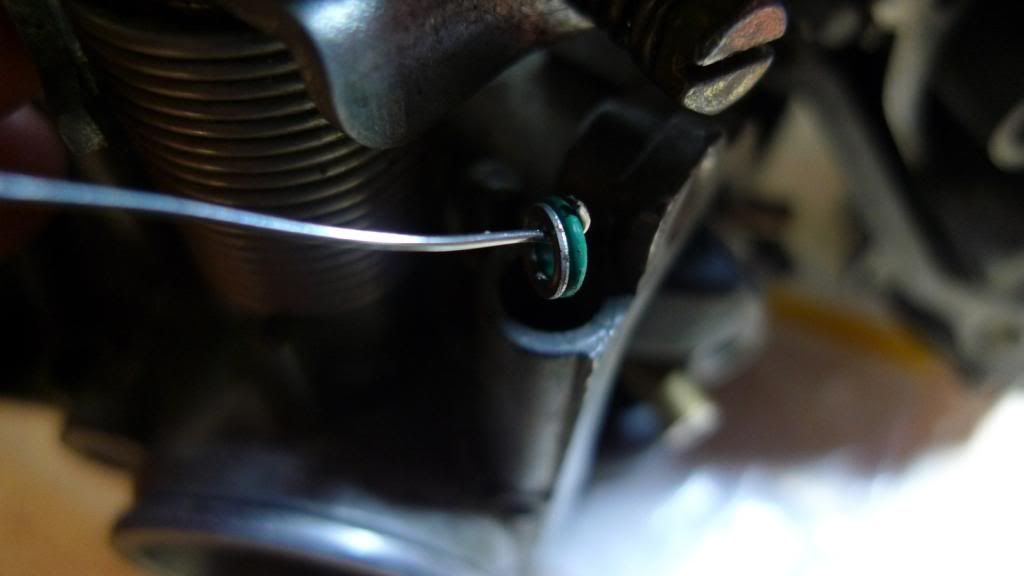
I did move some things from the old seized carbs over. Like the washers and seals for the mixture screws were new so I'll nab them. Now if you have ever tried to get them out they can be really annoying and fiddly. But ... there they can out together! Amazing.
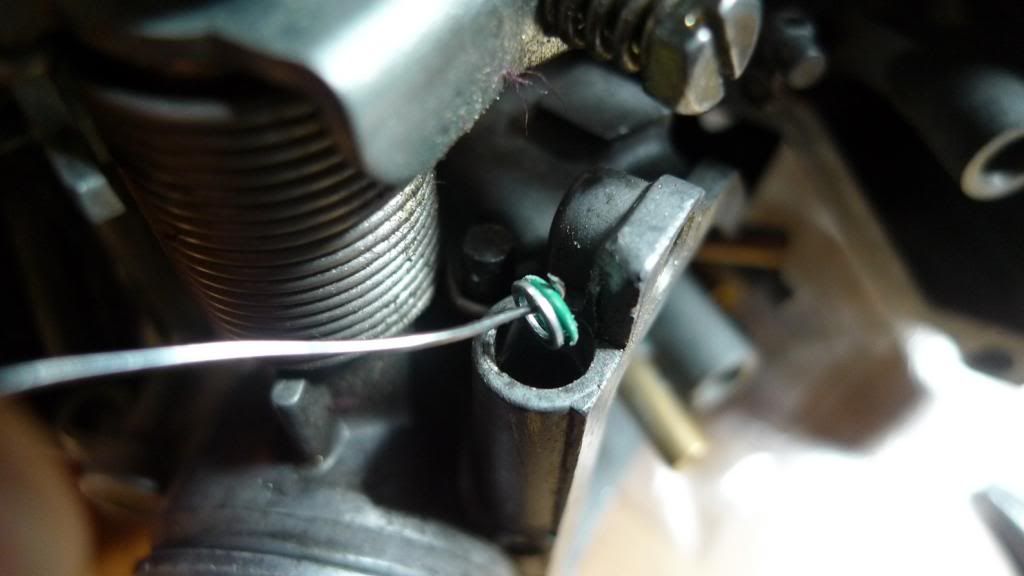
and in you go on the other carbs ...
then .. amazing, the next ones came out together too!!
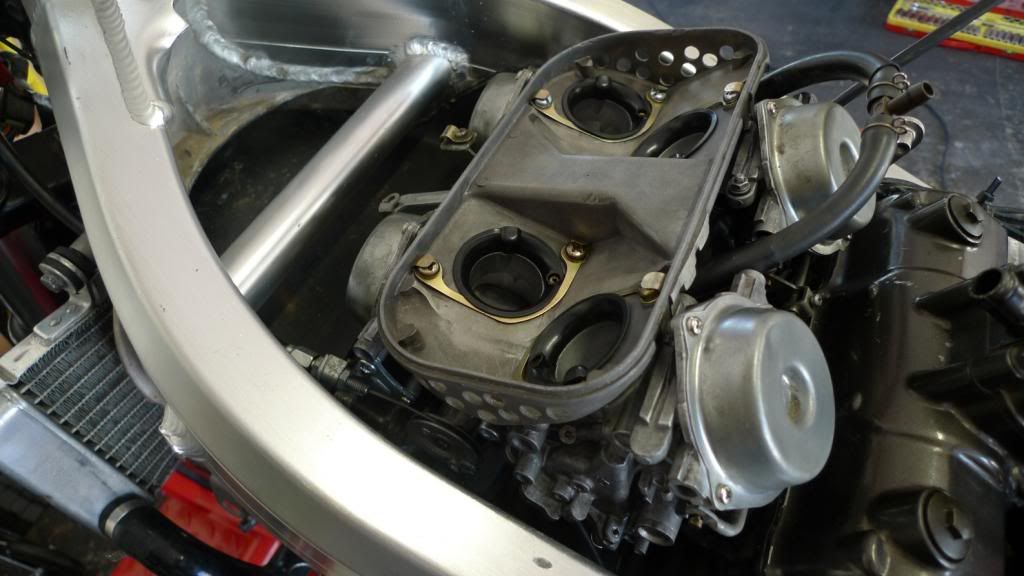
Looking good up top now. Floats / jets not done yet.

I got a replacement set of carbs and they were complete junk - they looked like they'd been at the bottom of the ocean for 5 years - but I got another set during the week and last weekend gave them a go 'as they are' on the bike - it still ran like crap ... I was pretty worried at that stage that I might not have screwed something up with the heads and had poor compression or something.
So, I set about stripping and cleaning the 3rd set of carbs. They were not in good nick either. I got them sonically cleaned for $30 but with a workshop that only uses water and truck wash basically. NO acid ....
So this weekend is finish off the rebuild of the 3rd carbs, set float heights and get things back into the bike for another start test.
After the latest sonic clean and my dremel scrubbing they were not too bad, but still not quite as good condition as my original set - stuff like this upsets me ... :

And they have a motley look, but, I have given them light coat of oil to protect them:

I don't know whether to be concerned by this stain or not, but the passages around the stain seem clear and I can blow air through them:

Getting them together:


I did move some things from the old seized carbs over. Like the washers and seals for the mixture screws were new so I'll nab them. Now if you have ever tried to get them out they can be really annoying and fiddly. But ... there they can out together! Amazing.

and in you go on the other carbs ...

then .. amazing, the next ones came out together too!!

Looking good up top now. Floats / jets not done yet.

-
StrayAlien
- Familiar Member
- Posts: 361
- Joined: Sun Jan 15, 2012 9:27 am
- Bike owned: NC30, Dukes, Hog
- Location: Melbourne, Straya
Re: Post race-bingle NC30 rebuild - pic thread
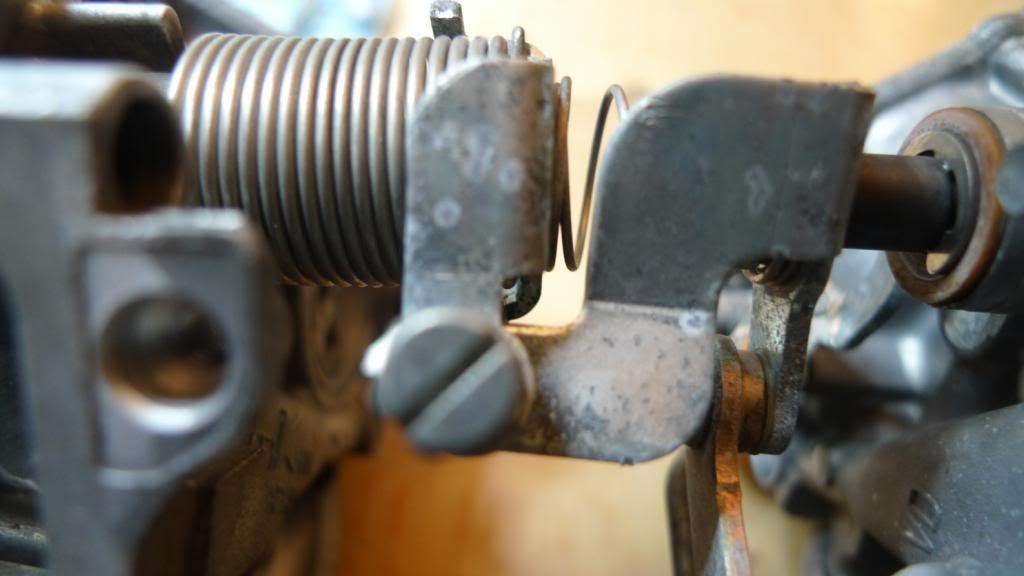
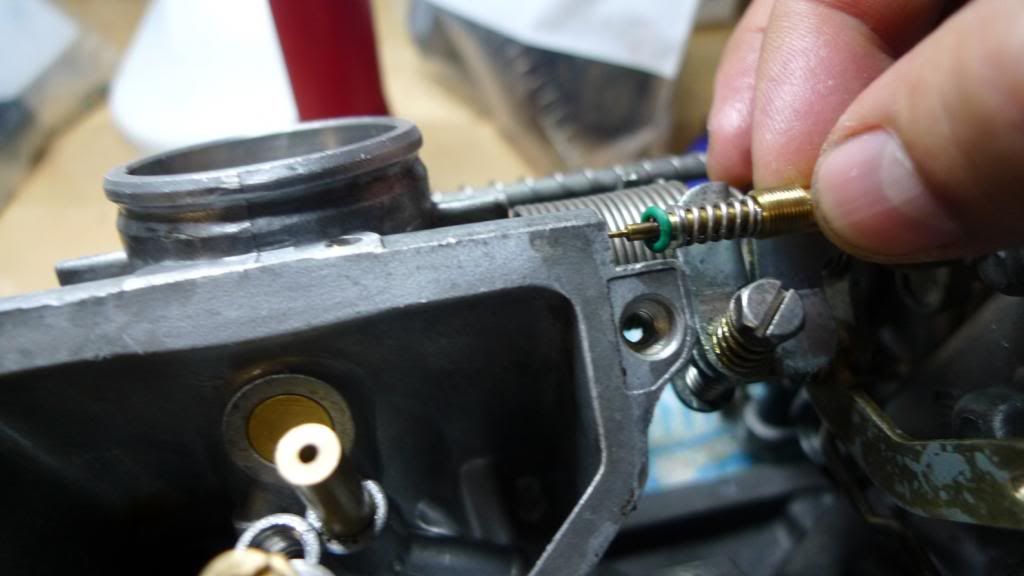
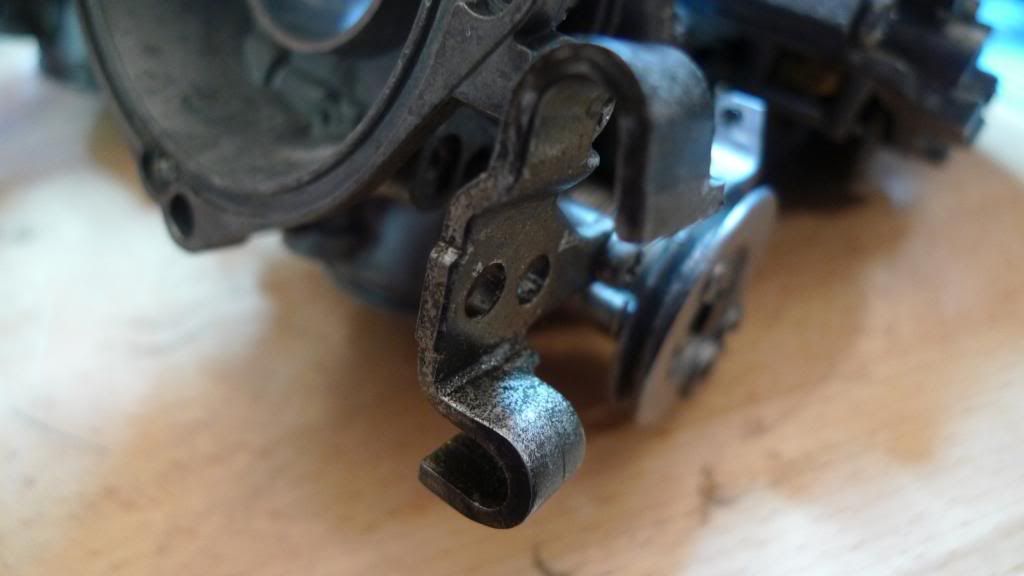
As a small aside, the original carbs have some HRC goodies in them (from RO I believe). I moved all that accross to new carbs. They are fitted with NC24 slides - they have the little half moon:

Also, I believe the throttle cable bracket is NC24:
Compare with OEM:
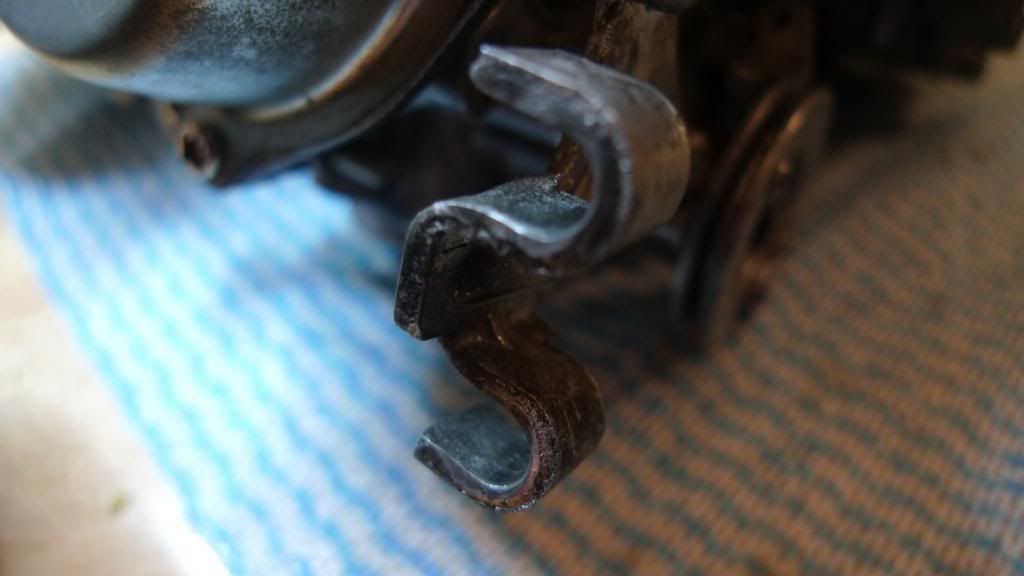
Here is the NC24 overlayed on OEM for comparison:
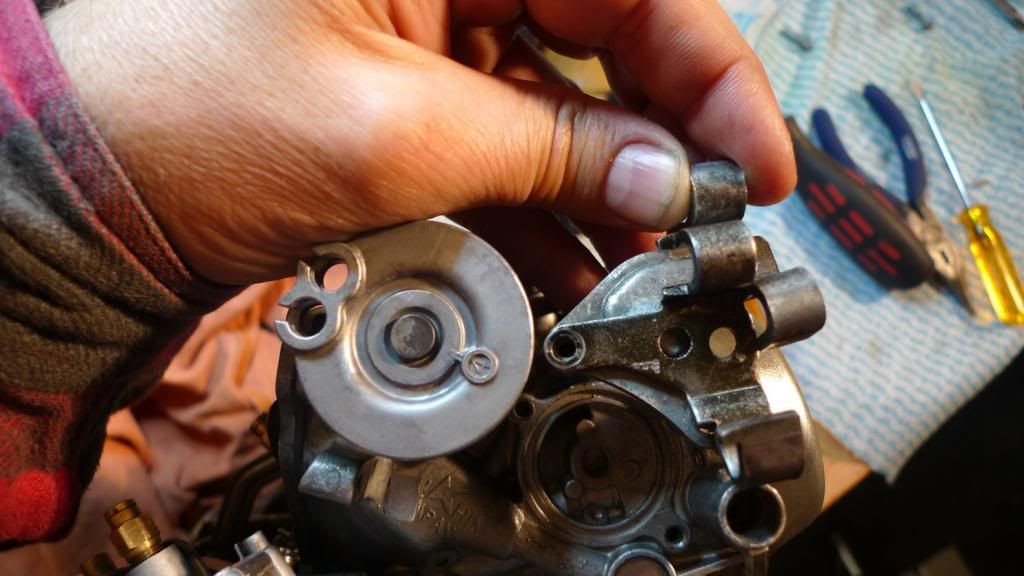
I am not sure of the exact utility of the NC24 bracket on the NC30 carbs, but it does change the pull angle of the cable somewhat. Actually, it seems to put a fairly sever kink in the cable and stresses the cable, so I decided to go back to OEM.
All I have to do is get this off .... bugger ...
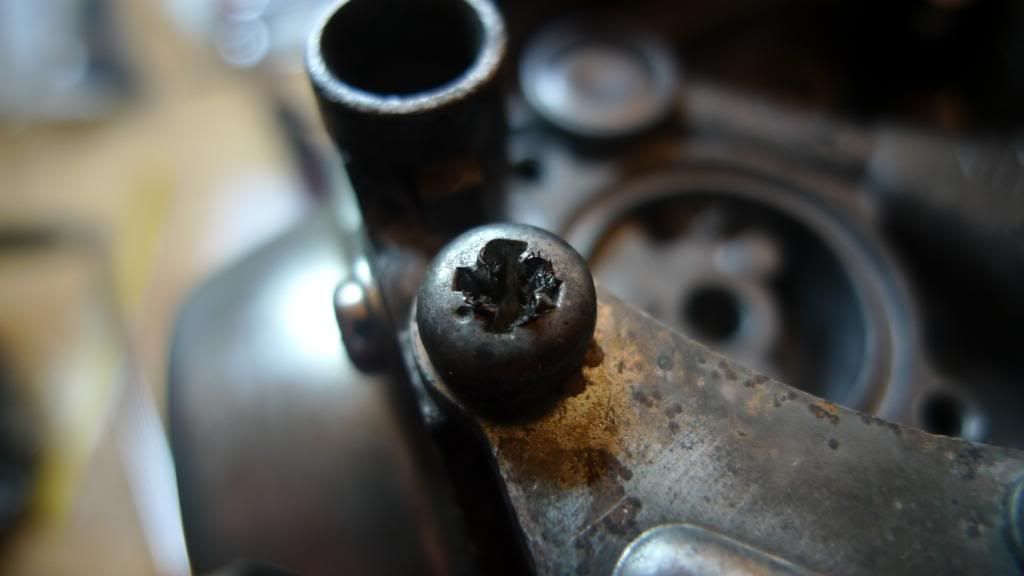
But the dremel helped out :
and off (Dremels are VERY VERY VERY handy) .....

Also, I believe the throttle cable bracket is NC24:

Compare with OEM:

Here is the NC24 overlayed on OEM for comparison:

I am not sure of the exact utility of the NC24 bracket on the NC30 carbs, but it does change the pull angle of the cable somewhat. Actually, it seems to put a fairly sever kink in the cable and stresses the cable, so I decided to go back to OEM.
All I have to do is get this off .... bugger ...

But the dremel helped out :

and off (Dremels are VERY VERY VERY handy) .....

Last edited by StrayAlien on Sat Nov 09, 2013 12:12 pm, edited 1 time in total.
-
StrayAlien
- Familiar Member
- Posts: 361
- Joined: Sun Jan 15, 2012 9:27 am
- Bike owned: NC30, Dukes, Hog
- Location: Melbourne, Straya
Re: Post race-bingle NC30 rebuild - pic thread
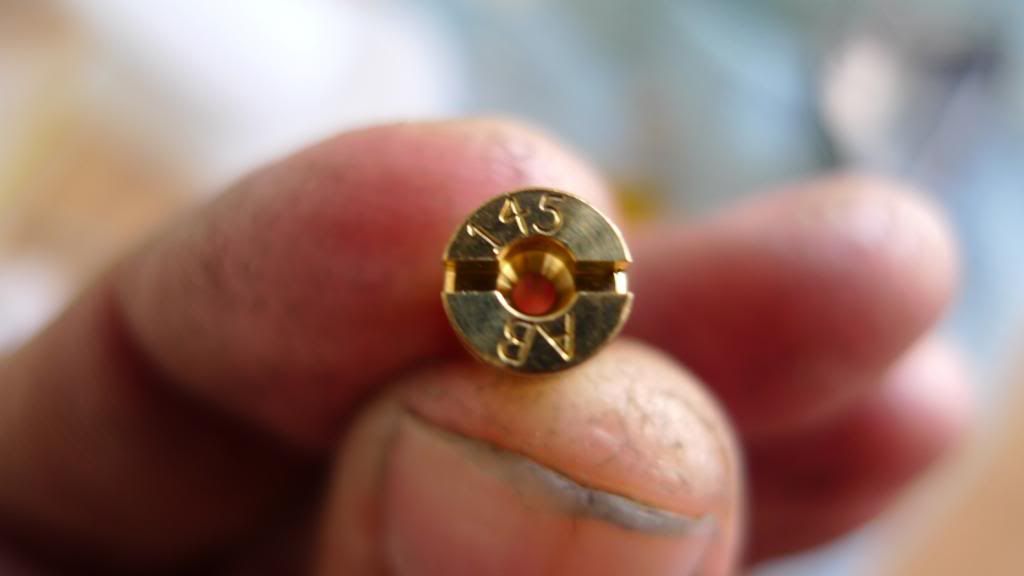
Some new jets from RO arrived on Friday - just in time for thr weekend! Nice one.

Happy that everything in and on the carbs was back together and working and measured correctly it was time to get things into the bike and give it another start test ...
A smear of grease on the rubbers and then heat them:
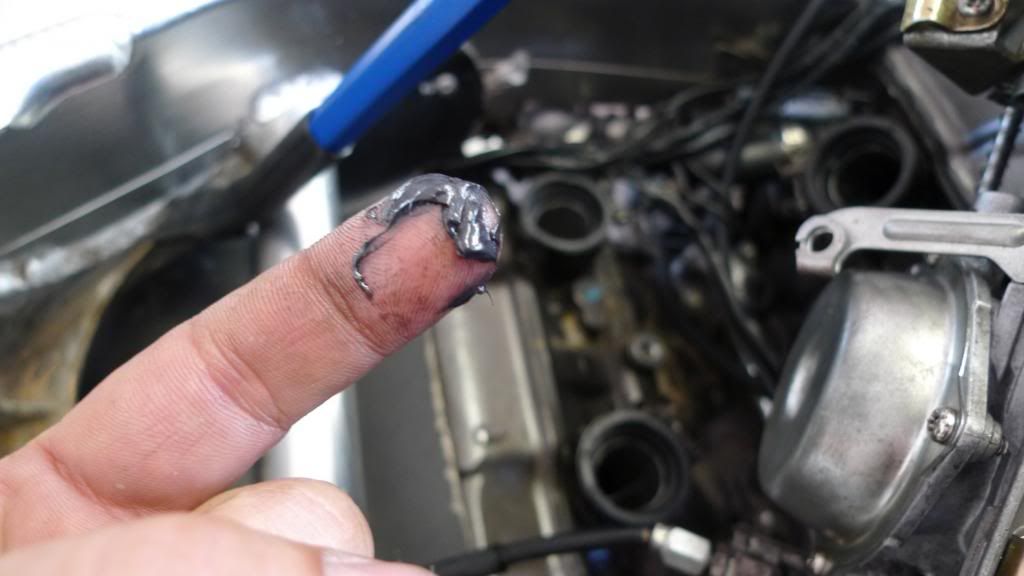
All set:
and in. If you heat the rubbers this is really quite easy to do. Only took 15 seconds or so. Thanks to mate Norm for the lesson on this.
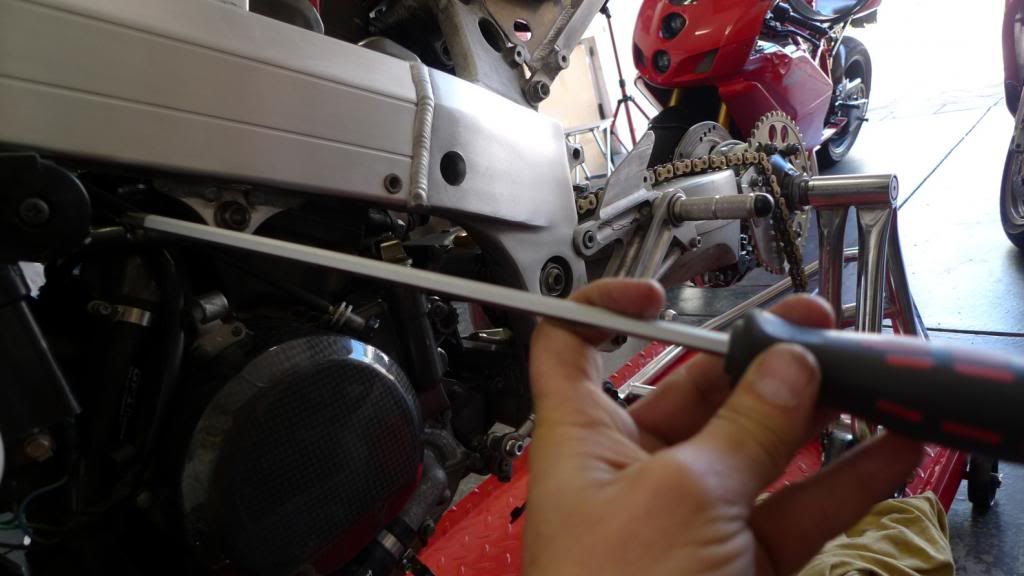
You need a nice long phillips head to tighten the rubber collars:
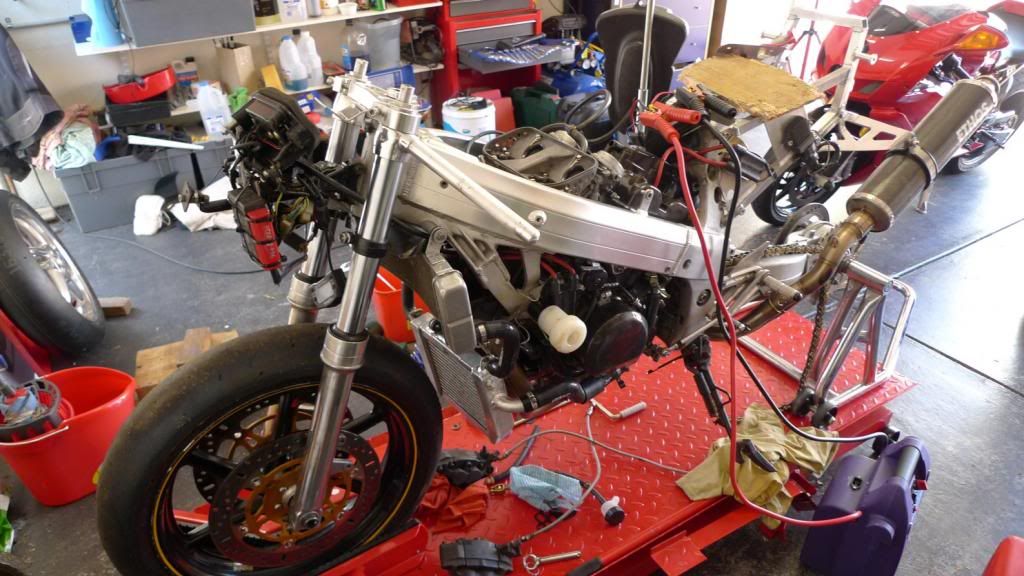
All set for the big test. Note battery pack and small elevated fuel tank connected to carbs:
Choke in and thumb the start button and ....
IT STARTS!!! ... IT STARTS!!! ... IT STARTS!!! ...IT STARTS!!! ...IT STARTS!!! ...IT STARTS!!! ...IT STARTS!!! ...IT STARTS!!! ...IT STARTS!!! ...IT STARTS!!! ...IT STARTS!!! ...IT STARTS!!! ...
.. and it runs smoothly too .. :-) :-) :-)
Among the many things left to do .. carbs syncing is on the list ..
Very happy this weekend. Beer. But no time to rest ....


Happy that everything in and on the carbs was back together and working and measured correctly it was time to get things into the bike and give it another start test ...
A smear of grease on the rubbers and then heat them:

All set:

and in. If you heat the rubbers this is really quite easy to do. Only took 15 seconds or so. Thanks to mate Norm for the lesson on this.

You need a nice long phillips head to tighten the rubber collars:

All set for the big test. Note battery pack and small elevated fuel tank connected to carbs:

Choke in and thumb the start button and ....
IT STARTS!!! ... IT STARTS!!! ... IT STARTS!!! ...IT STARTS!!! ...IT STARTS!!! ...IT STARTS!!! ...IT STARTS!!! ...IT STARTS!!! ...IT STARTS!!! ...IT STARTS!!! ...IT STARTS!!! ...IT STARTS!!! ...
.. and it runs smoothly too .. :-) :-) :-)
Among the many things left to do .. carbs syncing is on the list ..
Very happy this weekend. Beer. But no time to rest ....
Last edited by StrayAlien on Sat Nov 09, 2013 12:11 pm, edited 1 time in total.
-
StrayAlien
- Familiar Member
- Posts: 361
- Joined: Sun Jan 15, 2012 9:27 am
- Bike owned: NC30, Dukes, Hog
- Location: Melbourne, Straya
Re: Post race-bingle NC30 rebuild - pic thread
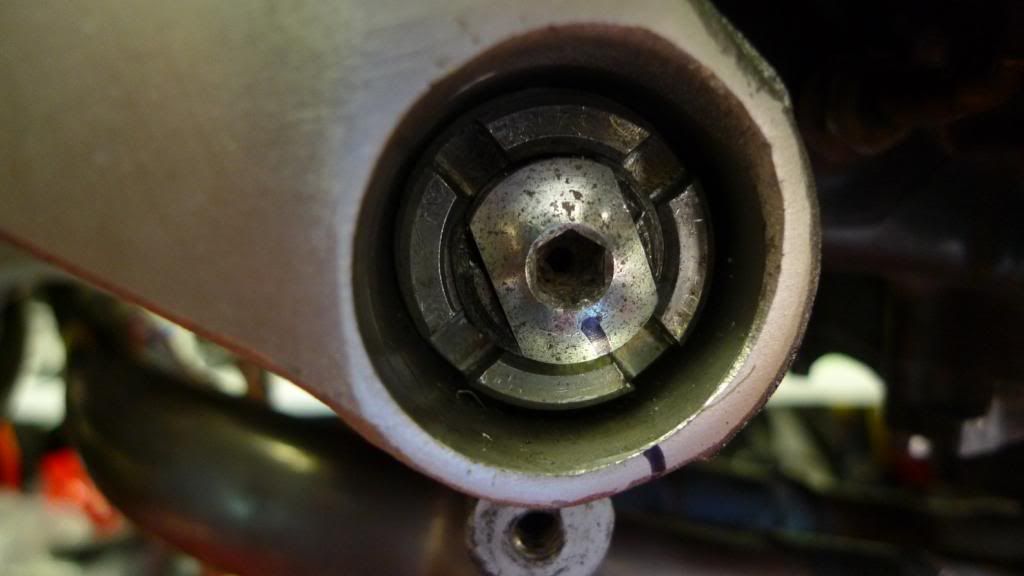
Now that it starts and I don't need to get the engine out, time to get the engine mounts all torqued.
The collars require a special tool. I got mine on ebay from a bloke in the UK:
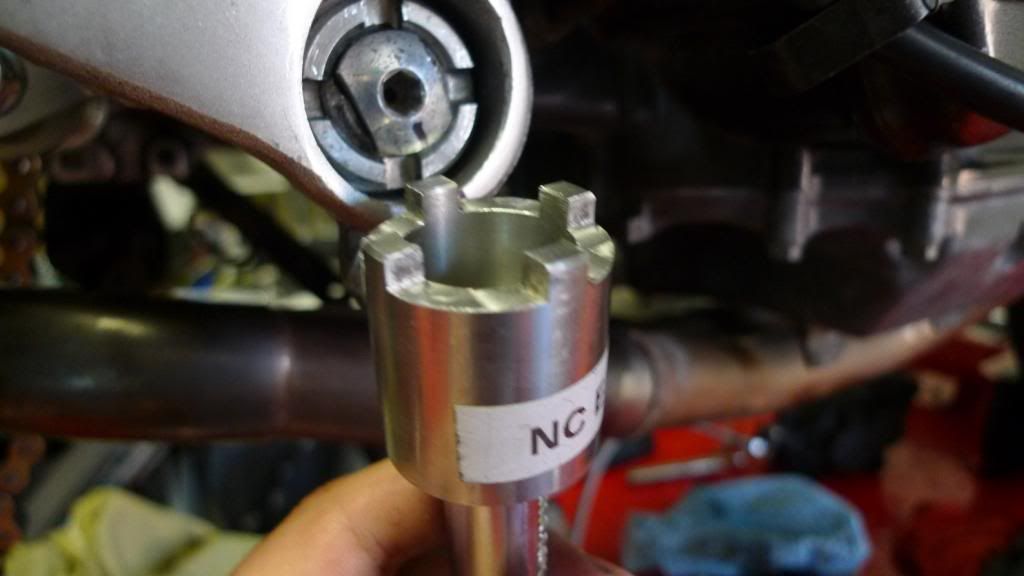
As per haynes, after torquing the inner mount bolts, make a mark on bolt and frame so that when tightening collar you can check they have not moved:
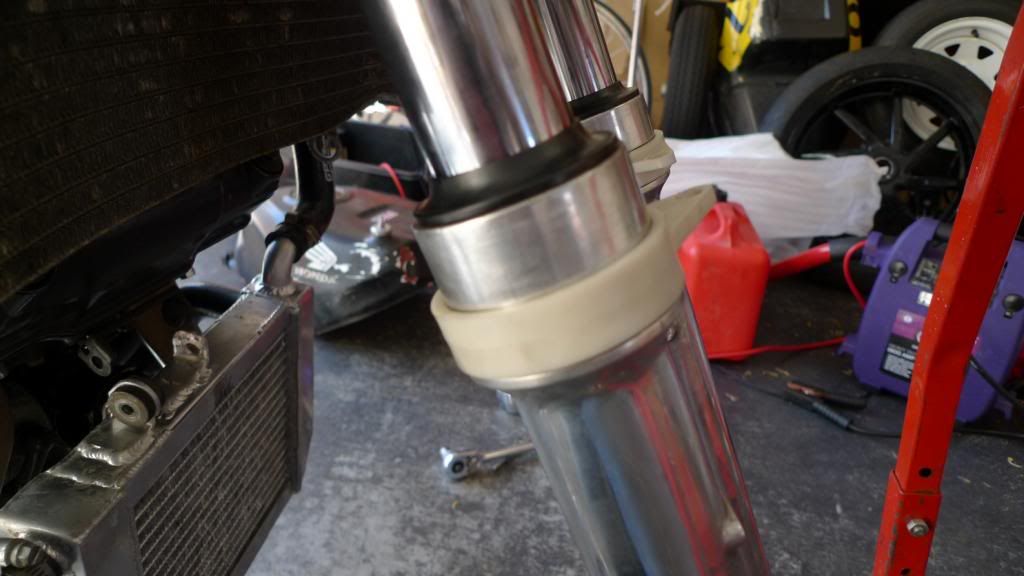
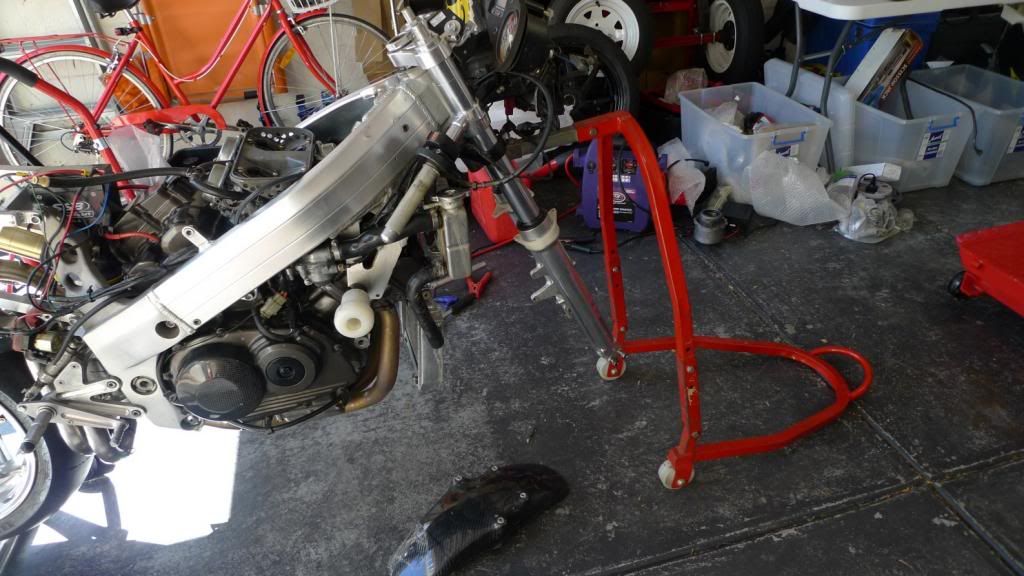
I forgot to put these little guys on the forks, so, wheel off and forks out to install them:
The collars require a special tool. I got mine on ebay from a bloke in the UK:

As per haynes, after torquing the inner mount bolts, make a mark on bolt and frame so that when tightening collar you can check they have not moved:

I forgot to put these little guys on the forks, so, wheel off and forks out to install them:


-
Malc
- Site Supporter

- Posts: 223
- Joined: Tue Apr 08, 2008 5:01 pm
- Bike owned: NC35, 5SL, 3XV, 2MA
- Location: Sharpthorne
Re: Post race-bingle NC30 rebuild - pic thread
Excellent thread mate, really enjoyed reading it. Just one question - winding the clock back to 25/10, it looks like you didn't decoke the valve faces? If this is the case, just curious why not?
-
StrayAlien
- Familiar Member
- Posts: 361
- Joined: Sun Jan 15, 2012 9:27 am
- Bike owned: NC30, Dukes, Hog
- Location: Melbourne, Straya
Re: Post race-bingle NC30 rebuild - pic thread
Hi Malc,
Thanks for the comments.
I did remove the carbon on a number of them using the dremel buffs that came with the dremel but they don't last too long and at $15.00 for a set of three (each a different grade) I decided to use the buffs to de-coke just the stems and all of that 'upper' side of the valve - these were all nicely polished.
I did a few valve faces but most, I thought (in my amateur opinion), were in pretty good shape.
Answer: I am a cheapskate. :-)
-
StrayAlien
- Familiar Member
- Posts: 361
- Joined: Sun Jan 15, 2012 9:27 am
- Bike owned: NC30, Dukes, Hog
- Location: Melbourne, Straya
Re: Post race-bingle NC30 rebuild - pic thread
The adventure continues ...
You may have seen in some previous photos the rear subframe was bent. It is a Rick Oliver aluminium race subframe. Very nice bit of it.
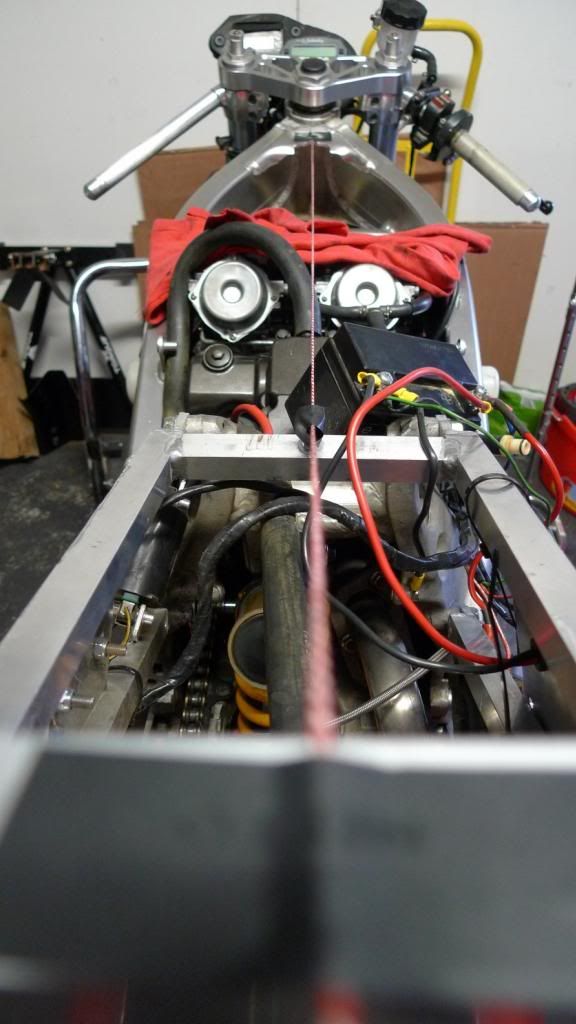
To be able to use the 2006 CBR1000RR shock, I need to move the battery somewhere (we'll see that stuff soon) - and there is no point doing any of that stuff with a bent subframe. You can see it is bent pretty clearly here:

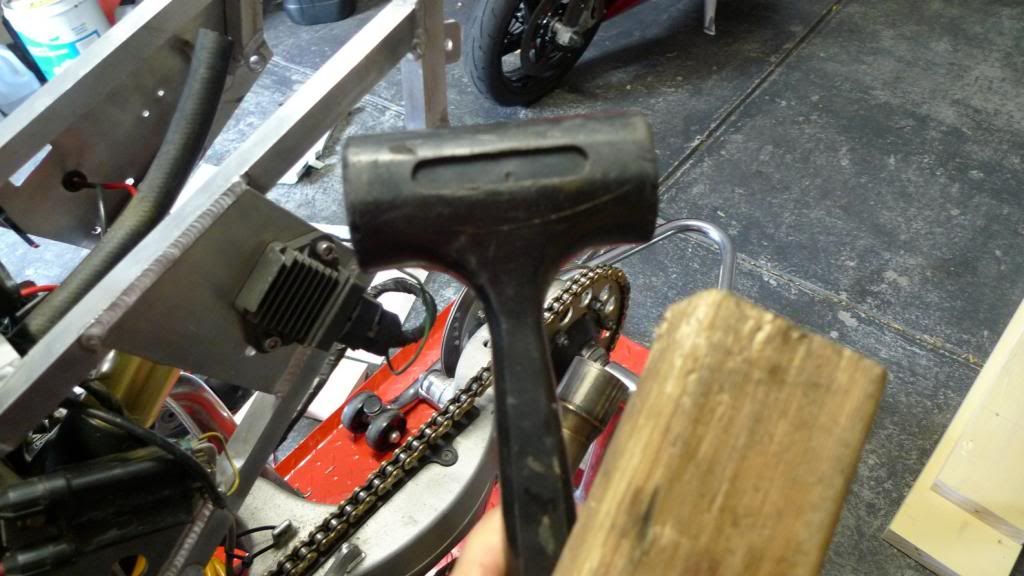
These are my instruments of repair - "percussive maintenance" may be the correct term ...
I wasn't expecting it to be quite so easy to get moving so I don't have a before photo with a string line. But after a few hefty smacks it was pretty much back in line:
Some other small things needed straightening, like these two guys on both sides:
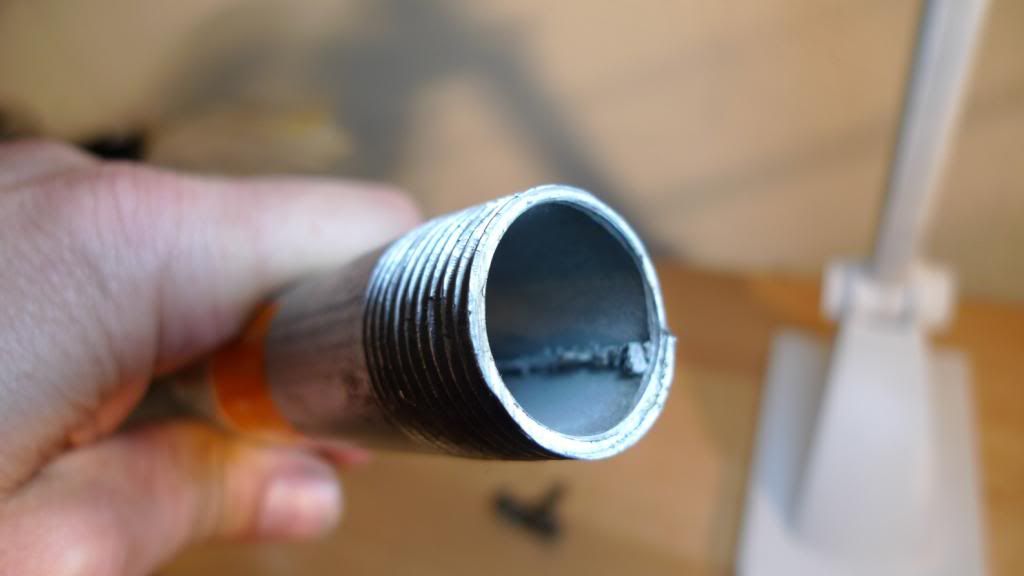
For a couple of bucks I got a small bit of plumbing pipe from the hardware store that would fit ... the diameter is spot on, but it had this weld crap in it so it would not go on:
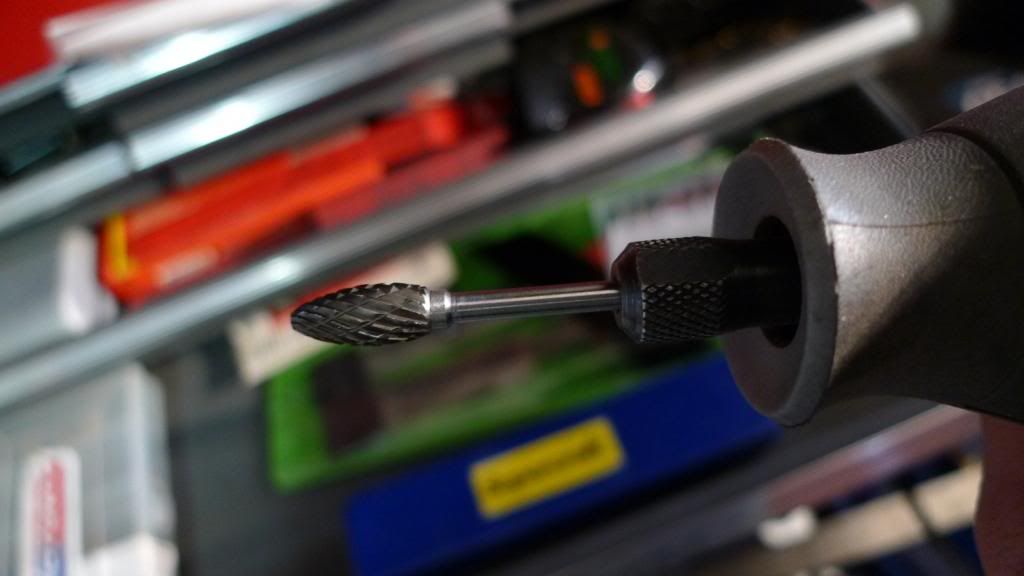
Enter my brand new direct-from-china cheaper-than-chicken-shit 'carbide tipped' dremel metal eater thingies from ebay:
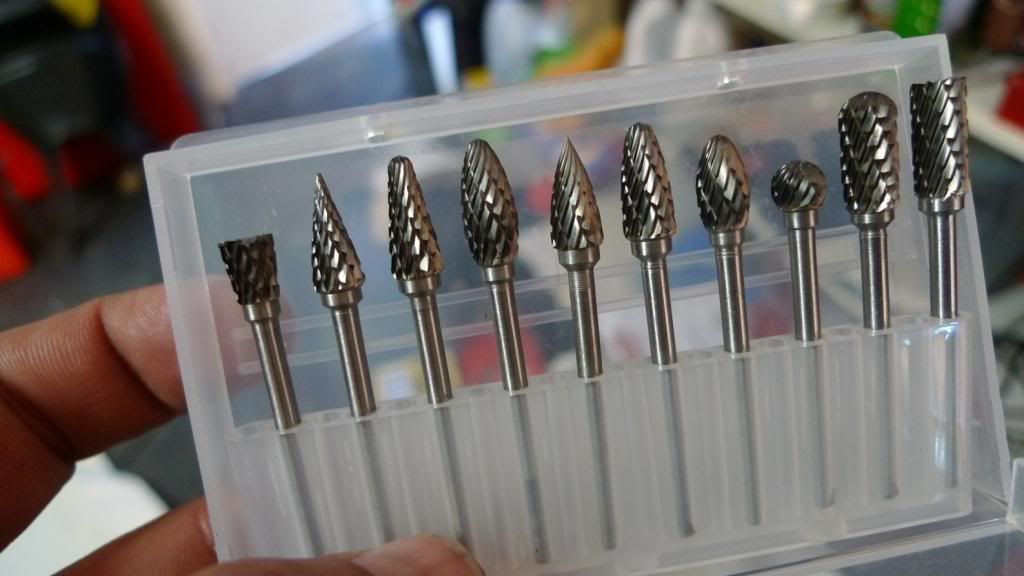
Actually, they are absolutely beautiful things. They might be made from metal coloured cheese for all I know, but worth a go. I wanted them for when I had the heads apart but the shipping time was too long for me to use them on the heads, but I got them anyways.
Worked a treat and (seriously) in about 5 seconds:
And then used to straighten things a bit:
Continued ...
You may have seen in some previous photos the rear subframe was bent. It is a Rick Oliver aluminium race subframe. Very nice bit of it.
To be able to use the 2006 CBR1000RR shock, I need to move the battery somewhere (we'll see that stuff soon) - and there is no point doing any of that stuff with a bent subframe. You can see it is bent pretty clearly here:

These are my instruments of repair - "percussive maintenance" may be the correct term ...

I wasn't expecting it to be quite so easy to get moving so I don't have a before photo with a string line. But after a few hefty smacks it was pretty much back in line:

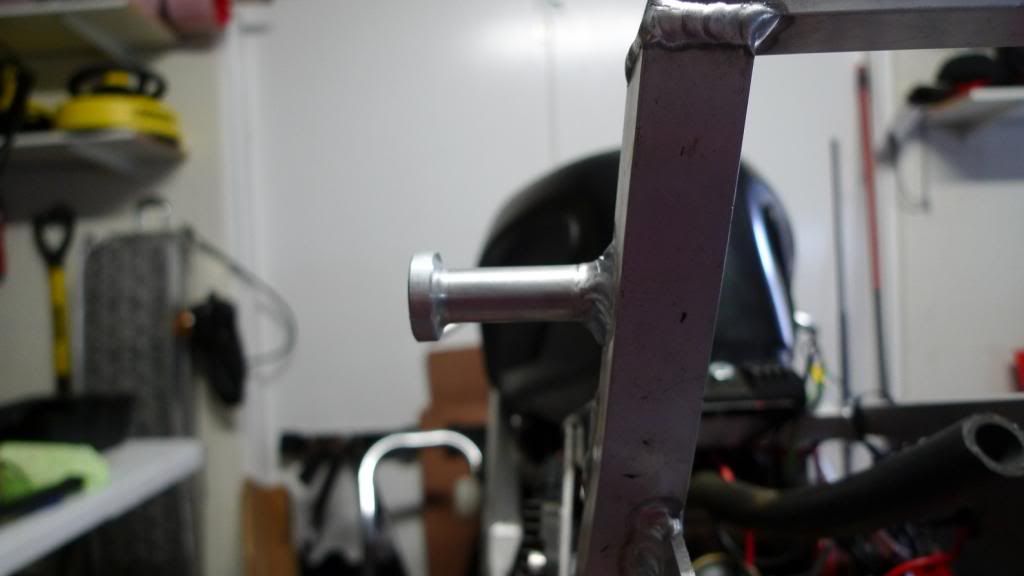
Some other small things needed straightening, like these two guys on both sides:

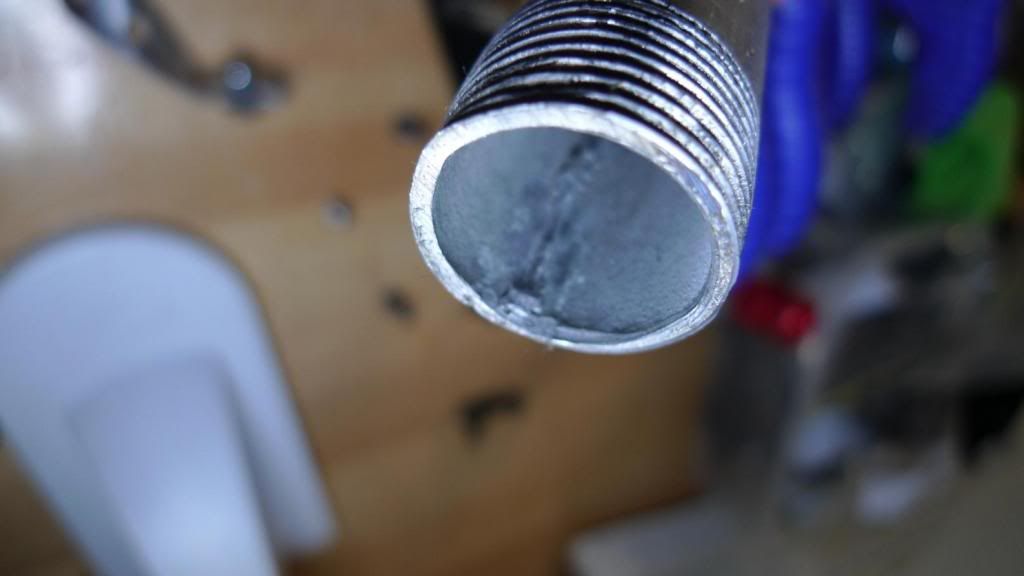
For a couple of bucks I got a small bit of plumbing pipe from the hardware store that would fit ... the diameter is spot on, but it had this weld crap in it so it would not go on:

Enter my brand new direct-from-china cheaper-than-chicken-shit 'carbide tipped' dremel metal eater thingies from ebay:

Actually, they are absolutely beautiful things. They might be made from metal coloured cheese for all I know, but worth a go. I wanted them for when I had the heads apart but the shipping time was too long for me to use them on the heads, but I got them anyways.

Worked a treat and (seriously) in about 5 seconds:

And then used to straighten things a bit:

Continued ...
-
StrayAlien
- Familiar Member
- Posts: 361
- Joined: Sun Jan 15, 2012 9:27 am
- Bike owned: NC30, Dukes, Hog
- Location: Melbourne, Straya
Re: Post race-bingle NC30 rebuild - pic thread
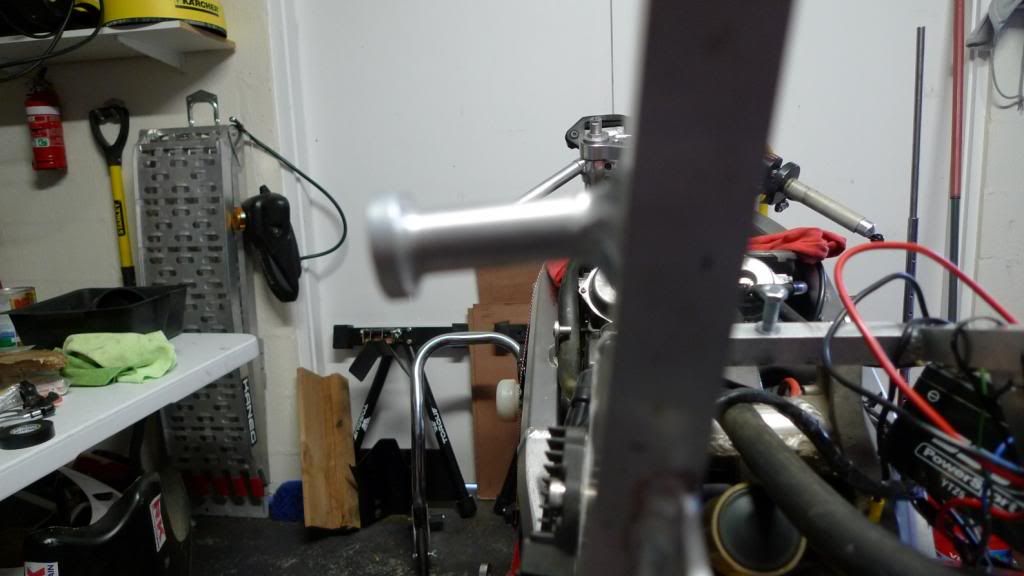
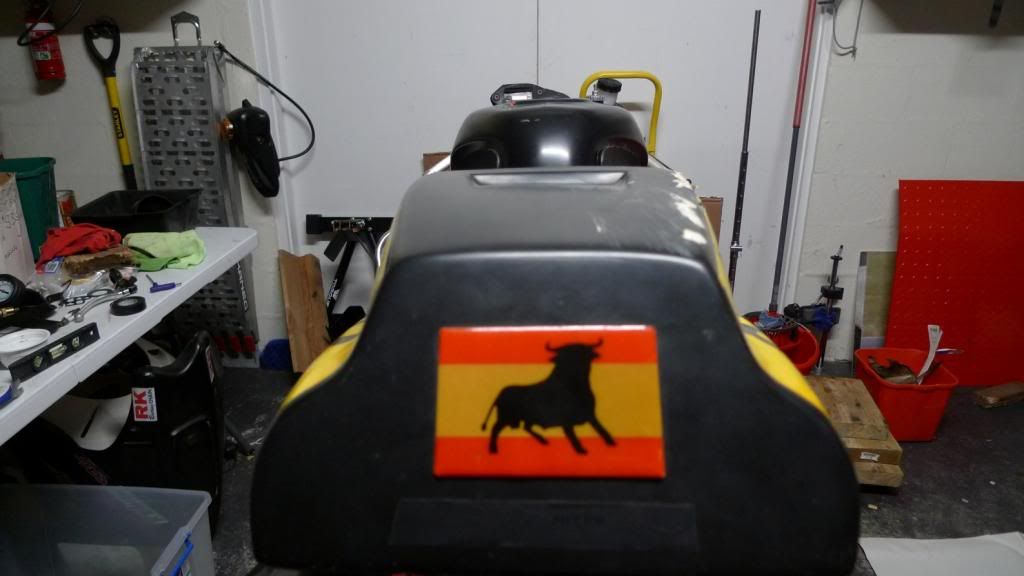
The subframe may have been in line, but it was still a little twisted as you can see here. (Yes, the 'Bee' does have a Spanish flavour. My Nr 1 support crew and motorcycle racing crazy wifey just happens to be a Spaniard).
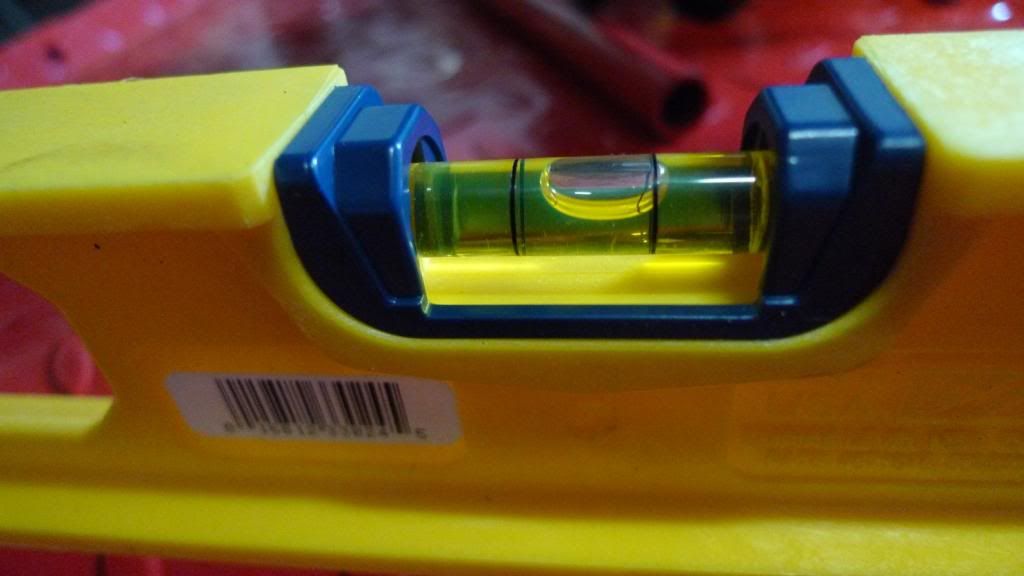
So .. I put a level on the lift to see how it was sitting:
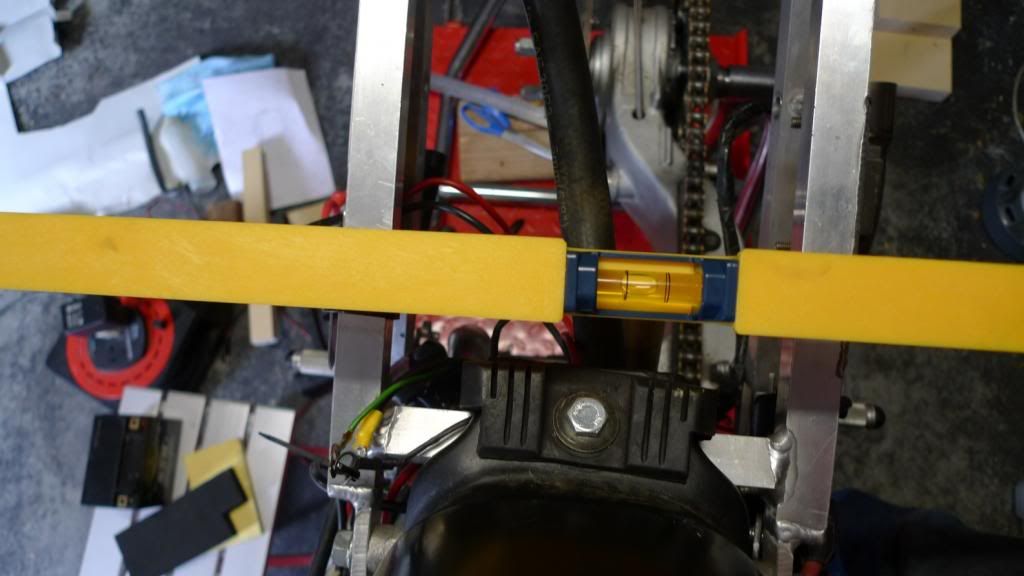
And then just to confuse you all took the rest of the photos of the level from the other direction ... but you can see that in order to get about the same level I had to slide one end of the level up the subframe a little on the left side of the bike to mimic the level of the lift:
A fair amount of smacking later and I was close, but in fear of damaging the subframe I left it 'close enough for now':

With things pretty much in order there, time to move on to relocating the battery.
Continued ...

So .. I put a level on the lift to see how it was sitting:

And then just to confuse you all took the rest of the photos of the level from the other direction ... but you can see that in order to get about the same level I had to slide one end of the level up the subframe a little on the left side of the bike to mimic the level of the lift:

A fair amount of smacking later and I was close, but in fear of damaging the subframe I left it 'close enough for now':

With things pretty much in order there, time to move on to relocating the battery.
Continued ...