How to: Re-route your brake line and foam fill the swingarm
Posted: Sun Nov 23, 2008 7:16 pm
So this is something that many of you have either done or probably read about. I have spoken to some members about it over past and present times and still find people asking questions on how to do it and advice etc etc. It is a relatively simple modification and I believe it to be worthwhile. I know that some of you will have done the one, and ignored the other but I wanted to do both and since its apart its much esaier that way.
I didnt actually want to do it right now, as I havent bought my replacement rear shock yet. It can be done with the shock in place, its just eaier and cleaner to do it with it removed. I was being asked for more pics and help so I thought Id just do it as I wanted to do it anyway.
This modification has been done in several different ways with similar outcomes. I guess that it depends on what tools you have and what else you intend to do at the same time to which way you would do it. I find it easier to remove the hub and get the brake line through that way but its not neccesary if your just routing the brake line. Its also an opportune moment to grease your hub (yay) as its all apart at the same time, so here goes...
1) Support the bike. Easier said than done. I paddock stand will not support the bike the right way for this job. An abba stand should. There is many other ways of supporting the bike such as ratchet straps/blocks/bottle jacks etc its your bike and your method. Essentially you dont really want any support on the wheel or swingarm. Make sure its secure!
2) Remove rear wheel. Slacken off the chain and I disconnected the caliper. Remove the sprocket carrier (removing the (IIRC) 42mm nut securing the carrier is a real pain).
3) All the rear end clutter should be out of the way now. So its time to remove the hub. Removing the circlip is a rear pain aswell. A big pair of quality circlip pliers should be used, but improvised tools can be used but is not recommended. With the circlip removed the caliper bracket can be slid off, and the hub should then be free to slide out.
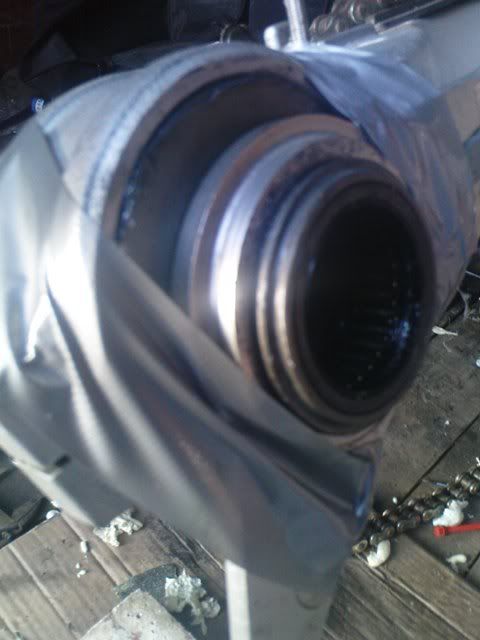
This is roughly what it your dealing with before the clip is removed and the caliper bracket still on:

4) Next you need to decide where you want the brake line to go in and out. This is where most variation occurs. I put mine where it is as the holes were already pre-drilled by the previous owner so I used them. You could have the line disappear into the side of the swingarm at the shock end and appear under the swingarm or well where ever you like in reason. Try and hoover/clean out as much swarf as possible.
5) Thread the brake line through. Much easier to do this with the hub out as the line isnt very flexible. If you still have the hub in, try tying string or a steel trace or coat hanger etc to the line and pulling through that way. I fed the brake line through at the shock end first, and grabbed it as it appeared at the hub end. Manipulate the line to exit via the hole you drilled.

Note the use of rubber grommets on entry/exit.
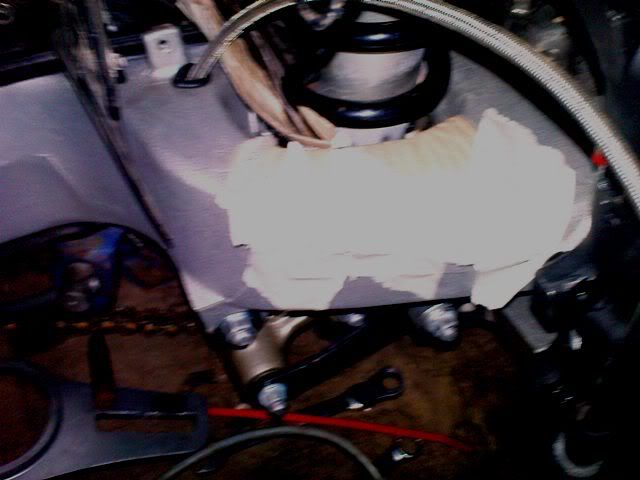
6) Having feed the brake line through the swingarm, now you need to guage how much needs to protrude at each end. Do this by mocking up where the caliper and master cylinder would be. Dont forget that you will need a little bit of slack too to make fitting bits easier later on. This is why its easier to foam fill with the shock out. As you can see in the pic I have taped card around the shock to try to prevent excess foam spilling over it. Blank off this area now if you still have your shock in.
7) Fill the swingarm with an expanding aerosol foam at the hub end. I used a polyfiller 1 bought from woolies for under under a fiver. You can also find the stuff in B&Q/homebase etc. Again its easier to do this with the shock removed as you can fill it from the other end too for better resuts. Otherwise be clever in thinking up ways of getting the foam further down the swing arm. I used extra tubing to direct it right to the end and then just carry on back filling. It expands big time. Allow to cure as per instructions on your bottle.
8) Trim back all the excess foam after its set (c.12 hours for mine) with a sharp knife.

As you can see from this pic, it may need extra foam adding untill it sets and has spilled into the hub area. Again wait till it sets then clean up the area with a knife.
9) Clean out the hub area and give it a little grease. Check now that the hub rotates freely and is not obstructed by any foam which it shouldnt be. Re-installing the hub is the opposite of removal. I found that taping the hub in place makes putting the circlip on more easily as the hub then doesnt slide around so much.
Note: Dont tape in the area where the circlip locates, as it will not locate fully.
My final product looks like this. I havent bolted everything together as I am still do other bits around here and so just wanted to show the final effect.


I think I have covered how I did it, but it really does depend on what bits you want to do at the same time and also where you want the lines to go etc etc
I didnt actually want to do it right now, as I havent bought my replacement rear shock yet. It can be done with the shock in place, its just eaier and cleaner to do it with it removed. I was being asked for more pics and help so I thought Id just do it as I wanted to do it anyway.
This modification has been done in several different ways with similar outcomes. I guess that it depends on what tools you have and what else you intend to do at the same time to which way you would do it. I find it easier to remove the hub and get the brake line through that way but its not neccesary if your just routing the brake line. Its also an opportune moment to grease your hub (yay) as its all apart at the same time, so here goes...
1) Support the bike. Easier said than done. I paddock stand will not support the bike the right way for this job. An abba stand should. There is many other ways of supporting the bike such as ratchet straps/blocks/bottle jacks etc its your bike and your method. Essentially you dont really want any support on the wheel or swingarm. Make sure its secure!
2) Remove rear wheel. Slacken off the chain and I disconnected the caliper. Remove the sprocket carrier (removing the (IIRC) 42mm nut securing the carrier is a real pain).
3) All the rear end clutter should be out of the way now. So its time to remove the hub. Removing the circlip is a rear pain aswell. A big pair of quality circlip pliers should be used, but improvised tools can be used but is not recommended. With the circlip removed the caliper bracket can be slid off, and the hub should then be free to slide out.
This is roughly what it your dealing with before the clip is removed and the caliper bracket still on:
4) Next you need to decide where you want the brake line to go in and out. This is where most variation occurs. I put mine where it is as the holes were already pre-drilled by the previous owner so I used them. You could have the line disappear into the side of the swingarm at the shock end and appear under the swingarm or well where ever you like in reason. Try and hoover/clean out as much swarf as possible.
5) Thread the brake line through. Much easier to do this with the hub out as the line isnt very flexible. If you still have the hub in, try tying string or a steel trace or coat hanger etc to the line and pulling through that way. I fed the brake line through at the shock end first, and grabbed it as it appeared at the hub end. Manipulate the line to exit via the hole you drilled.
Note the use of rubber grommets on entry/exit.
6) Having feed the brake line through the swingarm, now you need to guage how much needs to protrude at each end. Do this by mocking up where the caliper and master cylinder would be. Dont forget that you will need a little bit of slack too to make fitting bits easier later on. This is why its easier to foam fill with the shock out. As you can see in the pic I have taped card around the shock to try to prevent excess foam spilling over it. Blank off this area now if you still have your shock in.
7) Fill the swingarm with an expanding aerosol foam at the hub end. I used a polyfiller 1 bought from woolies for under under a fiver. You can also find the stuff in B&Q/homebase etc. Again its easier to do this with the shock removed as you can fill it from the other end too for better resuts. Otherwise be clever in thinking up ways of getting the foam further down the swing arm. I used extra tubing to direct it right to the end and then just carry on back filling. It expands big time. Allow to cure as per instructions on your bottle.
8) Trim back all the excess foam after its set (c.12 hours for mine) with a sharp knife.
As you can see from this pic, it may need extra foam adding untill it sets and has spilled into the hub area. Again wait till it sets then clean up the area with a knife.
9) Clean out the hub area and give it a little grease. Check now that the hub rotates freely and is not obstructed by any foam which it shouldnt be. Re-installing the hub is the opposite of removal. I found that taping the hub in place makes putting the circlip on more easily as the hub then doesnt slide around so much.
Note: Dont tape in the area where the circlip locates, as it will not locate fully.
My final product looks like this. I havent bolted everything together as I am still do other bits around here and so just wanted to show the final effect.
I think I have covered how I did it, but it really does depend on what bits you want to do at the same time and also where you want the lines to go etc etc