NC35 CBR600RR Rear Shock Guide
Posted: Thu May 19, 2011 11:49 pm
Hey guys,
I've been looking around for an NC35 - CBR600RR Rear Shock Conversion Guide but without any luck there hasn't one been made, all i've found are NC30 Guides
So today i received my CBR600RR Shock and installed it, so heres a pretty detailed guide on how to install it, hopefully this guide can helpfully help other NC35 Owners in need when approaching this conversion.
NC35 CBR600RR Rear Shock Guide
Acquire Shock
1. I Picked up a 2004,2005 or 2006 CBR600RR Rear Shock of eBay from the US for around $100, the one i bought said it had 50miles on it, so i decided to go with it. When i received it it was in pretty shmick condition.

Clearance
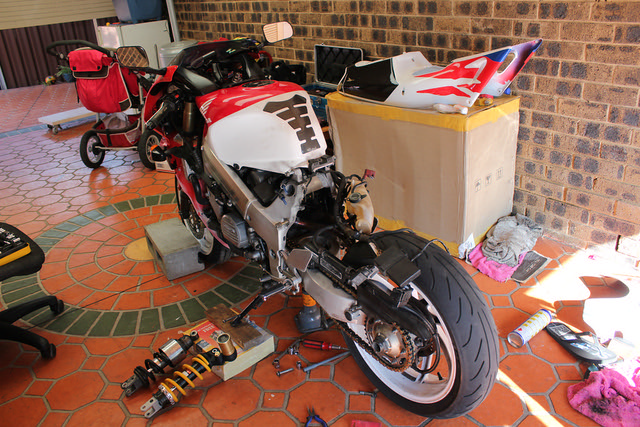
I begun by taking off my Rear Fairing, Subframe, Half of my exhaust system, Cables, Battery, Undertail and anything else that would make it easier for me to access the Original Rear Shock Absorber.
Support
Jack the bike up on a rear stand if you have one and place a car jack under the Engine for more support, make sure you lock your front brakes & put it in Gear 1 just incase it decides to roll or lose balance ( This would be better if you had a friend with you to hold the bike). I decided to go Ghetto Styles and use bricks, Yellow Pages, Wood and anything else that is strong enough to support the motorcycle :)


Getting Access to your Rear Shock Absorber
There are Three bolts that you must remove so you can get access to the bottom of the rear shock, The first two bolts are the bolts holding the linkage, remove theses two bolts so you can gain access to the bolt holding the bottom of the rear shock in place, A socket wrench is required for this job.


Removing your rear shock
Once you remove the all of the bolts on the bottom, you can remove the top bolt which is holding the rear shock, it is pretty difficult to remove but once you slip your hand in and get around it you'll manage to remove it.

The comparison between the Old 17 Year old Shock to a Modern Honda CBR600RR Rear Shock :)


Installing the New Shock
When i was installing the new shock i realised that the bolt that holds the shock in place from the top shock pin due to another screw holding that shock pin in place, it was off by at least a millimeter or two, so i had to get a metal grinder and sand the top off by just a bit, the red i marked in the photo below shows how much i removed off the rear shock, after this was done, Installing the new shock required me to use a washer/space between the shock so it would fit perfectly without it moving at all.
NOTE: make sure you respray the top with black spray or primer or anything that will prevent the top from rusting.


We taped up the nitrogen gas cylinder because we didn't want the gold to get damaged.

Modding the Subframe & Undertail/Battery Box.
As we were putting everything back together there was an issue with the subframe & nitrogen gas cylinder. The Ignition coil was blocking the nitrogen gas cylinder from going through. This required us to relocate it and to remove the scrap metal which was welded onto the subframe. So we used a metal grinder to cut it off.

Relocated the ignition coil right next to the cylinder using cable ties and wallah perfect relocation!
The undertail/battery box required cutting so once you remove a large portion of the battery box the nitrogen gas cylinder will fit perfectly, The battery will fit on top of the cylinder or you can replace it by getting a smaller one, your choice.
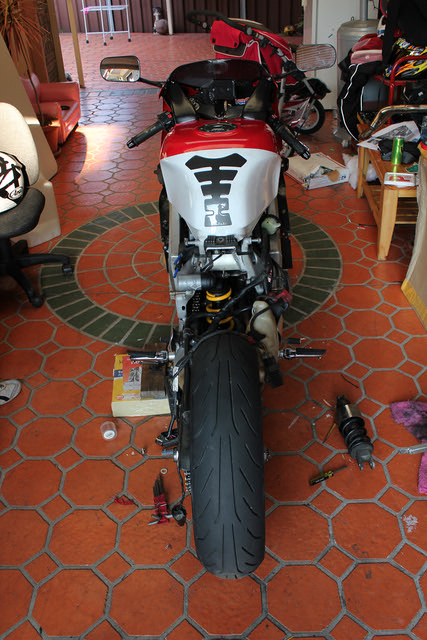
Put everything back together and you have completed the CBR600RR Rear Shock Conversion
I've been looking around for an NC35 - CBR600RR Rear Shock Conversion Guide but without any luck there hasn't one been made, all i've found are NC30 Guides
So today i received my CBR600RR Shock and installed it, so heres a pretty detailed guide on how to install it, hopefully this guide can helpfully help other NC35 Owners in need when approaching this conversion.
NC35 CBR600RR Rear Shock Guide
Acquire Shock
1. I Picked up a 2004,2005 or 2006 CBR600RR Rear Shock of eBay from the US for around $100, the one i bought said it had 50miles on it, so i decided to go with it. When i received it it was in pretty shmick condition.
Clearance
I begun by taking off my Rear Fairing, Subframe, Half of my exhaust system, Cables, Battery, Undertail and anything else that would make it easier for me to access the Original Rear Shock Absorber.
Support
Jack the bike up on a rear stand if you have one and place a car jack under the Engine for more support, make sure you lock your front brakes & put it in Gear 1 just incase it decides to roll or lose balance ( This would be better if you had a friend with you to hold the bike). I decided to go Ghetto Styles and use bricks, Yellow Pages, Wood and anything else that is strong enough to support the motorcycle :)
Getting Access to your Rear Shock Absorber
There are Three bolts that you must remove so you can get access to the bottom of the rear shock, The first two bolts are the bolts holding the linkage, remove theses two bolts so you can gain access to the bolt holding the bottom of the rear shock in place, A socket wrench is required for this job.
Removing your rear shock
Once you remove the all of the bolts on the bottom, you can remove the top bolt which is holding the rear shock, it is pretty difficult to remove but once you slip your hand in and get around it you'll manage to remove it.
The comparison between the Old 17 Year old Shock to a Modern Honda CBR600RR Rear Shock :)
Installing the New Shock
When i was installing the new shock i realised that the bolt that holds the shock in place from the top shock pin due to another screw holding that shock pin in place, it was off by at least a millimeter or two, so i had to get a metal grinder and sand the top off by just a bit, the red i marked in the photo below shows how much i removed off the rear shock, after this was done, Installing the new shock required me to use a washer/space between the shock so it would fit perfectly without it moving at all.
NOTE: make sure you respray the top with black spray or primer or anything that will prevent the top from rusting.
We taped up the nitrogen gas cylinder because we didn't want the gold to get damaged.
Modding the Subframe & Undertail/Battery Box.
As we were putting everything back together there was an issue with the subframe & nitrogen gas cylinder. The Ignition coil was blocking the nitrogen gas cylinder from going through. This required us to relocate it and to remove the scrap metal which was welded onto the subframe. So we used a metal grinder to cut it off.
Relocated the ignition coil right next to the cylinder using cable ties and wallah perfect relocation!
The undertail/battery box required cutting so once you remove a large portion of the battery box the nitrogen gas cylinder will fit perfectly, The battery will fit on top of the cylinder or you can replace it by getting a smaller one, your choice.
Put everything back together and you have completed the CBR600RR Rear Shock Conversion