CB-1 Mk2
- CMSMJ1
- Moderators

- Reactions:
- Posts: 7150
- Joined: Thu May 01, 2008 9:42 am
- Bike owned: NC30-No9
- Location: Chesterfield, United Kingdom
Re: CB-1 Mk2
Stashed in container - was cheap to me and I "swapped" it with my mate, who doesn;t want it - so if it was sold I would get some space back in my container and he would get some cash - winning! It is..errmm..rough. And so if you wanted it...cheap! Was used for LDD and so has pedigree but I;ve no desire to sort it - so, when should I drop it off?
IMPERATOR REX ANGLORUM
The V4 is the law..
NC30 - No9 - my old mate
The V4 is the law..
NC30 - No9 - my old mate
-
CB1pod70
- NWAA Supporter

- Reactions:
- Posts: 302
- Joined: Thu Apr 09, 2015 1:55 pm
- Location: Gravesend
Re: CB-1 Mk2
And once you've made a list of parts required, let me KnowCMSMJ1 wrote: ↑Thu Mar 15, 2018 10:57 amStashed in container - was cheap to me and I "swapped" it with my mate, who doesn;t want it - so if it was sold I would get some space back in my container and he would get some cash - winning! It is..errmm..rough. And so if you wanted it...cheap! Was used for LDD and so has pedigree but I;ve no desire to sort it - so, when should I drop it off?
- jim157
- Admin NWAA

- Reactions:
- Posts: 1004
- Joined: Mon May 17, 2010 7:15 pm
- Bike owned: A few small ones
- Location: Norwich
Re: CB-1 Mk2
I wish I had the room but I've already got a couple of projects that have gone nowhere in a few years....
AUTOEXEC.TWAT
- CMSMJ1
- Moderators

- Reactions:
- Posts: 7150
- Joined: Thu May 01, 2008 9:42 am
- Bike owned: NC30-No9
- Location: Chesterfield, United Kingdom
Re: CB-1 Mk2
I'll see about dragging it to Cadwell for you.... no need for thanks
IMPERATOR REX ANGLORUM
The V4 is the law..
NC30 - No9 - my old mate
The V4 is the law..
NC30 - No9 - my old mate
-
CB1pod70
- NWAA Supporter

- Reactions:
- Posts: 302
- Joined: Thu Apr 09, 2015 1:55 pm
- Location: Gravesend
Re: CB-1 Mk2
Ok so this one got off to a bit of a false start and with the weather we had in February & March, I did struggle to build up the enthusiasm to head out into the garage. When I have been there, it was to work on other bikes.
Race season has approached pretty quickly so the NC23 race bike has taken priority and needed a replacement gearbox to solve the problems with jumping out of 5th. Unfortunately to get at the gearbox means stripping down the whole engine and you end up with this
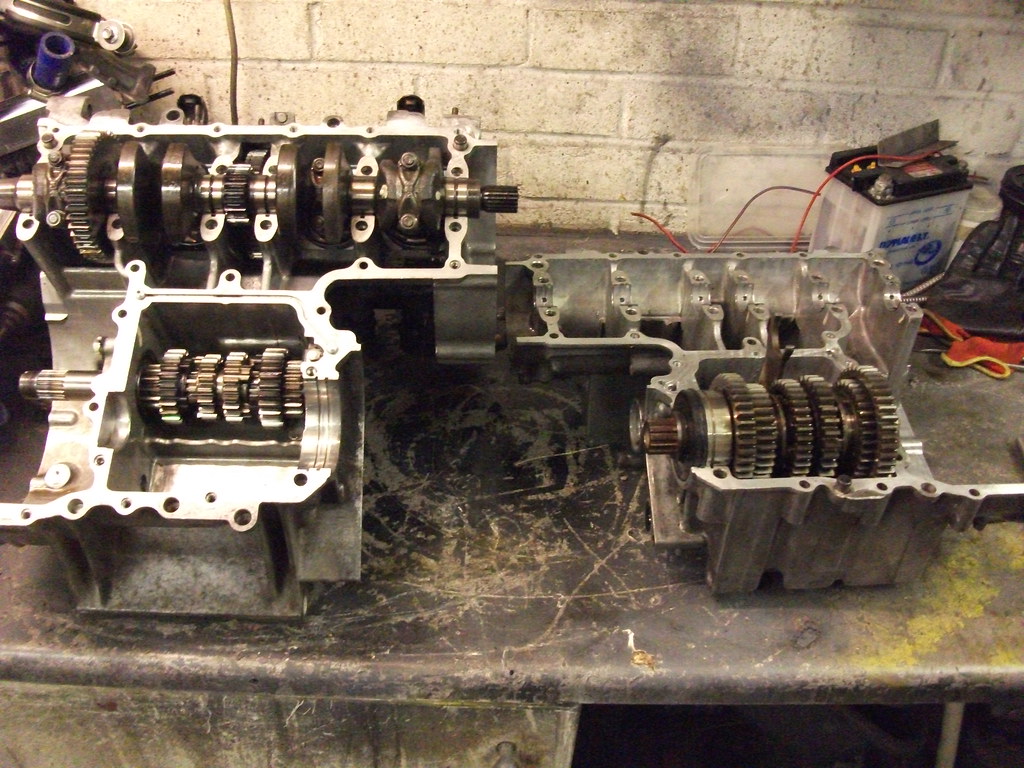 DSCF0780 by pod_70, on Flickr
and plenty of work to put it all back together again
Interestingly enough, the gear clusters (and ratios) for the NC27 & NC23 are the same despite the 27 using a 17" wheel and the 23 an 18". The only difference between the engines is therefore the cylinder heads & carbs, a lightened clutch basket in the 23 and the water pumps (the 23 has additional take-offs for the oil cooler behind the oil filter which is missing on the NC27)
I took the NC23 for it's first test run at Lydden Hill 2 weekends ago and it seems to be running great. Not the best circuit for testing as it's only 1 mile long and you only really use 2nd, 3rd & 4th but the session the previous weekend at Snetteron was cancelled due to snow on the track!
Whilst there I bumped into our very own Bikemonkey and much fun was had by all
Race season has approached pretty quickly so the NC23 race bike has taken priority and needed a replacement gearbox to solve the problems with jumping out of 5th. Unfortunately to get at the gearbox means stripping down the whole engine and you end up with this
 DSCF0780 by pod_70, on Flickr
and plenty of work to put it all back together again
Interestingly enough, the gear clusters (and ratios) for the NC27 & NC23 are the same despite the 27 using a 17" wheel and the 23 an 18". The only difference between the engines is therefore the cylinder heads & carbs, a lightened clutch basket in the 23 and the water pumps (the 23 has additional take-offs for the oil cooler behind the oil filter which is missing on the NC27)
I took the NC23 for it's first test run at Lydden Hill 2 weekends ago and it seems to be running great. Not the best circuit for testing as it's only 1 mile long and you only really use 2nd, 3rd & 4th but the session the previous weekend at Snetteron was cancelled due to snow on the track!
Whilst there I bumped into our very own Bikemonkey and much fun was had by all
-
CB1pod70
- NWAA Supporter

- Reactions:
- Posts: 302
- Joined: Thu Apr 09, 2015 1:55 pm
- Location: Gravesend
Re: CB-1 Mk2
I had nothing planned for the Easter break so now that the race bike is up and running, what better than to crack on with the NC27?
Well Friday was taken up with a few odd jobs on the NC23 and sorting out the van ready for it's service on Saturday (there were jobs that I knew the garage would contact me about to add as extras to the service, so I figured I'd do them myself to save a few pounds).
The Van came back from the service with an advisory on the brakes so needs new pads, front discs, rear shoes & rear slave cylinders are required. so these were duly ordered. My Dad also popped over for a visit so we went out for the day to the Royal Engineers Museum in Chatham and spent the day looking at tanks and other cool military stuff - well worth a visit if you're in the area.
Sunday - I finally made it into the garage and managed to pull the little 27 out of its corner The plan was to take apart the front end and so first off were the clip-ons. It would appear that Honda have borrowed these from another model (VFR750 perhaps?) and the lower locating lugs would foul the bolt for the top yokes so Honda have added an additional spacer
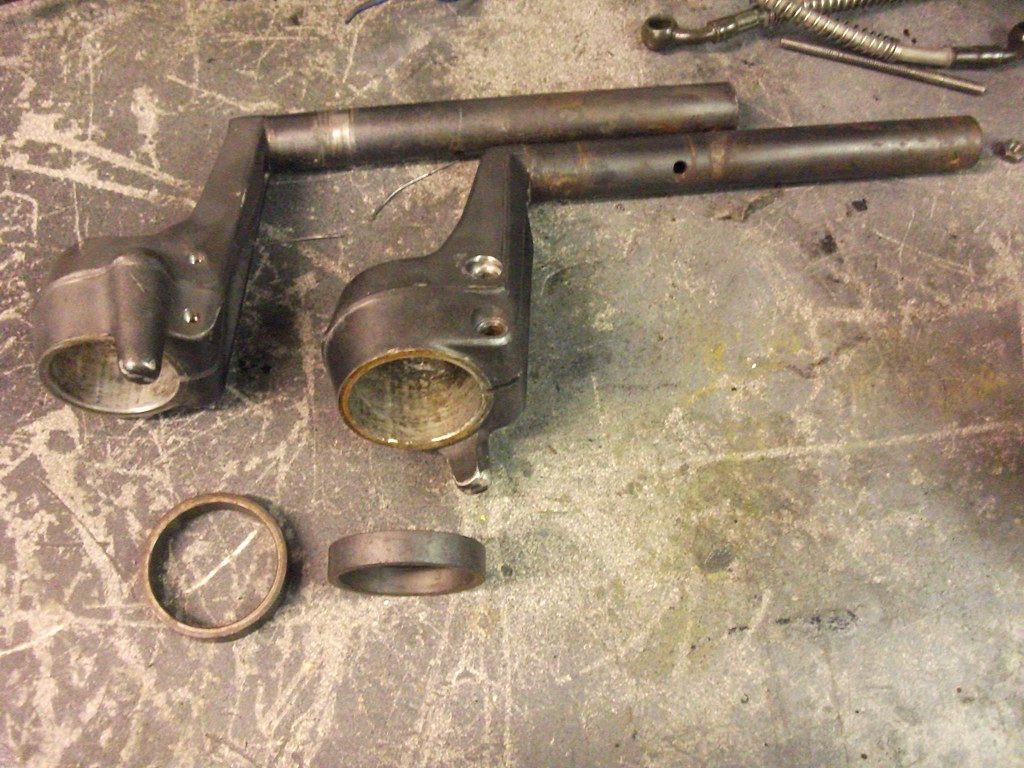 DSCF0785 by pod_70, on Flickr
The top yoke came off and the list of damaged parts slowly revealed itself:
Clocks (not enough remaining to bother photographing)
Headlight
Headlight Frame, Rubber Top Hats & Alloy Brackets
Choke Lever
Clutch Cable
Clutch Lever Mount
Grips (these were pretty grubby and worn anyway)
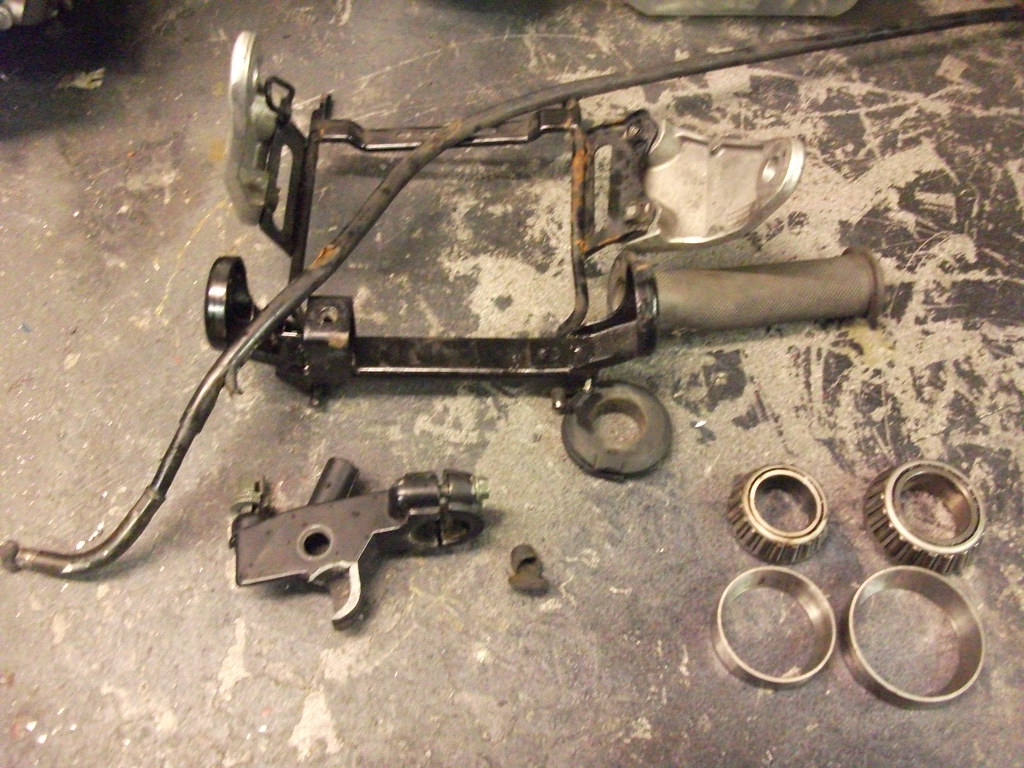 DSCF0786 by pod_70, on Flickr
Well Friday was taken up with a few odd jobs on the NC23 and sorting out the van ready for it's service on Saturday (there were jobs that I knew the garage would contact me about to add as extras to the service, so I figured I'd do them myself to save a few pounds).
The Van came back from the service with an advisory on the brakes so needs new pads, front discs, rear shoes & rear slave cylinders are required. so these were duly ordered. My Dad also popped over for a visit so we went out for the day to the Royal Engineers Museum in Chatham and spent the day looking at tanks and other cool military stuff - well worth a visit if you're in the area.
Sunday - I finally made it into the garage and managed to pull the little 27 out of its corner
 DSCF0785 by pod_70, on Flickr
The top yoke came off and the list of damaged parts slowly revealed itself:
Clocks (not enough remaining to bother photographing)
Headlight
Headlight Frame, Rubber Top Hats & Alloy Brackets
Choke Lever
Clutch Cable
Clutch Lever Mount
Grips (these were pretty grubby and worn anyway)
 DSCF0786 by pod_70, on Flickr
-
CB1pod70
- NWAA Supporter

- Reactions:
- Posts: 302
- Joined: Thu Apr 09, 2015 1:55 pm
- Location: Gravesend
Re: CB-1 Mk2
Next job was to remove the forks and check the stations with a straight edge. These have survived the crash and thankfully are straight so that's one less thing to worry about thankfully. I'll check the length against another pair of forks but at a guess, I'd say they are about 25mm longer than those on a mk1. the fork oil didn't look too bad but I'll drain & replace this while I've got the forks out.
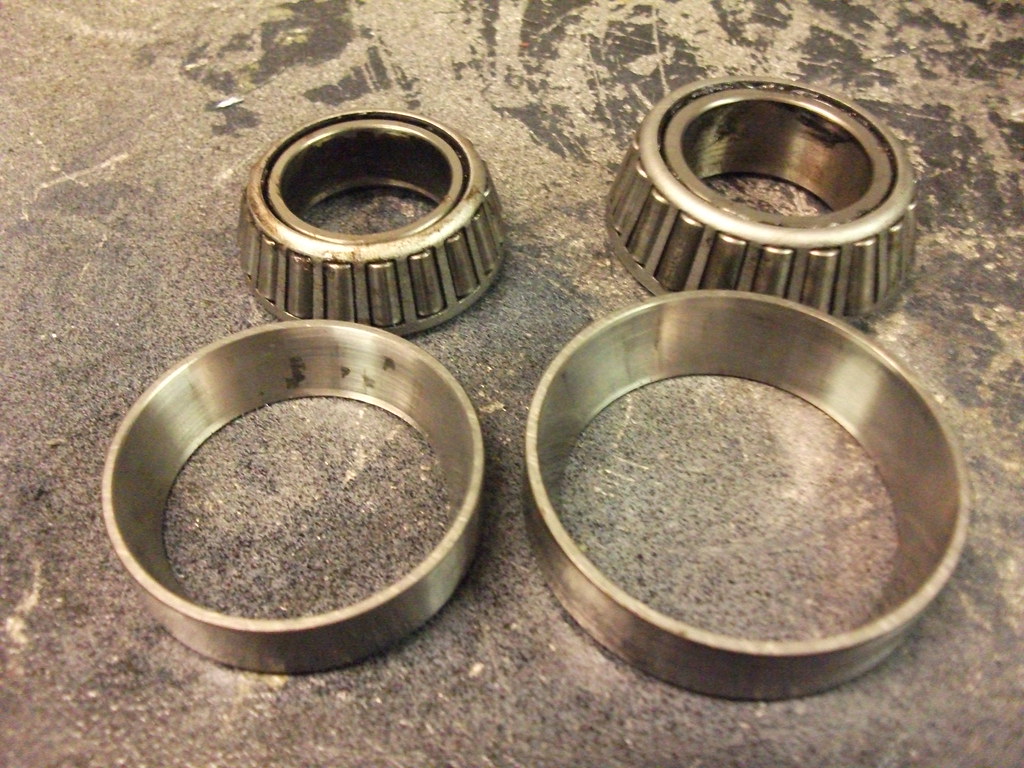
The steering felt a bit notchy so I pulled the yokes out and found that the bottom bearing was past its best and there were notches in the outer race on the top race so these had to go and a new set has been ordered.
 DSCF0783 by pod_70, on Flickr
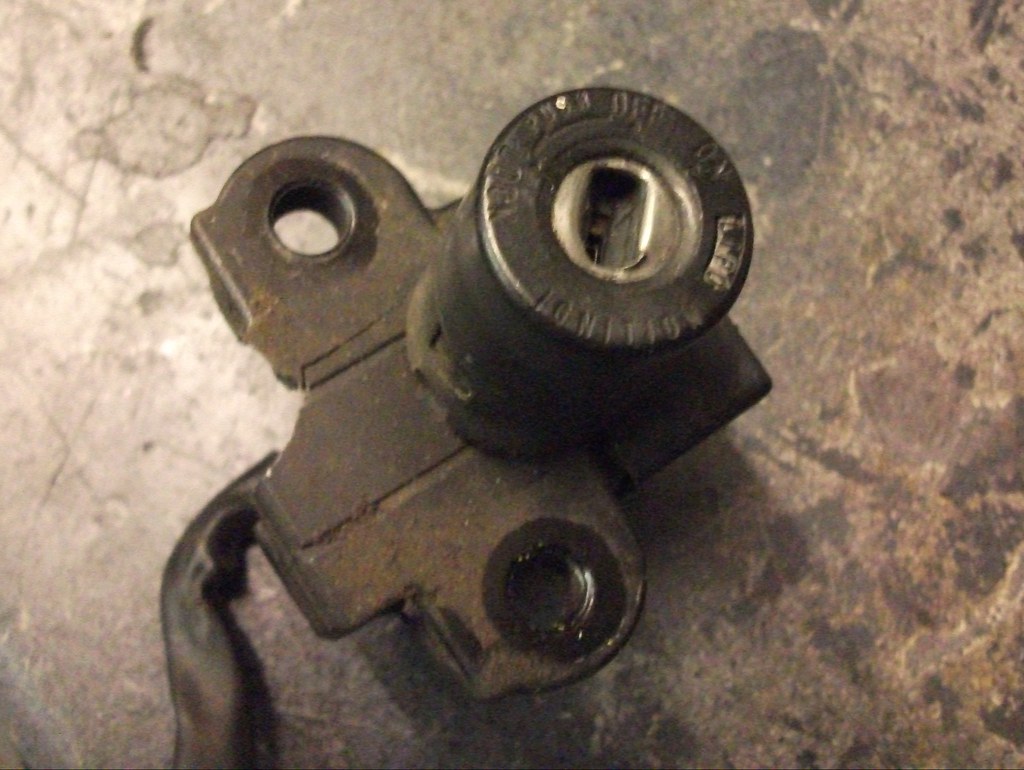
Another casualty of the crash was the Ignition Barrel. A chunk has been taken out of the casing around the steering lock and it looks like someone has taken a screwdriver to the lock in the past.
 DSCF0791 by pod_70, on Flickr
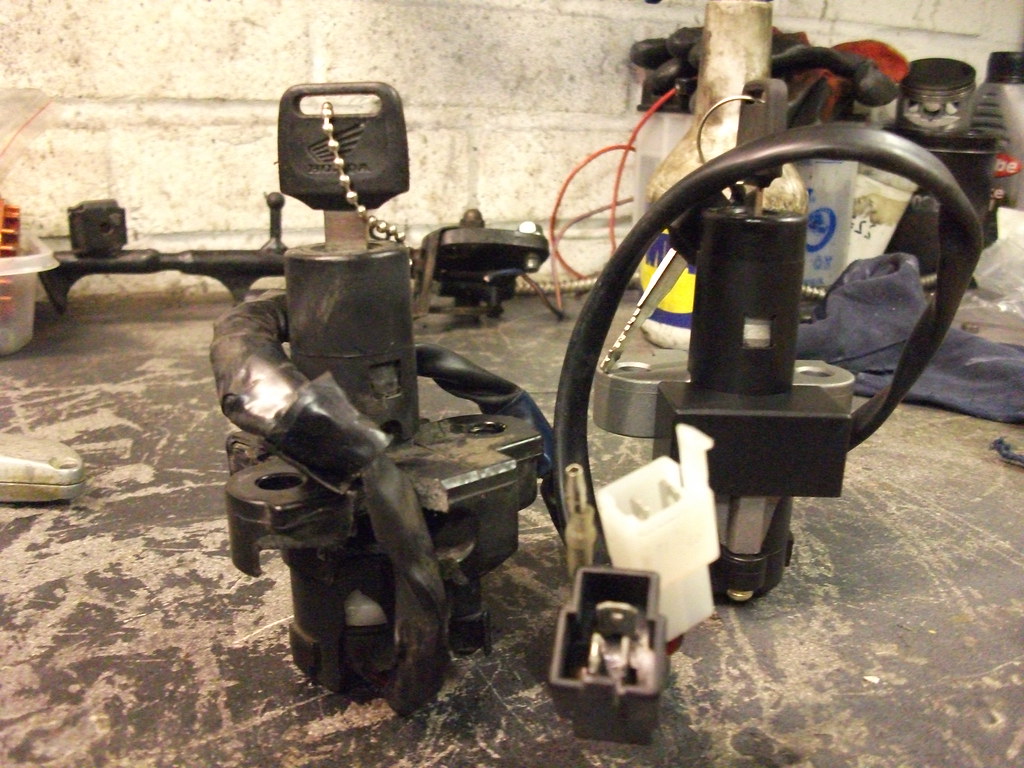
A quick rummage through the spares stash soon turned up a replacement Chinese lock. Unfortunately the Chinese lock has a 2 pin connector and a bullet connector on the fan motor feed rather than the 3 pin connector on the Honda lock so I'll have to modify the wiring to suit
 DSCF0792 by pod_70, on Flickr
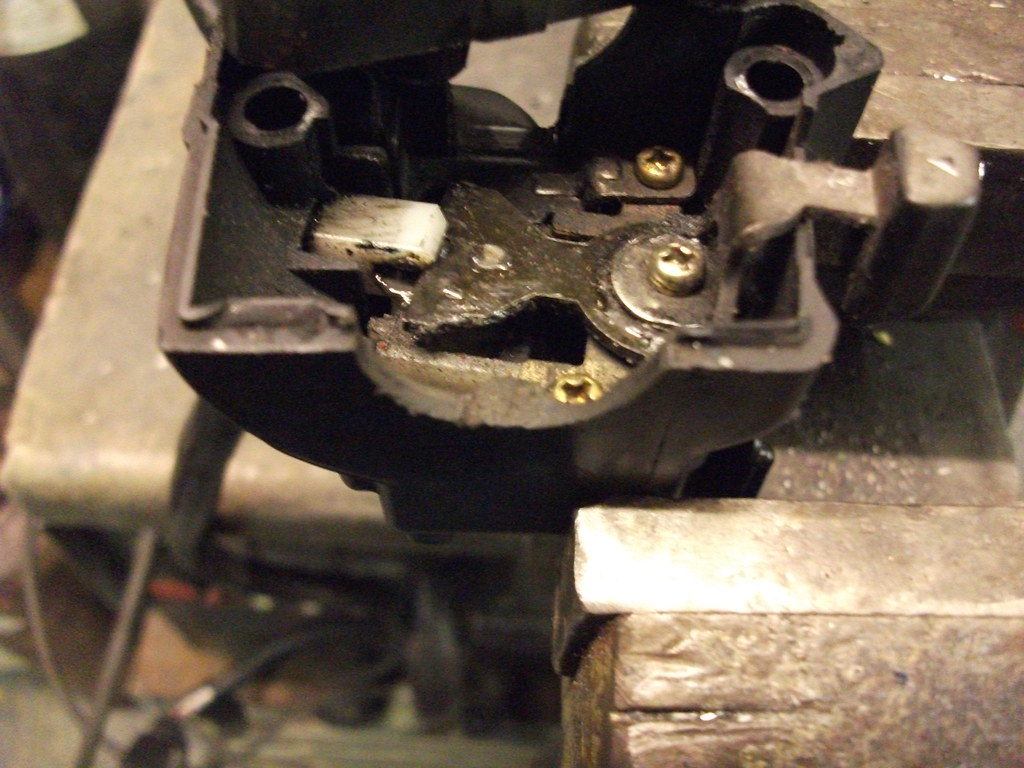
One of my pet hates is switchgear that moves around on the handlebars and for some reason, someone had cut the locating lug off of the L/H switchgear allowing it to rotate. I have no idea why they did this as the locating hole is in the clip-ons
 DSCF0788 by pod_70, on Flickr
I carefully drilled and tapped remains of the pin to take an M3 screw so that the head would now serve as the locating pin. The head is a little big bigger than the plastic pin so the hole in the clip-on was enlarged to suit
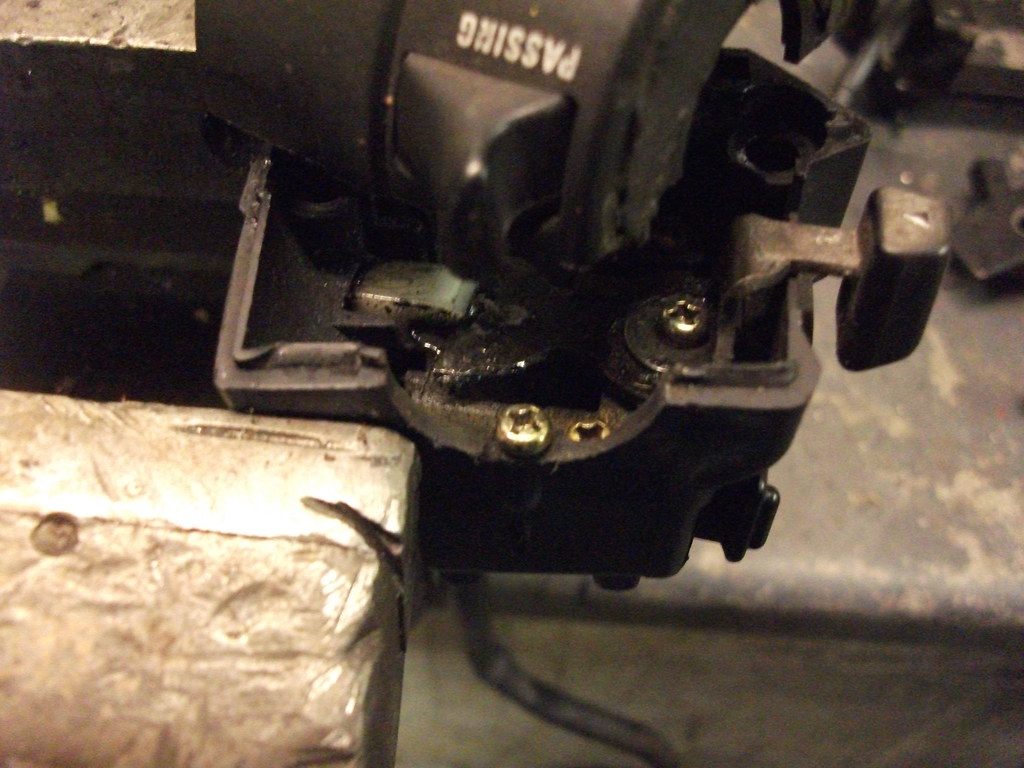 DSCF0789 by pod_70, on Flickr
Whilst I was there I gave the switches a good clean and blast of contact cleaner.
As there isn't much else I could do until the replacement head bearings arrive, I treated the forks & bottom yoke to a quick rub down, prime and few coats of black paint. They had been painted over in the past and were suffering from quite a few stone chips.
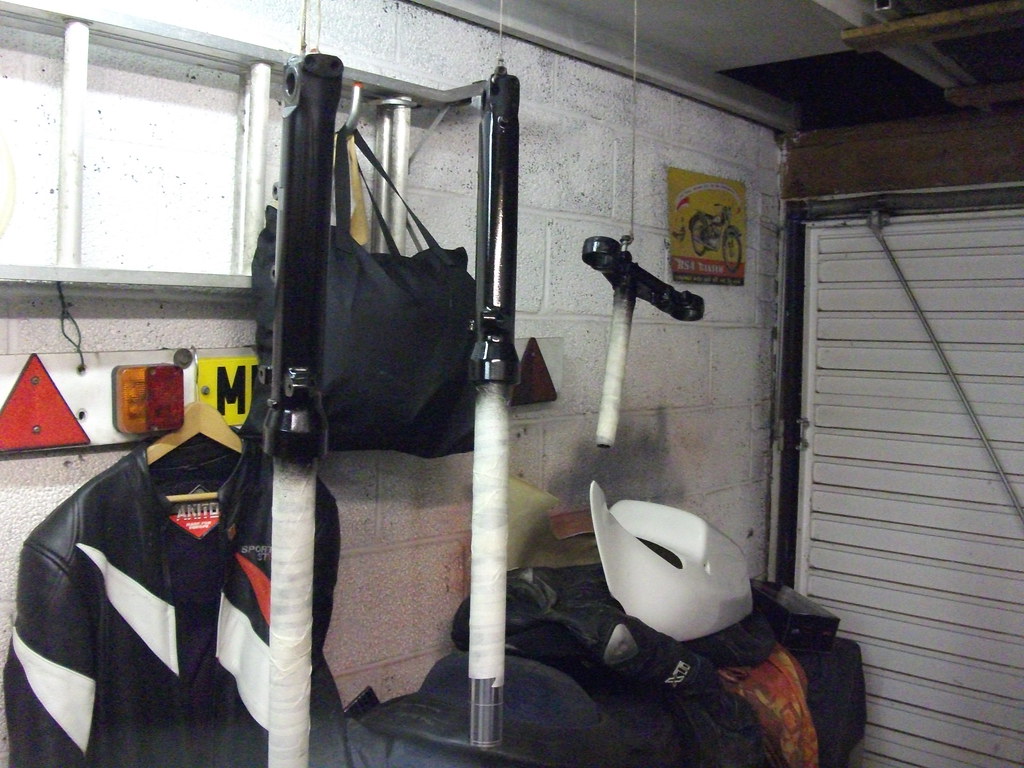 DSCF0793 by pod_70, on Flickr
All in all, not a bad days work
The steering felt a bit notchy so I pulled the yokes out and found that the bottom bearing was past its best and there were notches in the outer race on the top race so these had to go and a new set has been ordered.
 DSCF0783 by pod_70, on Flickr
Another casualty of the crash was the Ignition Barrel. A chunk has been taken out of the casing around the steering lock and it looks like someone has taken a screwdriver to the lock in the past.
 DSCF0791 by pod_70, on Flickr
A quick rummage through the spares stash soon turned up a replacement Chinese lock. Unfortunately the Chinese lock has a 2 pin connector and a bullet connector on the fan motor feed rather than the 3 pin connector on the Honda lock so I'll have to modify the wiring to suit
 DSCF0792 by pod_70, on Flickr
One of my pet hates is switchgear that moves around on the handlebars and for some reason, someone had cut the locating lug off of the L/H switchgear allowing it to rotate. I have no idea why they did this as the locating hole is in the clip-ons
 DSCF0788 by pod_70, on Flickr
I carefully drilled and tapped remains of the pin to take an M3 screw so that the head would now serve as the locating pin. The head is a little big bigger than the plastic pin so the hole in the clip-on was enlarged to suit
 DSCF0789 by pod_70, on Flickr
Whilst I was there I gave the switches a good clean and blast of contact cleaner.
As there isn't much else I could do until the replacement head bearings arrive, I treated the forks & bottom yoke to a quick rub down, prime and few coats of black paint. They had been painted over in the past and were suffering from quite a few stone chips.
 DSCF0793 by pod_70, on Flickr
All in all, not a bad days work
-
CB1pod70
- NWAA Supporter

- Reactions:
- Posts: 302
- Joined: Thu Apr 09, 2015 1:55 pm
- Location: Gravesend
Re: CB-1 Mk2
Bank holiday Monday and as I was waiting on parts for the van, I was able to spend a few more hours on this. Obviously I couldn't do anything more with the front end so I moved back and set to on removing the airbox to reveal a rather grubby air filter element.
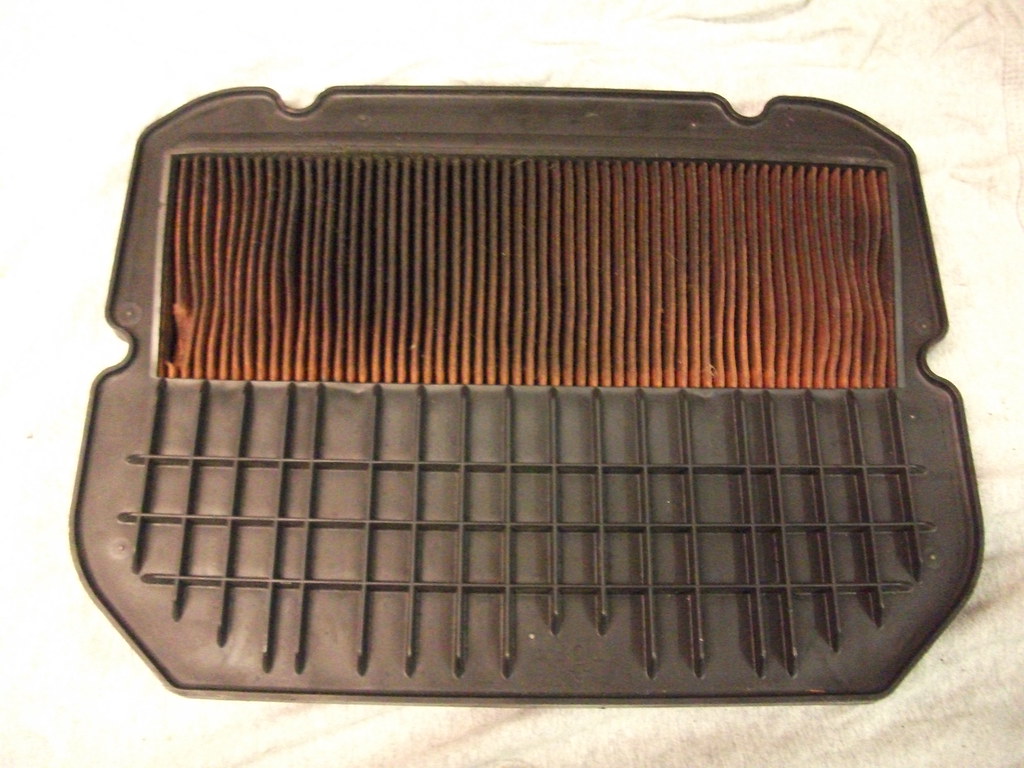 DSCF0796 by pod_70, on Flickr
Although these are fairly readily available through the likes of Wemoto, CMSNL & David Silver spares for around £25, I decided to employ the patented Amorti foam replacement method and whilst it's been documented before, I'm sure the accompanying photos have been lost to Photobucket, so here's the procedure:
1). Take a Stanley knife and cut out the paper element
2). Using the Stanley knife and some sandpaper clean up the opening and remove as much of the remains of the paper element as possible. You won't remove it all as it is moulded into the plastic.
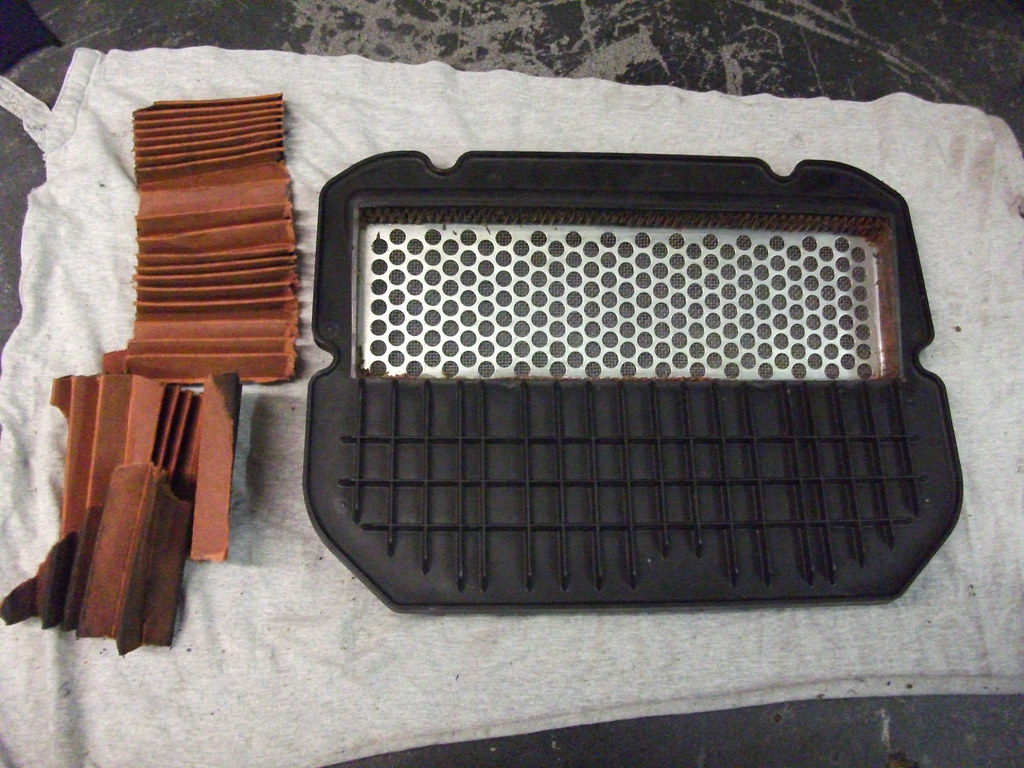 DSCF0799 by pod_70, on Flickr
3). Cut a new element from a sheet of Filter foam. This needs to be a few mm bigger than the opening in the filter body so it can expand to fill any irregularities in the opening
4). Using some silicon gasket sealant, bond the short edges in place - this got a bit messier than I would have liked due to using an old tube of sealant but it's now not going anywhere.
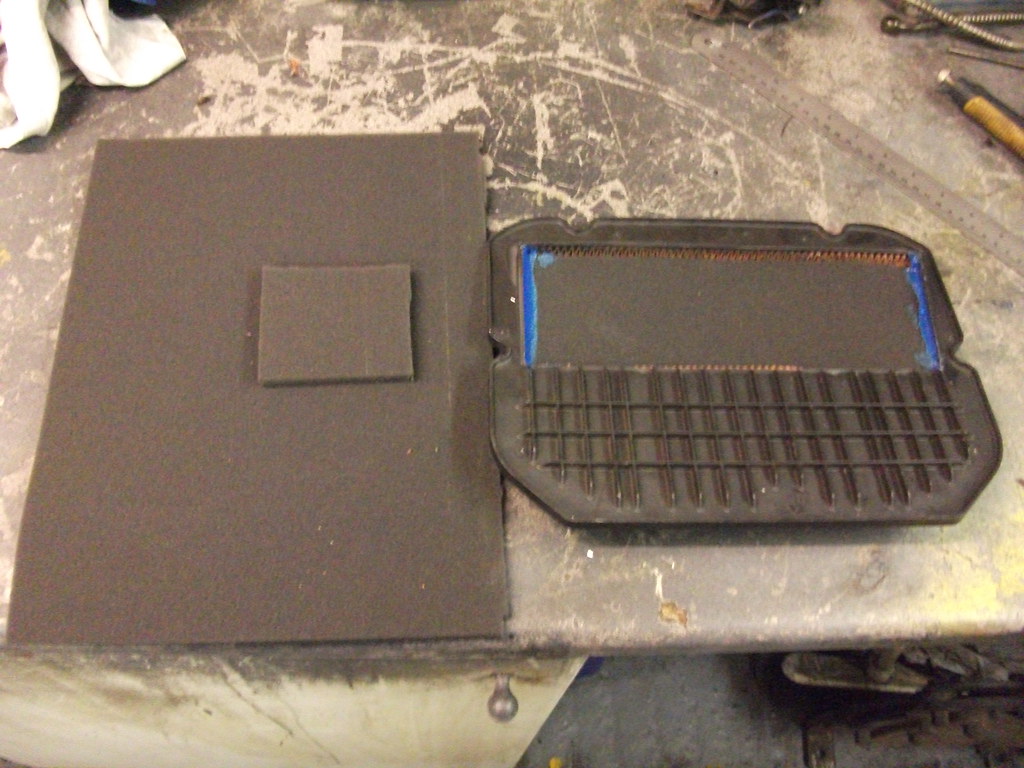 DSCF0800 by pod_70, on Flickr
After that the carbs were stripped ready for a dip in the ultrasonic cleaner and a new set of O-rings courtesy of Blair at LItetek. A few other parts were removed and the next job is to check the valve clearances
 DSCF0796 by pod_70, on Flickr
Although these are fairly readily available through the likes of Wemoto, CMSNL & David Silver spares for around £25, I decided to employ the patented Amorti foam replacement method and whilst it's been documented before, I'm sure the accompanying photos have been lost to Photobucket, so here's the procedure:
1). Take a Stanley knife and cut out the paper element
2). Using the Stanley knife and some sandpaper clean up the opening and remove as much of the remains of the paper element as possible. You won't remove it all as it is moulded into the plastic.
 DSCF0799 by pod_70, on Flickr
3). Cut a new element from a sheet of Filter foam. This needs to be a few mm bigger than the opening in the filter body so it can expand to fill any irregularities in the opening
4). Using some silicon gasket sealant, bond the short edges in place - this got a bit messier than I would have liked due to using an old tube of sealant but it's now not going anywhere.
 DSCF0800 by pod_70, on Flickr
After that the carbs were stripped ready for a dip in the ultrasonic cleaner and a new set of O-rings courtesy of Blair at LItetek. A few other parts were removed and the next job is to check the valve clearances
-
CB1pod70
- NWAA Supporter

- Reactions:
- Posts: 302
- Joined: Thu Apr 09, 2015 1:55 pm
- Location: Gravesend
-
CB1pod70
- NWAA Supporter

- Reactions:
- Posts: 302
- Joined: Thu Apr 09, 2015 1:55 pm
- Location: Gravesend
Re: CB-1 Mk2
Well I've decided that this thread should be re-named Andy's excuses for not fixing the CB-1 as I haven't touched this since Easter, however I have been busy so here are some other bits...
We had our first race of the year at Silverstone on the 7th & 8th April. Practice went well on the Friday and Qualifying was pretty good too. I was actually feeling really confident & comfortable on the bike for the first time since my big tumble at Oulton last year. In the 1st race I managed to knock 0.9 seconds of my qualifying time and a further 0.36 second off in the 2nd race. Still very much at the back of the grid but happy with that.
Sunday was a different story. It was wet (but not raining) in the morning so I decided to stick the Avon AM22/23 tyres on the bike which are kind of an intermediate tyre because I figured the track would dry too much and shred my brand new wet tyres to bits (yes I know cheapskate!) Before we were due to go out of course it started raining so I changed the front for the wet tyre but didn't manage to change the rear - should be alright surely - Err NO, the back end was sliding and spinning up all over the place and I really had no choice but to nurse the bike through the session as people were crashing all round me. For the second race we were sent back to the pits after the sighting lap as there was petrol over the track. When we restarted, it felt a bit weird sitting on the grid surrounded by detergent bubbles from the clean-up and everything felt scarily slippy. Started off not enjoying myself and had definitely lost my mojo until the race leader lapped me and I thought well if he do it, I can at least make more of an effort too. Amazingly picking up the pace made everything easier and I was just getting back into it when the red flag came out.
Anyway here's a few gratuitous racing pics:
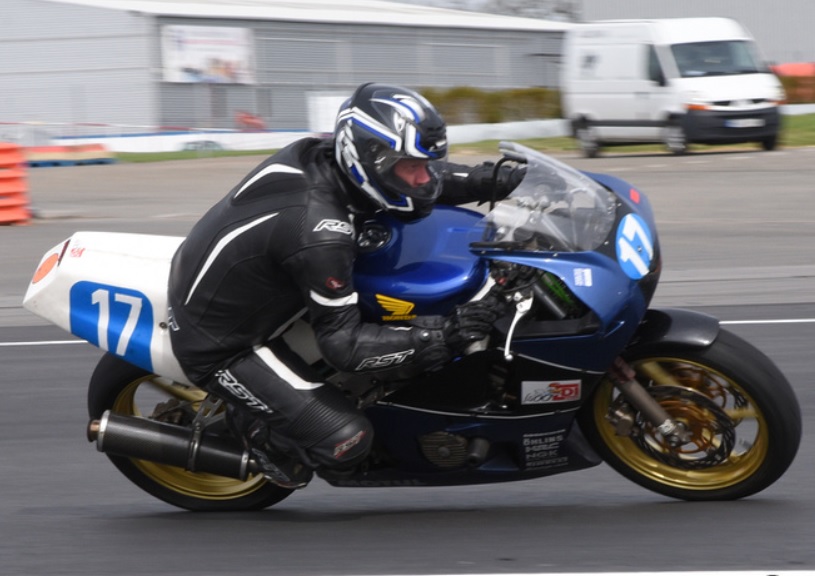 Silverstone 2 by pod_70, on Flickr
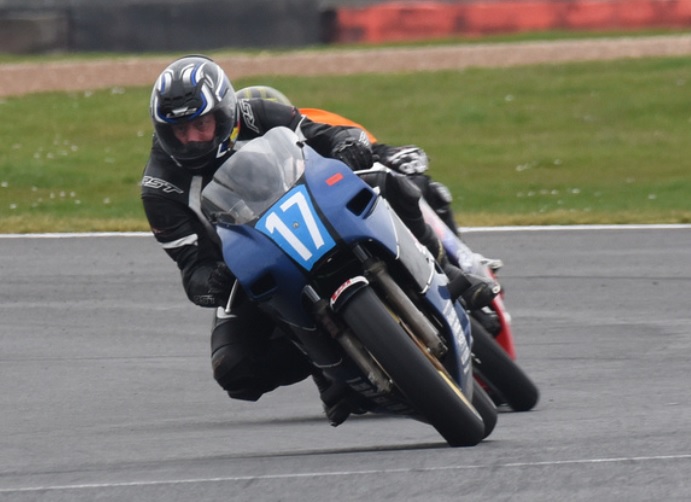 Silverstone 1 by pod_70, on Flickr
We had our first race of the year at Silverstone on the 7th & 8th April. Practice went well on the Friday and Qualifying was pretty good too. I was actually feeling really confident & comfortable on the bike for the first time since my big tumble at Oulton last year. In the 1st race I managed to knock 0.9 seconds of my qualifying time and a further 0.36 second off in the 2nd race. Still very much at the back of the grid but happy with that.
Sunday was a different story. It was wet (but not raining) in the morning so I decided to stick the Avon AM22/23 tyres on the bike which are kind of an intermediate tyre because I figured the track would dry too much and shred my brand new wet tyres to bits (yes I know cheapskate!) Before we were due to go out of course it started raining so I changed the front for the wet tyre but didn't manage to change the rear - should be alright surely - Err NO, the back end was sliding and spinning up all over the place and I really had no choice but to nurse the bike through the session as people were crashing all round me. For the second race we were sent back to the pits after the sighting lap as there was petrol over the track. When we restarted, it felt a bit weird sitting on the grid surrounded by detergent bubbles from the clean-up and everything felt scarily slippy. Started off not enjoying myself and had definitely lost my mojo until the race leader lapped me and I thought well if he do it, I can at least make more of an effort too. Amazingly picking up the pace made everything easier and I was just getting back into it when the red flag came out.
Anyway here's a few gratuitous racing pics:
 Silverstone 2 by pod_70, on Flickr
 Silverstone 1 by pod_70, on Flickr
Last edited by CB1pod70 on Thu May 10, 2018 1:24 pm, edited 1 time in total.
