Project GK76A.
Forum rules
Please can you post items for sale or wanted in the correct For Sale section. Items / bikes for sale here will be removed without warning. Reasons for this are in the FAQ. Thanks
Please can you post items for sale or wanted in the correct For Sale section. Items / bikes for sale here will be removed without warning. Reasons for this are in the FAQ. Thanks
-
HalifaxMark
- Settled in member
- Posts: 12
- Joined: Thu Feb 09, 2012 6:18 pm
- Bike owned: GSXR - 400 GK76A
Re: Project GK76A.
Thanks rgvsp, I've found the part number in one of the Japanese manuals hosted at graniterock (36740-33C00), so far a lot of 600 parts (36740-D00) are being thrown at me but hopefully I'll find something usable. :D
rgvsp wrote:Mark,
I've been doing a rebuild and you are correct that a lot of parts are used on other Suzuki's. I basically just check out the part number in the parts manual and then enter it on a Suzuki parts supplier website (such as http://www.suzukipartshouse.net/pages/O ... ibrand=SUZ) and see what other models it spits back. Since the prices are usually crazy I check on Ebay first to see what used parts are out there.
-
HalifaxMark
- Settled in member
- Posts: 12
- Joined: Thu Feb 09, 2012 6:18 pm
- Bike owned: GSXR - 400 GK76A
Re: Project GK76A.
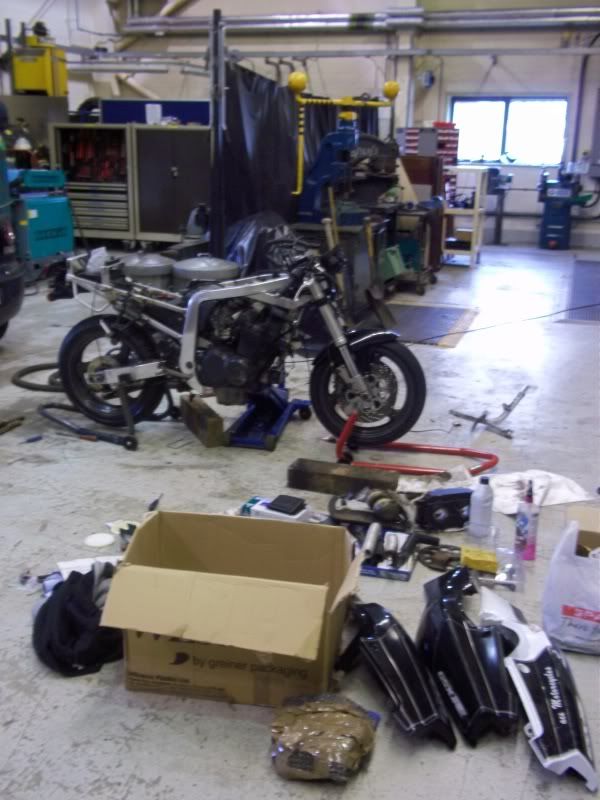
Update! After a couple of weeks spent juggling my finances, ordering parts in and cleaning as I go I can finally post an update on my progress.
Courtesy of my friends and work colleagues I now have an engine minus sheared-off studs and wheels with new rubber on them. I also have a box of bits that include a new chain and sprocket set, replacement rubber-grommets to mount the fairings, a new air filter, HEL braided steel brake lines, a new rear brake-disc, Pro-bolt fairing & screen kits and air intake pipes (which I probably paid through the nose for but oh well. ).
).
After this weekend is over I should have the majority of this back on the bike, leaving only the carb's (which I want to strip & clean), the engine (which needs cleaning and maybe painting in places) and the exhaust system. My plan for the exhaust system is to get the down-pipes blasted in work and then sprayed in VHT paint, the end-can is going to be cut open, the dents in it are going to be knocked out and then I'm going to TIG weld it back together.
If all goes well I'll have pictures to post up on Saturday/Sunday.
I
Courtesy of my friends and work colleagues I now have an engine minus sheared-off studs and wheels with new rubber on them. I also have a box of bits that include a new chain and sprocket set, replacement rubber-grommets to mount the fairings, a new air filter, HEL braided steel brake lines, a new rear brake-disc, Pro-bolt fairing & screen kits and air intake pipes (which I probably paid through the nose for but oh well.
After this weekend is over I should have the majority of this back on the bike, leaving only the carb's (which I want to strip & clean), the engine (which needs cleaning and maybe painting in places) and the exhaust system. My plan for the exhaust system is to get the down-pipes blasted in work and then sprayed in VHT paint, the end-can is going to be cut open, the dents in it are going to be knocked out and then I'm going to TIG weld it back together.
If all goes well I'll have pictures to post up on Saturday/Sunday.
I
-
HalifaxMark
- Settled in member
- Posts: 12
- Joined: Thu Feb 09, 2012 6:18 pm
- Bike owned: GSXR - 400 GK76A
Re: Project GK76A.
A day or two late due to technical difficulties, but I give you pictures!
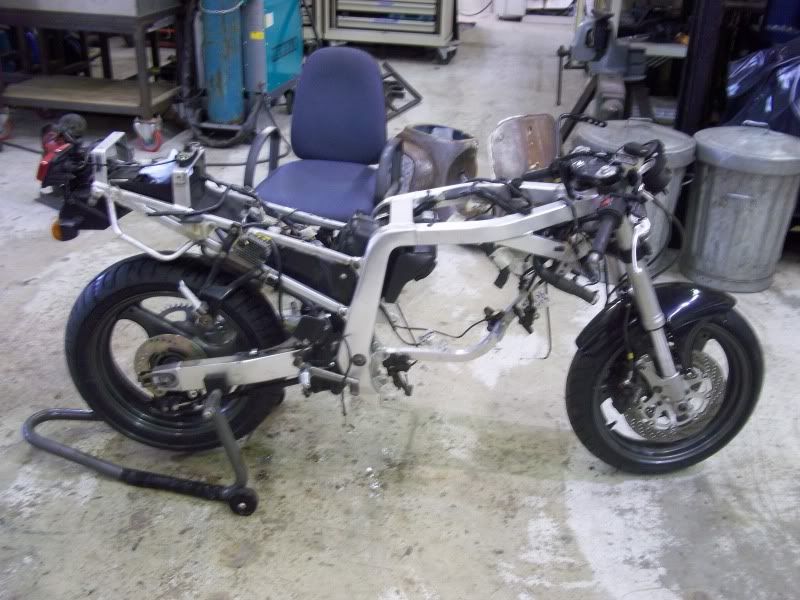
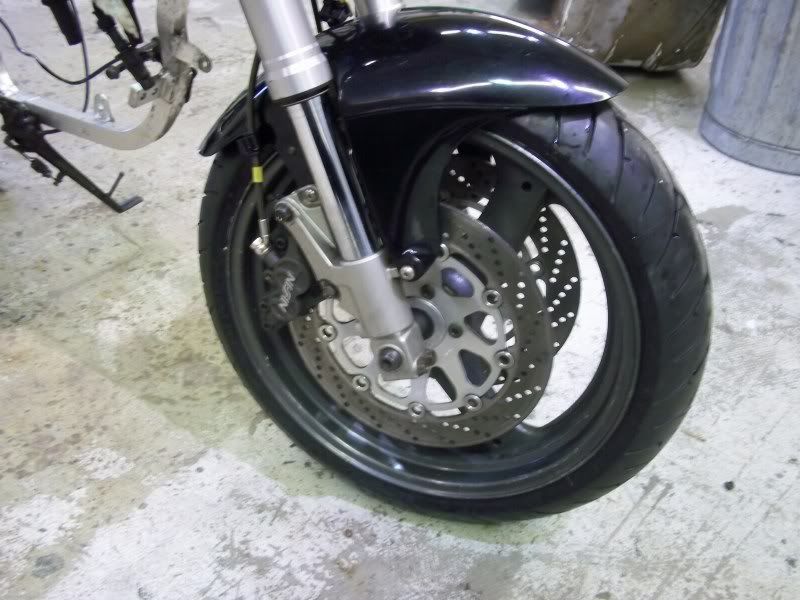
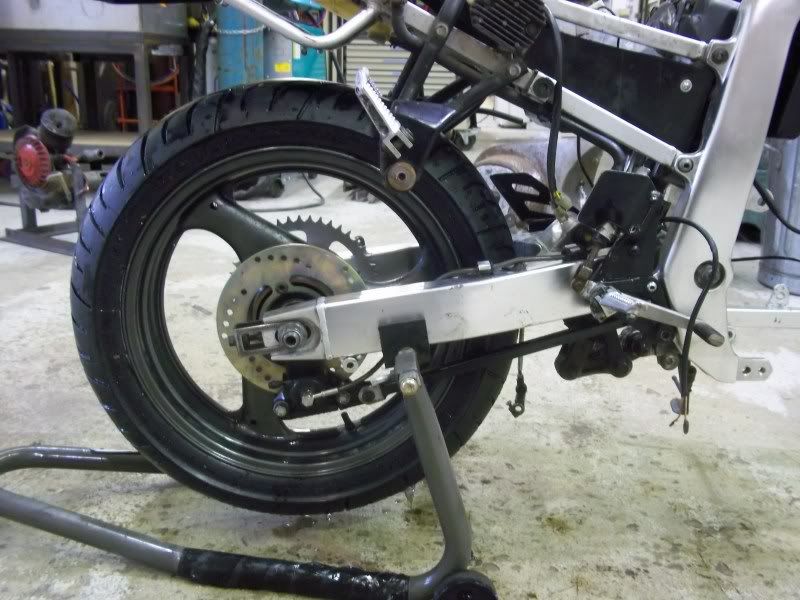
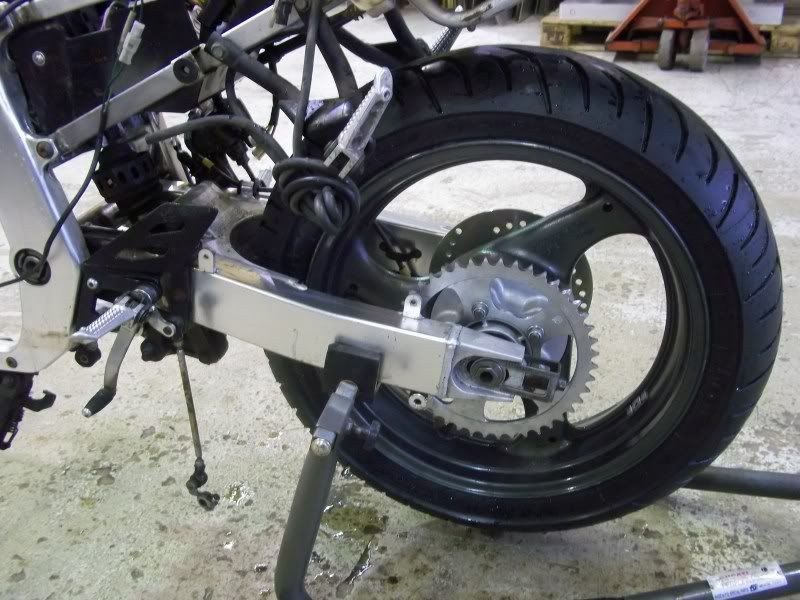
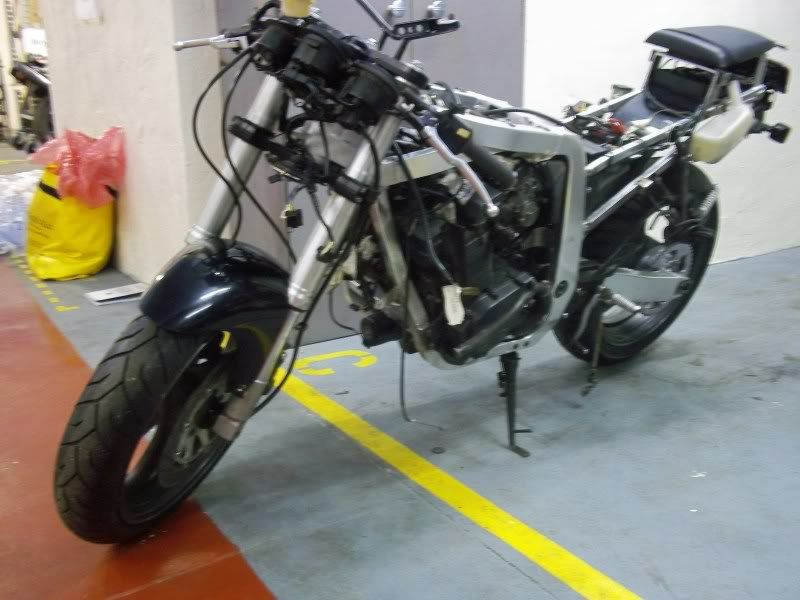
This is where I stand after a long weekend; she's mostly clean and the engine is back in although not fully connected. A mate will be helping me with that tomorrow after work. The front and rear brakes now work and I'm handing the second set of fairings over to a mate for stripping and spraying gloss black; I think they must've had 3-4 different coats on them.
One thing I realised as I was putting things in this weekend was that I don't seem to have a battery tray; I'm not sure if it's because the current battery wouldn't have fitted into the space for it, but I'm going to fabricate one in work to keep it in place.
-
HalifaxMark
- Settled in member
- Posts: 12
- Joined: Thu Feb 09, 2012 6:18 pm
- Bike owned: GSXR - 400 GK76A
Re: Project GK76A.
After some confusion and a lack of labelling on my part,  I've realised that I have no clue as to what order the connectors that attach to the ignition coils go on in. Can anybody take a picture or explain which wire goes to which ignition coil connector please?
-
Variablevalves suck

- Site Supporter

- Posts: 1922
- Joined: Sat Jan 24, 2009 10:52 am
- Bike owned: GSXR Carb o'ring kits supplied
- Location: Stoke-on-trent
Re: Project GK76A.
The L/H coil is Orange and White feeds 1/4.
The R/H coil is Orange and Black/Yellow feeds 2/3.
The R/H coil is Orange and Black/Yellow feeds 2/3.
-
HalifaxMark
- Settled in member
- Posts: 12
- Joined: Thu Feb 09, 2012 6:18 pm
- Bike owned: GSXR - 400 GK76A
Re: Project GK76A.
Cheers Variablevalves suck, there's only 4 connections that don't seem to have a home now; the two coming off of the headlight wires, a short blue wire with a round connector that's on the cooling system just below the tank (sorry but I don't know the technical term for it ) and lastly a random black wire that comes off the the same wiring bunch as the ignition cables.
Other than trying to figure out the homes for these wires and despite another deadline for completion having passed, here's what else has been done on the bike:
•I've de-rusted and re-painted the headlight bracket and cannibalised the headlight that came with the spare set of fairings to complete me original one.
•I've de-rusted and re-painted the bottom left corner of the fuel-tank, it's a temporary fix until I can either buy a new one or get this one stripped and painted properly.
•The wiring loom has been in and out a couple more times now; I've settled for it running around the LHS of the air box and along the frame before spreading out at the front of the bike. There's just enough slack in the clocks' cables to allow the front-end it's full turning arc.
•I bought near enough a whole swinging arm off of flea-bay for the rear hugger, I now have a spare rear-shock (from an SP model I believe), link, dog legs and swinging arm. Not bad for £35 posted.
•And last but not least ive had the original downpipes blasted, exposing a hole on the outside join of one pipe to the connector and a small hole opposite this one on the inside. MIG'ing aorTIG'ing the inside hole will prove impossible due to its location and I've been advised to use something called "gum-gum" rather than attempt to gas-weld it. Does anybody have an opinion on this?
No pictures this time due to my PC's power-supply giving up the ghost.
-
HalifaxMark
- Settled in member
- Posts: 12
- Joined: Thu Feb 09, 2012 6:18 pm
- Bike owned: GSXR - 400 GK76A
Re: Project GK76A.
I forget to mention that I've fitted a K6 rear shock, it drops straight in but there's no clearance between the link and the shock. I'm not sure if this'll be a problem so I'm planning on machining a very small amount of material away from my spare link to see if I can create some clearance.
As always, I'd appreciate your thoughts and opinions on what I've posted up. :)
As always, I'd appreciate your thoughts and opinions on what I've posted up. :)
-
morris147
- NWAA Supporter

- Posts: 248
- Joined: Sat Apr 25, 2009 11:08 pm
Re: Project GK76A.
I had to take a little off for it to fit. It really works well out on the track.HalifaxMark wrote:I forget to mention that I've fitted a K6 rear shock, it drops straight in but there's no clearance between the link and the shock. I'm not sure if this'll be a problem so I'm planning on machining a very small amount of material away from my spare link to see if I can create some clearance.
As always, I'd appreciate your thoughts and opinions on what I've posted up. :)
-
morris147
- NWAA Supporter
- Posts: 248
- Joined: Sat Apr 25, 2009 11:08 pm
Re: Project GK76A.
Also Dont use Gun Gum, it will only last a couple of miles!
-
donk
- Site Supporter
- Posts: 123
- Joined: Tue Jun 01, 2010 8:48 pm
- Bike owned: Gk76a x2
- Location: worcester
Re: Project GK76A.
i had the same problem with my downpipes after shot blasting i had a couple of holes in the middle of the
4 into 1 i took them to a welding company and they cut the collector in half and tig welded a plate around the 4 downpipes from the in side and re tig welded the collector back on it was a mint job and it runs fine
4 into 1 i took them to a welding company and they cut the collector in half and tig welded a plate around the 4 downpipes from the in side and re tig welded the collector back on it was a mint job and it runs fine