My Nc30 'BCF' build thread
-
Tim400GB

- Site Supporter

- Reactions:
- Posts: 1168
- Joined: Mon Jan 04, 2010 7:24 pm
- Bike owned: 1 x NC30, 2 x NC32.5,
- Location: SE Greater London
My Nc30 'BCF' build thread
Been asked more than once to move my thread over to 400GB.
so here it is in one long epic post.
This is my VFR400R nc30, had it since i was 21 as a birthday present which was 'restored' by my bro and dad. So it holds a lot of sentimental value to me.
Sad to say it broke down on me and years went past as theres always something/other bikes more important to do. She slowly got relegated from a nice warm garage to covered up outside in the rain. She is now in a very poor state to say the least, any other bike i would have just broken it and sold the good bits.
This is my build thread as i intend to bring her back to her former glory with some nice upgrades to boot. Please bear with me as this may take a while, money, recession yadda yadda.
Apologies for the lame camera pics, they wont all be this bad (hopefully).
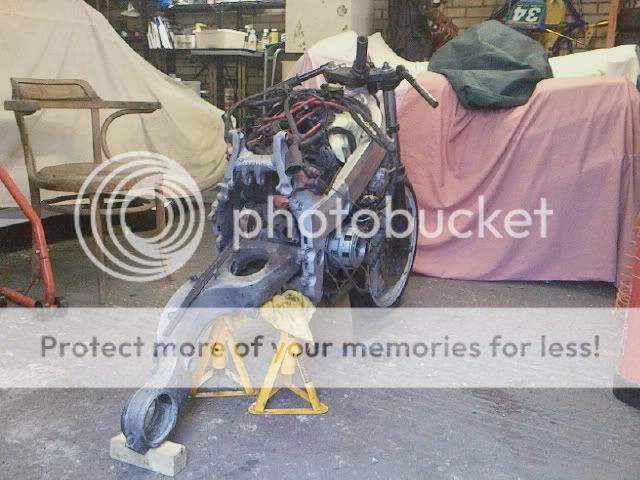
Here she is just before she came off the road.

This weekend have started stripping her down, many of the parts aren't even usable.


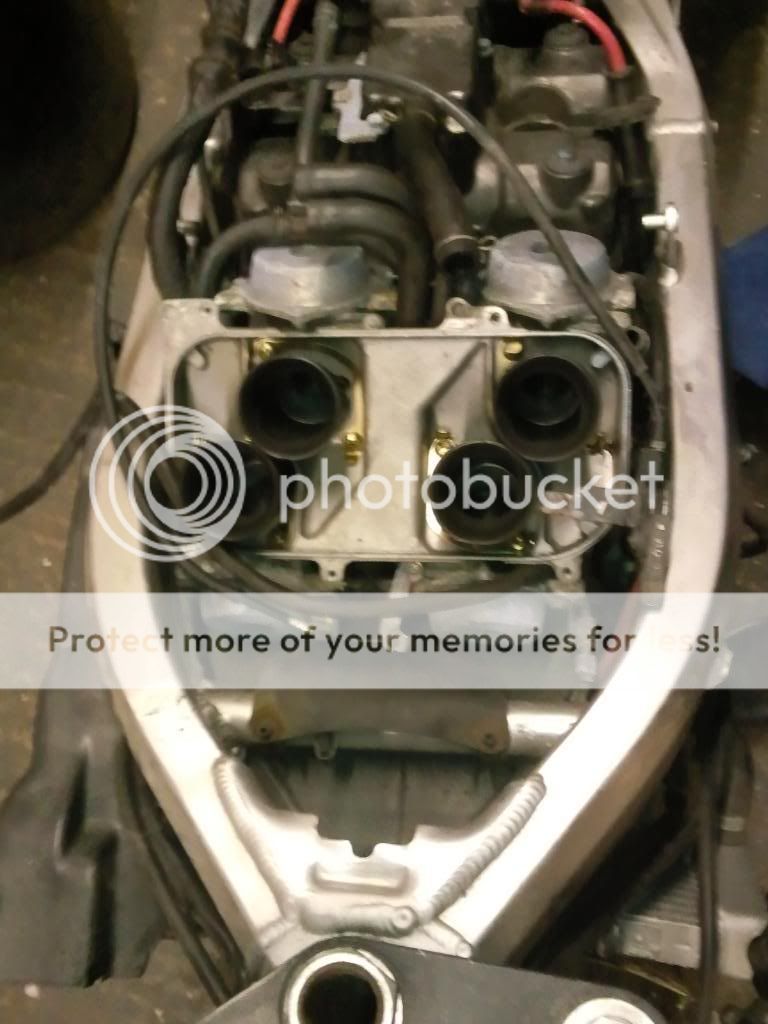

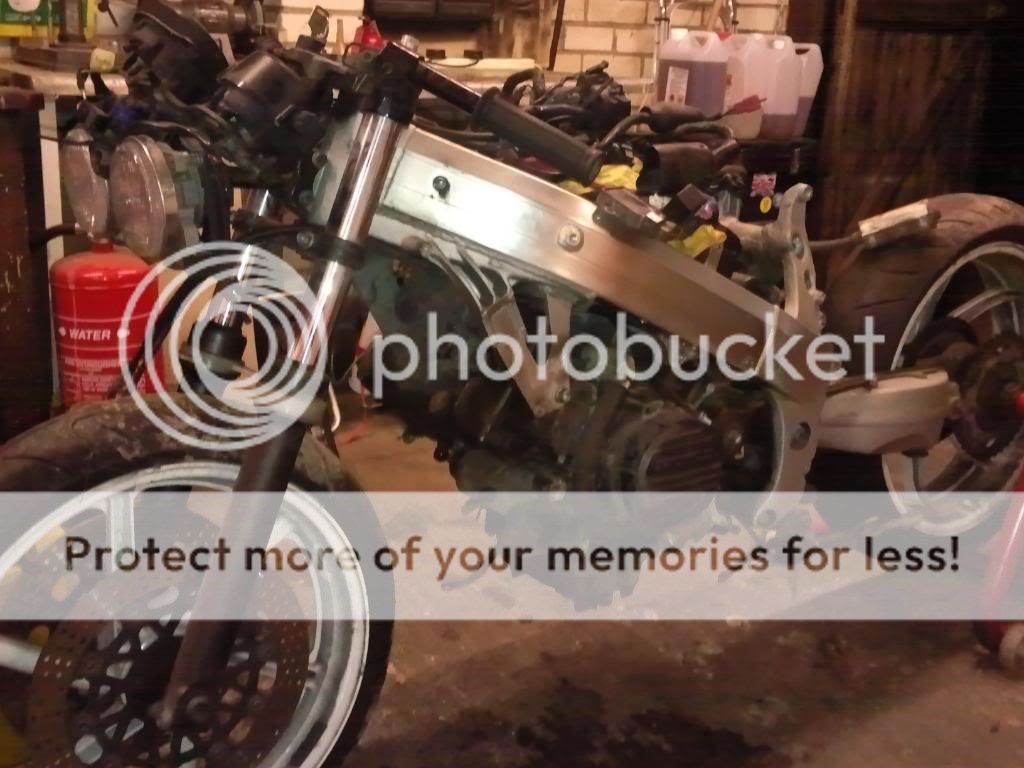
This was the last time she was on the road

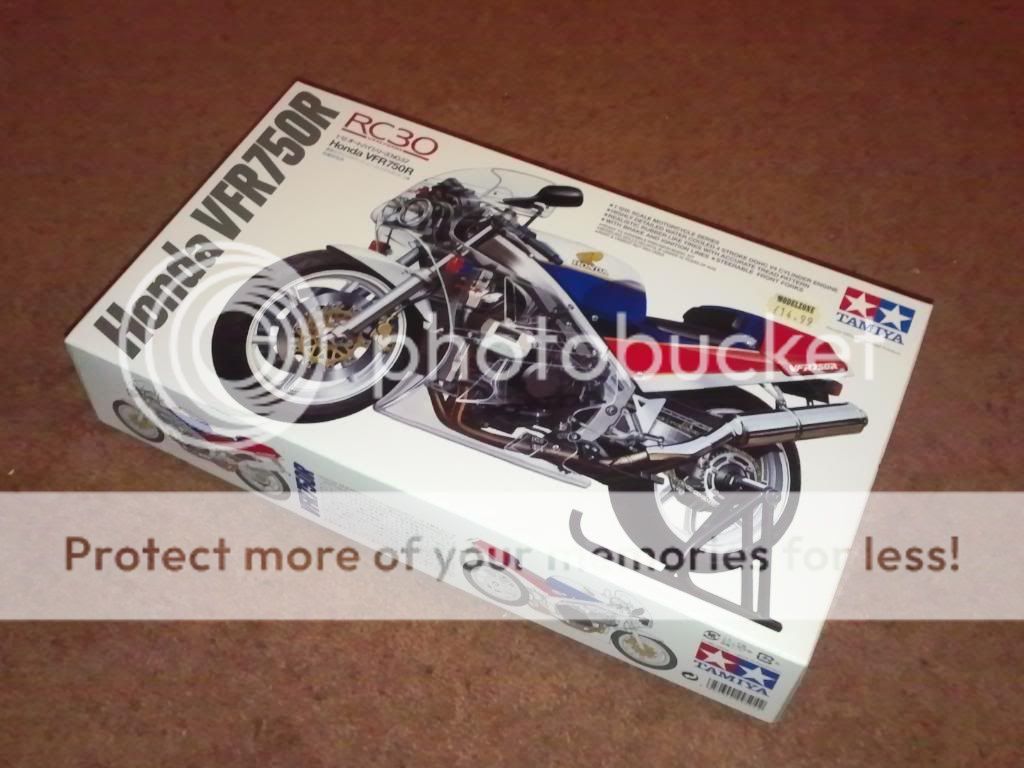
And i managed to source this little gem to help me with getting the paint right 8o)
Now need to source the castle sockets so i can get the engine and swing arm etc out and start cleaning
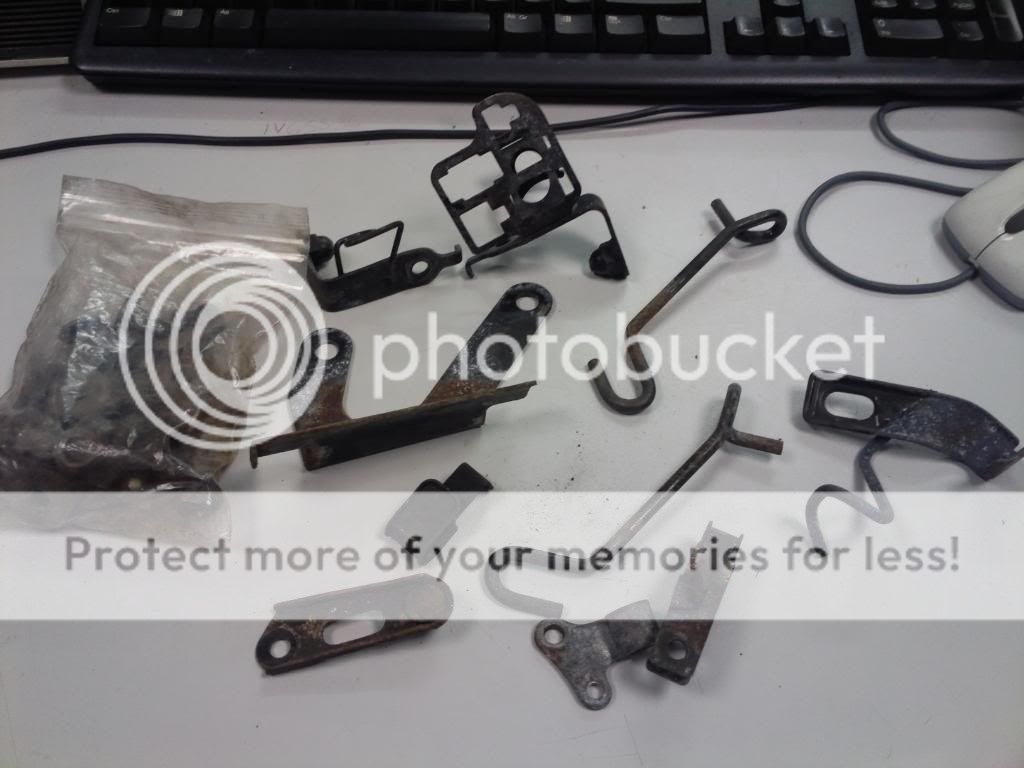
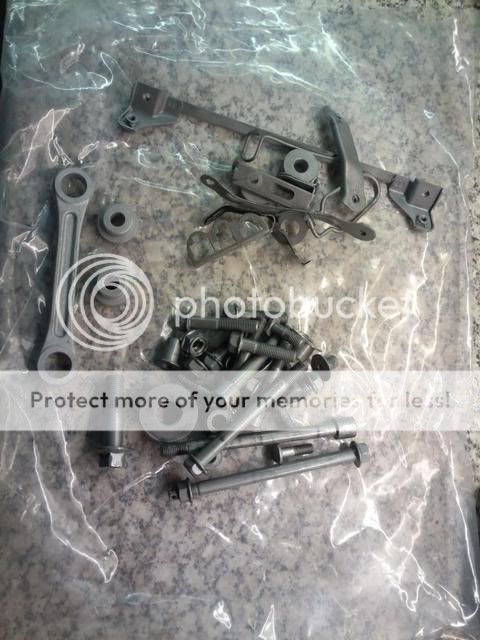
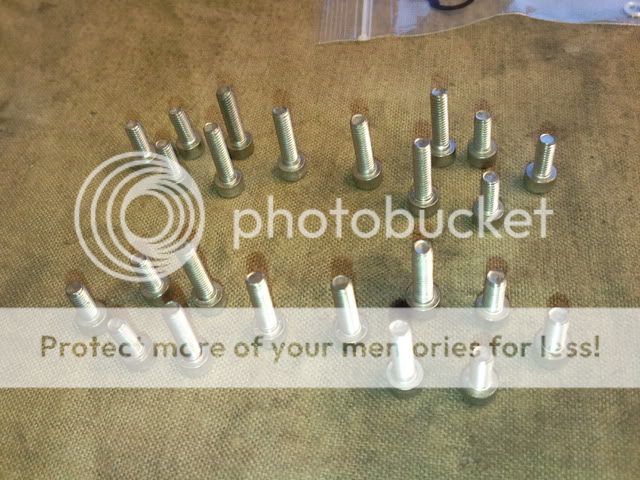
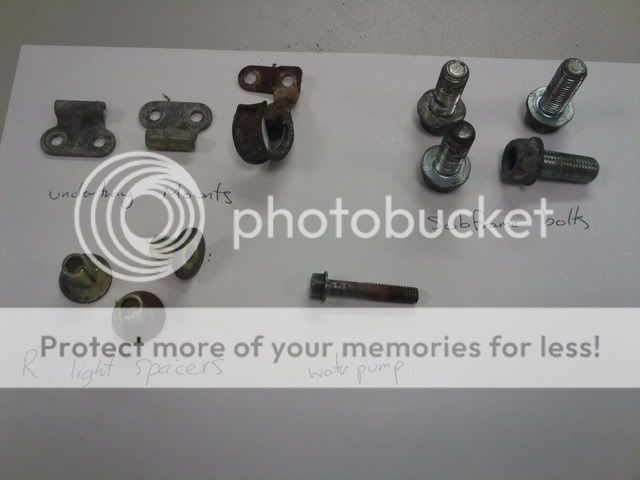
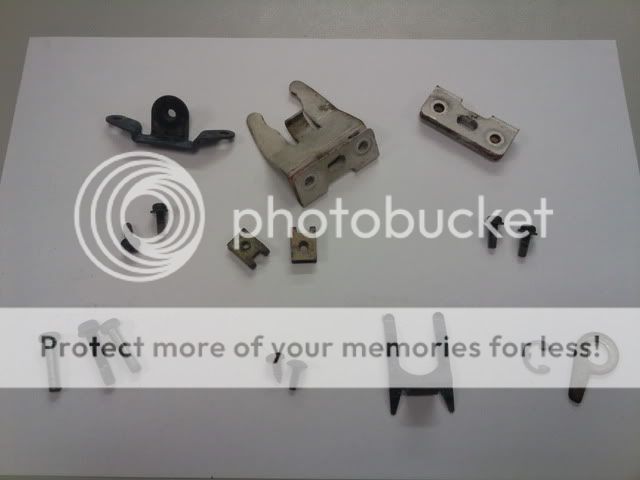
only a small update, took some of the 'honda only' bolts and brackets into work to see how they would benefit from some time in the sand blaster.
Works quite well but has taken the coating off, so have sprayed them with oil and bagged them up till i decide what to do with them. Choices are....
Paint
Zinc coating (standard for the brackets?)
Nickel plating
or Chrome plating (standard for fairing bolts?)
Anyway heres some before and after pics, forgot to photo the many bolts, washers and spacers i did aswell though D'oh


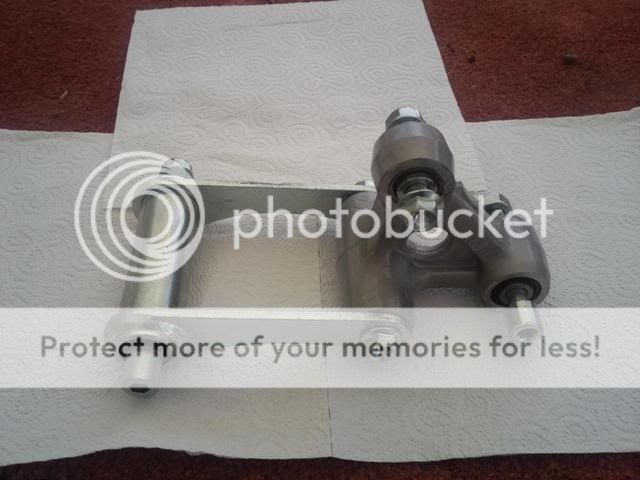
Another little up date, the RVF rear shock linkage and dogbone arrived (which will jack the rear end up slightly, hopefully giving a bit more rear wheel traction ), and as expected needed a clean up.
This is what it looked like after a can of brake cleaner
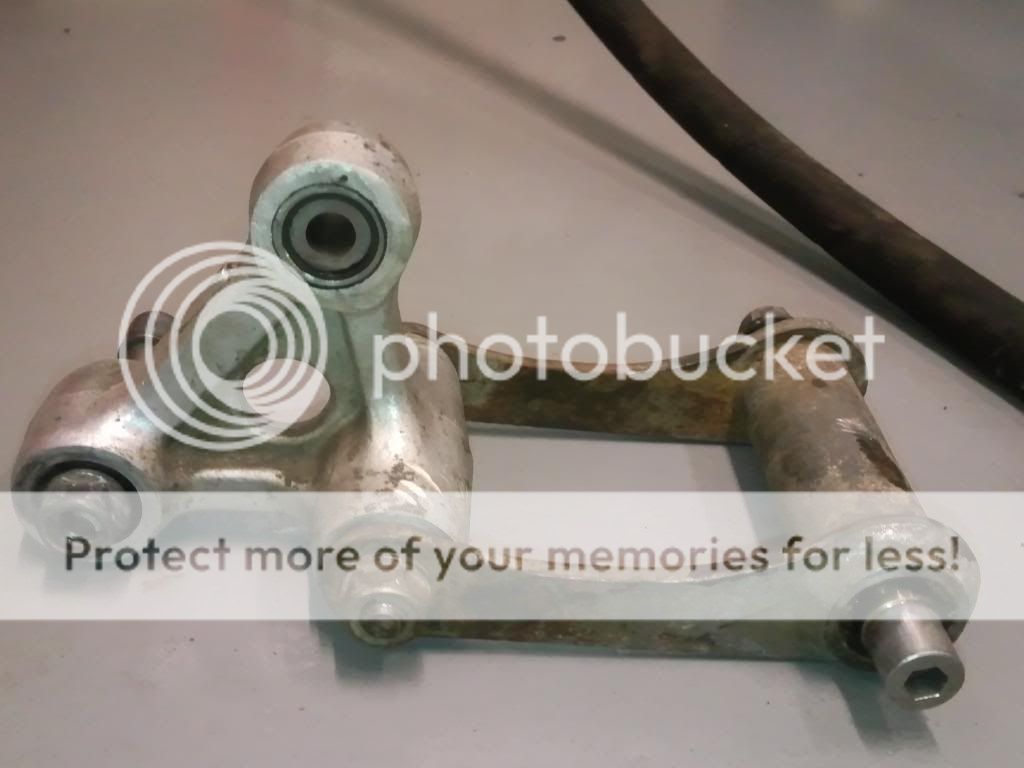
Taking note of how deep the bearings were pushed in, had to make a special tool to press them out.

After, ready for paint or plate

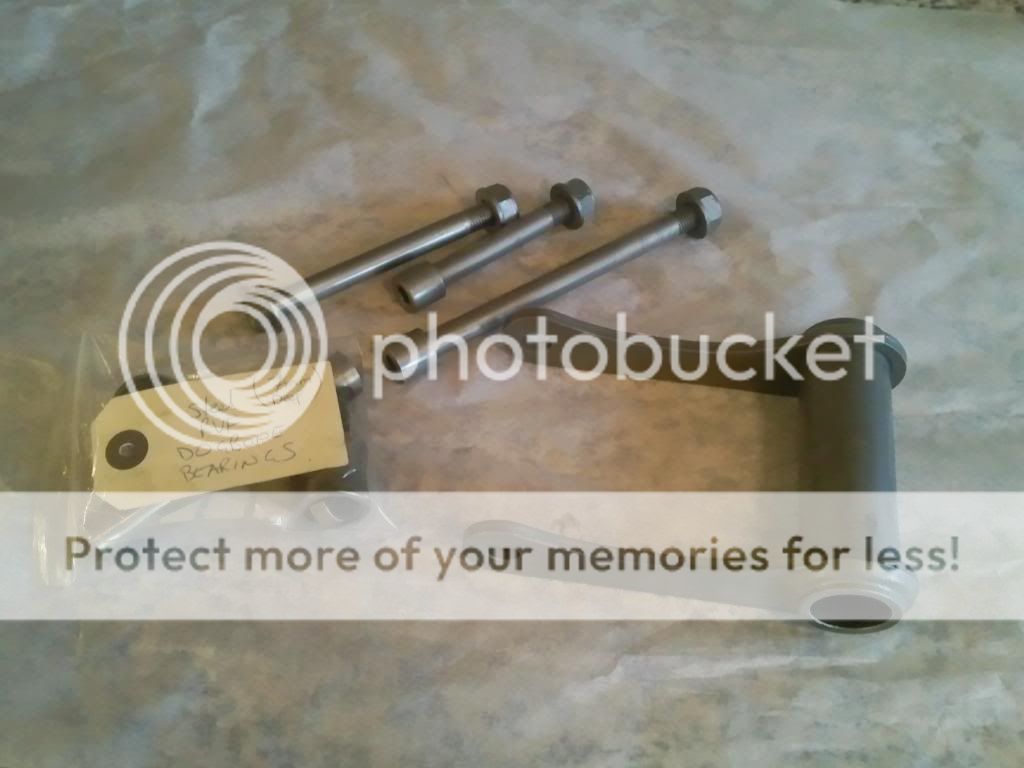
Also won a set of RVF400 forks off the bay, so hopefully get them stripped and 'ohlinised' fairly soon
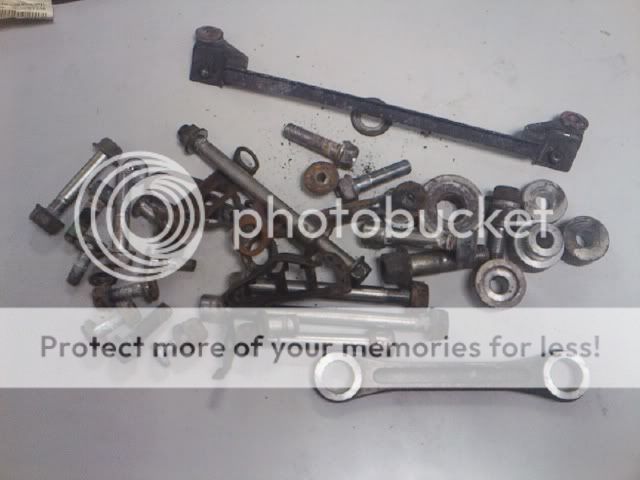
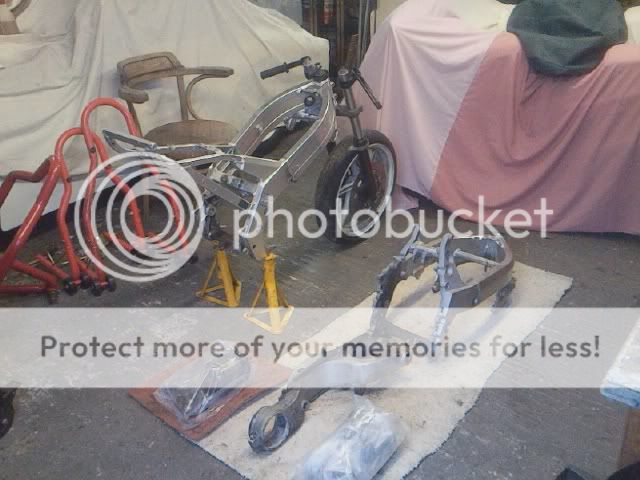
Week 3 update, bit more stripping down, namely the rear drive train and suspension, still haven't received the castle socket to remove the engine and swingarm. Also stripped the fairings down. Few more bits to bead blast at work now 8o)
This is all the removed parts and some of the other stored VFR400 parts I have collected for the project

More bead blasting, hopefully be done with that machine soon
Didn't manage to get to Honda today but the RVF forks have arrived, and they are in pretty good nick, very minimal marks to the sliders and the preload adjusters at the haven't any marks on them.
So i wasted no time in getting them to bits so i can have them re-anodised, titanium nitrided and fit new seals, bushes etc. Will also look into how much getting the internals upgraded would cost.
They come apart quite easily:
Prise dust seal away and undo oil seal spring clip
Undo the allen key bolt at the bottom of the shock
Undo the top mount of the shock and pull internals out
Good solid pull and the stanchion comes out of the slider with all bushes and seal.


Spoke to Andy white at Kais and hopefully have an Ohlins rear shock turn up at my front door at some point.
Don't think I will get much more done this weekend, dam valentines day
Tim
Some more progress.
Have bead blasted the fork bottoms and sliders. The fork stanchions are off to get rechromed and titanium nitrided. Hopefully drop the sliders off to get re-anodised next weekend.
Might have also found some RC30 fitment PVM wheels .
The castle tool has also turned up from Honda as well as the fork seals etc from David Silver.
Have found a needed genuine rear body panel and rad fan, will pack these away till i need them later on in the build.
Tomorrow will hopefully be a day of stripping the last of the bike down and getting some more pictures.
EDIT for progress
Rear dive hub is now totally stripped ready for replating and new disk (have also since removed wheel location pins and disk).

Engine, frame, swingarm and loom are now all seperated ready for cleaning.

And I knew that old 250 frame would come in useful one day. VFR forks fit RGV yokes
Tim
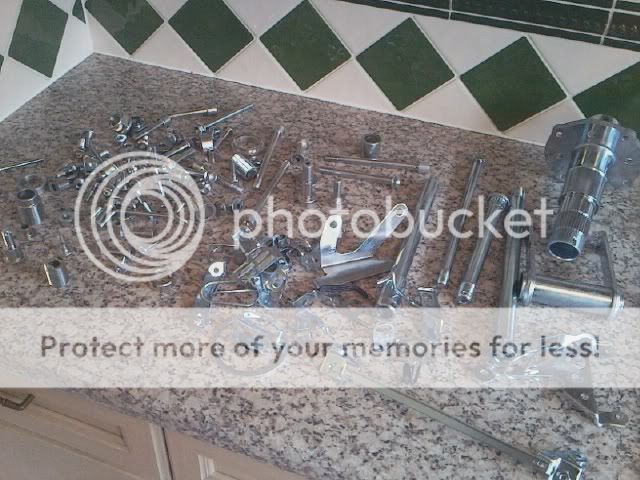
Wheels, shock, master cylinder and yokes have all arrived
Have to send all the fixings off to be recoated, wait on the different fork components and clean the frame and swingarm up before i can start rebuilding anything.
Another teaser pic for you all.

Tim
Got the fork sliders back from the anodisers but the stanchions aren't ready yet. So cant rebuild the forks, dam.
Have got all the fixings etc ready and bagged up to go to be re-coated in zinc. Total of 133 parts.

Alot of them will be replaced with titanium counterparts but any of the re-coated honda fixings I dont use will go on the 'Hondzuki' race bike.
Tim
Me sir? Pocket burning money, no sir. Hard earned and nearly single because of it, yes sir.
Decided that I don't need finger tips so I thought I'd get to work cleaning. The swingarm isn't quite perfect yet but the hub came up brilliantly. You can see by the state of the uncleaned frame what I had to start with.

Tim
Got all the fittings and mounts etc back from the platers. All 133 of them .
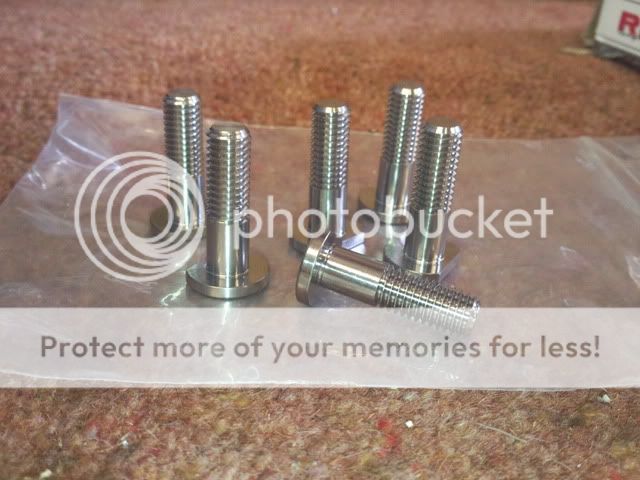
All got some new stainless bolts for the chain runner.

Got the stanchions back, painted the bottoms in Ohlins silver and put the seals onto them ready for when I build them back up.

And finally I put the new head stock bearings onto the yokes.
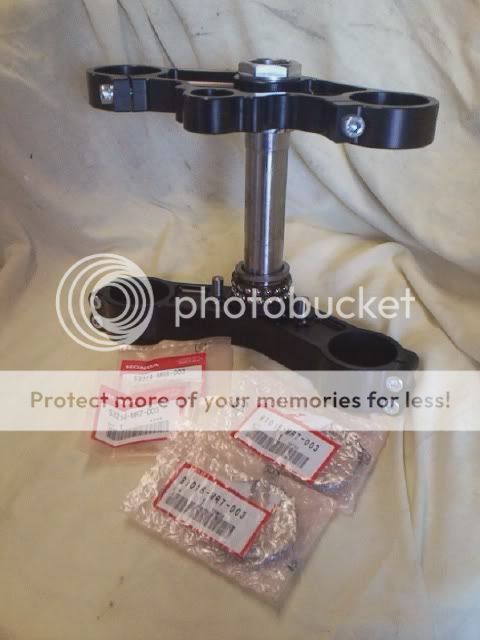
Now I'm waiting for a rear disc before I can rebuild the rear drive hub assembly.
Still working on getting the frame clean, tis taking a while .
.
Tim
Got the new engine back to mine.

She seems in fairly good nick. All the mounts and exhaust mounts are in good order. Have spent a while stripping the needed parts off the old lump and cleaning the new one.
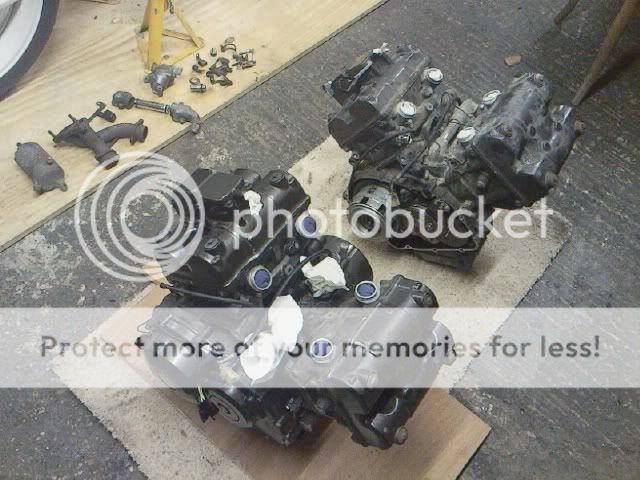
Here are some more bits for the bead blaster and painting/plating. Not the carbs obviously, will strip and rebuild them later.

Have since stripped off the cover bolts off the old lump and cleaned the new engine more so its ready for the tuner (phil-hopefully). Back to cleaning that chassis then .
Tim
. Cant recommend them enough, brilliant 'first' bikes and very forgiving too.
Now that you mention it the frame is coming up nicely now. Spent most of last night inhaling petrol fumes, still the best cleaner in my eyes.

Heres a close up shot of what was possibly the most grimey part of the frame.

Still needs going over to get the last parts of dirt off and the petrol residue but I've broken the back of it now .
Tim
Finished cleaning the chassis and banged in the new head stock bearing cups. Have wrapped it up for now to save from any un-necessary bumps and knocks.
I then turned my attention to then loom, a thing to remember about the nc30 is that the loom has to be laid through the chassis before the engine goes back in, PITA. It needs a dam good check over and clean, some parts will be replaced but most of it will just be tidied and re-taped.

Also worked on the yokes a bit more.


The engine is also now at Phil Lovett in Biggin Hill for the refresh.
Tim
Thought I was done with the bead blaster. . . . . but no, decided I am going to treat all the engine fixings to a new coat of zinc aswell.
Also blasted the front grill back so i can repaint it. Was quite grimey, but easily cleaned.


All the fixings are nice and clean now. Total of 80 parts to be zinc coated, the water pipes and the rear exhaust manifold will be rechromed.

The plan for the weekend, hopefully clean the loom up and make a start on tidying it up, paint the grill and starter motor silver and laquer some of the other parts.
Also complied a massive list of new parts I want from Honda, going to be a steep bill for seals and gaskets etc but I want original Honda quality.
8 x Exhaust studs 929000.602.00e
4 x head to exhaust gaskets 18291.216.000
8 x exhaust nuts 90304.hb3.771
2 x manifold to pipes gaskets 18291.mr8.000
1 x thermostat o-ring 91311.ke8.000
1 x thermostat seal 91331.pc9.003
1 x thermostat temp sensor 37750.pc1.004
1 x starter motor o-ring 91309.425.003
2 x water pipe o-ring 91301.mb0.000
2 x water pipe seal 91301.147.023
1 x water pipe o-ring 91312.ke7.003
1 x clutchcover gasket 11394.ml0.000
1 x generator cover gasket 11636.ml0.000
1 x sump gasket 11315.ml0.010
Other needed parts
1 x front tank rubber 17511.kv3.000
2 x side tank rubber 17611.ml7.000
1 x rear tank rubber 17613.gf6.000
1 x rear wheel nut cover 42603.mr8.000
1 x steering stem nut cover 53232.mr7.000
Total price = £178.20 delivered
If anyone is in the same situation (you never know) these are the two sites I used to source the part numbers and price.
David Silver Spares.
VFR400 parts catalogue.
Tim
Brilliant, a lovely sunny day to do some painting.
Got the starter motor done.
Before

After

Got the water pipes etc done.

Also got the front grill, rear brake carrier, torque arm (and spacers) and rear shock linkage done, but I'm being hassled to go down the pub beer garden so I'll add some more pics later. Hard life ain't it .
.
Tim
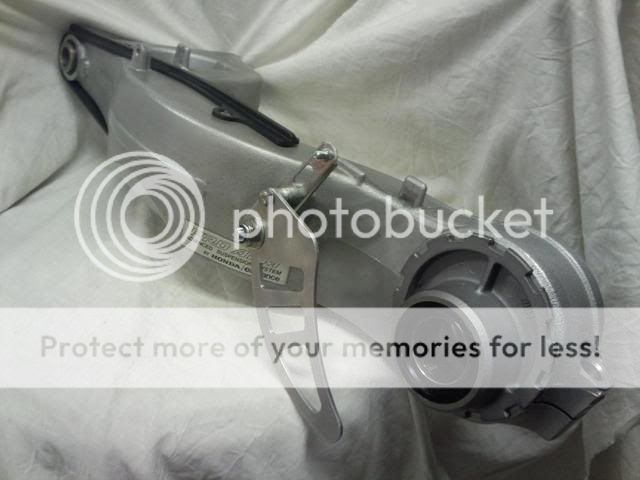
Rear brake torque arm

Rear brake carrier

RVF rear shock linkages all greased and built
Starting to actually build little things here and there now rather than constant cleaning .
Also ordered some ally clip ons (and some other little parts) from Rick Oliver, and a new rear disc which will allow me to rebuild the drive hub etc.
Tim
Package arrived from Rick today, so I spent a little time in the garage this evening bolting, torquing and lock wiring the rear disc up. Some of the nc30 guru's may have noticed that the bolt heads have been machined to sit flush, this is because the new wheels do not accomodate them.


Also trail fitted the 'shark fin' chain guard, would have also had all the rear drive hub built but my grease seems to have gone walkies. My sticky fingered dad no doubt .
More soon hopefully.
Tim
Went and got some grease today. Greased the hub and put it into place along with the caliper mount, circlip and torque arm. Also drilled the new longer bolt for the 'shark fin'/torque arm so i could split-pin the end (like Mr Honda does ). Also put a new split-pin on to the other bolt for the torque arm.

Then greased all the bearings and shaft before fitting and tightening into place.


Tim
A little update, before and after pics of the sump. Cleaned, blasted and then lacquered.


Also picked up a package from the zinc coaters. Another 93 parts ready for use, mostly for the engine (if i ever get it back ). I also had to have the exhaust manifold done in zinc as the chromer was very doubtful that a good finish could be achieved and be prone to rust. Sorry for the lame pics, was in a bit of a rush today.


Tim
Here are a few pics of the small advances made recently
New bushes for the forks

Parts replaced in the engine (dont let it fool you theres about £400 worth of bits just in this picture!)

The re-chromed water pipes.

Also bought a new front paddock stand that holds the bike under the bottom yoke and of course none of the supplied pins fitted. So I made this one at work from SS.

Tim
Having got the engine back the next stage was to prep it redy for paint. So first of all I removed the water pump and split that down for refurb later (the one's with the keen eye will notice that I have already blasted and lacquered the water pump cover from the old one) and then changed the scratched clutch cover for a better one.


Then it was a case of throughly degreasing the whole thing, masking and rubbing down/keying all the surfaces for paint. Here are some pics just after I finished the masking.


Due to me losing the daylight and way too much moisture in the air painting it will have to wait for another day. Ah well least the hard bit is out of the way now.
Tim
Happy days, another hot weekend with perfect weather for painting. Although I've had a rather busy weekend with other bikes I still managed to find the time to put paint to the engine, also removed all the masking and changed some of the old bolts for the re-zinc'd ones.
In new paint (satin black)


Old bolts replaced along with the timing cover and dip-stick.


Now need to get on the phone for the mass order of new seals and o-rings etc from Honda.
Wahey the fork seal driver was waiting for me on my return home from work. So forth cracked on rebuilding the front RVF forks.
Banged the new seals in.

Put the cartridges back in and filled them up with the correct amount of oil using a 50ml syringe. Then carefully put them into the SES yokes. Because I have painted the fork lowers I ran a tap down the threads before inserting the bolts. Also put the spindle and titanium bolt into place and put the Ohlins stickers on.


Only a little update I'm afraid, still waiting on the the engine parts. Steering damper has arrived from Sweden though, mmm ohlinsy goodness.
140mm stroke damper and mount.

Been a while since I've had an update, mainly due to time and money, but the order from Honda has finally arrived meaning I can carry on with the engine build and hopefully get the engine in the frame soon.
It doesnt look like much, but theres £142 worth of stuff there.

Might have a free day sunday to work on it but its my birthday so half the family might turn up meaning I wont get in the garage.
Finally managed to get into the garage to work on the bike, had to shift some stuff around but I got the nc30 engine into the centre of the floor and laid out all the parts etc I would be using. Every old seal and gasket has been replaced with new. Sorry about some of the lame camera phone pics btw.

I then set about rebuilding everything,
here's the starter motor

Thermostat, temp sensor, pipes etc
Water pipes


Water pump, one bolt has eluded me for the moment

Rear exhaust manifold, mmmm shiny new nuts


This is the next job on the list, its not in too bad shape, just needs a good clean and 're-wrap'

Another productive day today, fixed my bro's and my car and cleaned and re-wrapped the loom. Because its about a million times easier to put the loom through the frame before the engine goes in, thats what I did. I bagged and cable tied the loom to stop it from moving and getting damaged/scratching somthing when the engine goes in. Also prepared what bolts would be needed.


Next thing on the job sheet, strip these for soda blasting

Stripped the new (2nd hand) carbs ready for the soda blaster, I took the slides and needles out so they would get damaged. Need to drop them off and get on the phone to Rick Oliver to order new jets and gaskets etc now. Also ordered new connecting rubbers from Honda as I had to ruin the old ones getting the carbs off the old engine.


Got the carbs back from the sida blaster today, fairly happy with the result. Some little bits I wish he had spent some more time on.
Took bloody ages to get them clean, that stuff gets everywhere! But they are in a dry built state ready for the new gaskets/spec check/modifications. Also got some new SS bolts for the caps.
Original old carbs and new ones


Just need to get on the blower to Rick Oliver and order those parts now.
I won those indicator rubbers btw, cheers BillingTZR .
Have got the carbs fully rebuilt with all the little mods, have made sure that all the orifices and emulsion tubes are 100% clear too.
I have raised the needles 0.5mm, drilled out the slide vacuum orifices to 2.25mm, changed the main jets to 120 for the rear cylinders and 118 for the front cylinders and adjusted the pilot jets to 2.25 turns.


Using the SS bolts I bought earlier.
so here it is in one long epic post.
This is my VFR400R nc30, had it since i was 21 as a birthday present which was 'restored' by my bro and dad. So it holds a lot of sentimental value to me.
Sad to say it broke down on me and years went past as theres always something/other bikes more important to do. She slowly got relegated from a nice warm garage to covered up outside in the rain. She is now in a very poor state to say the least, any other bike i would have just broken it and sold the good bits.
This is my build thread as i intend to bring her back to her former glory with some nice upgrades to boot. Please bear with me as this may take a while, money, recession yadda yadda.
Apologies for the lame camera pics, they wont all be this bad (hopefully).
Here she is just before she came off the road.
This weekend have started stripping her down, many of the parts aren't even usable.
This was the last time she was on the road
And i managed to source this little gem to help me with getting the paint right 8o)
Now need to source the castle sockets so i can get the engine and swing arm etc out and start cleaning
only a small update, took some of the 'honda only' bolts and brackets into work to see how they would benefit from some time in the sand blaster.
Works quite well but has taken the coating off, so have sprayed them with oil and bagged them up till i decide what to do with them. Choices are....
Paint
Zinc coating (standard for the brackets?)
Nickel plating
or Chrome plating (standard for fairing bolts?)
Anyway heres some before and after pics, forgot to photo the many bolts, washers and spacers i did aswell though D'oh
Another little up date, the RVF rear shock linkage and dogbone arrived (which will jack the rear end up slightly, hopefully giving a bit more rear wheel traction ), and as expected needed a clean up.
This is what it looked like after a can of brake cleaner
Taking note of how deep the bearings were pushed in, had to make a special tool to press them out.
After, ready for paint or plate
Also won a set of RVF400 forks off the bay, so hopefully get them stripped and 'ohlinised' fairly soon
Week 3 update, bit more stripping down, namely the rear drive train and suspension, still haven't received the castle socket to remove the engine and swingarm. Also stripped the fairings down. Few more bits to bead blast at work now 8o)
This is all the removed parts and some of the other stored VFR400 parts I have collected for the project
More bead blasting, hopefully be done with that machine soon
Didn't manage to get to Honda today but the RVF forks have arrived, and they are in pretty good nick, very minimal marks to the sliders and the preload adjusters at the haven't any marks on them.
So i wasted no time in getting them to bits so i can have them re-anodised, titanium nitrided and fit new seals, bushes etc. Will also look into how much getting the internals upgraded would cost.
They come apart quite easily:
Prise dust seal away and undo oil seal spring clip
Undo the allen key bolt at the bottom of the shock
Undo the top mount of the shock and pull internals out
Good solid pull and the stanchion comes out of the slider with all bushes and seal.
Spoke to Andy white at Kais and hopefully have an Ohlins rear shock turn up at my front door at some point.
Don't think I will get much more done this weekend, dam valentines day
Tim
Some more progress.
Have bead blasted the fork bottoms and sliders. The fork stanchions are off to get rechromed and titanium nitrided. Hopefully drop the sliders off to get re-anodised next weekend.
Might have also found some RC30 fitment PVM wheels .
The castle tool has also turned up from Honda as well as the fork seals etc from David Silver.
Have found a needed genuine rear body panel and rad fan, will pack these away till i need them later on in the build.
Tomorrow will hopefully be a day of stripping the last of the bike down and getting some more pictures.
EDIT for progress
Rear dive hub is now totally stripped ready for replating and new disk (have also since removed wheel location pins and disk).
Engine, frame, swingarm and loom are now all seperated ready for cleaning.
And I knew that old 250 frame would come in useful one day. VFR forks fit RGV yokes
Tim
Wheels, shock, master cylinder and yokes have all arrived
Have to send all the fixings off to be recoated, wait on the different fork components and clean the frame and swingarm up before i can start rebuilding anything.
Another teaser pic for you all.
Tim
Got the fork sliders back from the anodisers but the stanchions aren't ready yet. So cant rebuild the forks, dam.
Have got all the fixings etc ready and bagged up to go to be re-coated in zinc. Total of 133 parts.
Alot of them will be replaced with titanium counterparts but any of the re-coated honda fixings I dont use will go on the 'Hondzuki' race bike.
Tim
Me sir? Pocket burning money, no sir. Hard earned and nearly single because of it, yes sir.
Decided that I don't need finger tips so I thought I'd get to work cleaning. The swingarm isn't quite perfect yet but the hub came up brilliantly. You can see by the state of the uncleaned frame what I had to start with.
Tim
Got all the fittings and mounts etc back from the platers. All 133 of them
All got some new stainless bolts for the chain runner.
Got the stanchions back, painted the bottoms in Ohlins silver and put the seals onto them ready for when I build them back up.
And finally I put the new head stock bearings onto the yokes.
Now I'm waiting for a rear disc before I can rebuild the rear drive hub assembly.
Still working on getting the frame clean, tis taking a while
Tim
Got the new engine back to mine.
She seems in fairly good nick. All the mounts and exhaust mounts are in good order. Have spent a while stripping the needed parts off the old lump and cleaning the new one.
Here are some more bits for the bead blaster and painting/plating. Not the carbs obviously, will strip and rebuild them later.
Have since stripped off the cover bolts off the old lump and cleaned the new engine more so its ready for the tuner (phil-hopefully). Back to cleaning that chassis then
Tim
ThanksSam_Y_93 wrote:Loving it mate, hows the frame coming along? Im looking to get one of these as my first "big" bike. Will be keeping an eye out to see how it comes along.
Now that you mention it the frame is coming up nicely now. Spent most of last night inhaling petrol fumes, still the best cleaner in my eyes.
Heres a close up shot of what was possibly the most grimey part of the frame.
Still needs going over to get the last parts of dirt off and the petrol residue but I've broken the back of it now
Tim
Finished cleaning the chassis and banged in the new head stock bearing cups. Have wrapped it up for now to save from any un-necessary bumps and knocks.
I then turned my attention to then loom, a thing to remember about the nc30 is that the loom has to be laid through the chassis before the engine goes back in, PITA. It needs a dam good check over and clean, some parts will be replaced but most of it will just be tidied and re-taped.
Also worked on the yokes a bit more.
The engine is also now at Phil Lovett in Biggin Hill for the refresh.
Tim
Thought I was done with the bead blaster. . . . . but no, decided I am going to treat all the engine fixings to a new coat of zinc aswell.
Also blasted the front grill back so i can repaint it. Was quite grimey, but easily cleaned.
All the fixings are nice and clean now. Total of 80 parts to be zinc coated, the water pipes and the rear exhaust manifold will be rechromed.
The plan for the weekend, hopefully clean the loom up and make a start on tidying it up, paint the grill and starter motor silver and laquer some of the other parts.
Also complied a massive list of new parts I want from Honda, going to be a steep bill for seals and gaskets etc but I want original Honda quality.
8 x Exhaust studs 929000.602.00e
4 x head to exhaust gaskets 18291.216.000
8 x exhaust nuts 90304.hb3.771
2 x manifold to pipes gaskets 18291.mr8.000
1 x thermostat o-ring 91311.ke8.000
1 x thermostat seal 91331.pc9.003
1 x thermostat temp sensor 37750.pc1.004
1 x starter motor o-ring 91309.425.003
2 x water pipe o-ring 91301.mb0.000
2 x water pipe seal 91301.147.023
1 x water pipe o-ring 91312.ke7.003
1 x clutchcover gasket 11394.ml0.000
1 x generator cover gasket 11636.ml0.000
1 x sump gasket 11315.ml0.010
Other needed parts
1 x front tank rubber 17511.kv3.000
2 x side tank rubber 17611.ml7.000
1 x rear tank rubber 17613.gf6.000
1 x rear wheel nut cover 42603.mr8.000
1 x steering stem nut cover 53232.mr7.000
Total price = £178.20 delivered
If anyone is in the same situation (you never know) these are the two sites I used to source the part numbers and price.
David Silver Spares.
VFR400 parts catalogue.
Tim
Brilliant, a lovely sunny day to do some painting.
Got the starter motor done.
Before
After
Got the water pipes etc done.
Also got the front grill, rear brake carrier, torque arm (and spacers) and rear shock linkage done, but I'm being hassled to go down the pub beer garden so I'll add some more pics later. Hard life ain't it
Tim
Rear brake torque arm
Rear brake carrier
RVF rear shock linkages all greased and built
Starting to actually build little things here and there now rather than constant cleaning
Also ordered some ally clip ons (and some other little parts) from Rick Oliver, and a new rear disc which will allow me to rebuild the drive hub etc.
Tim
Package arrived from Rick today, so I spent a little time in the garage this evening bolting, torquing and lock wiring the rear disc up. Some of the nc30 guru's may have noticed that the bolt heads have been machined to sit flush, this is because the new wheels do not accomodate them.
Also trail fitted the 'shark fin' chain guard, would have also had all the rear drive hub built but my grease seems to have gone walkies. My sticky fingered dad no doubt
More soon hopefully.
Tim
Went and got some grease today. Greased the hub and put it into place along with the caliper mount, circlip and torque arm. Also drilled the new longer bolt for the 'shark fin'/torque arm so i could split-pin the end (like Mr Honda does
Then greased all the bearings and shaft before fitting and tightening into place.
Tim
A little update, before and after pics of the sump. Cleaned, blasted and then lacquered.
Also picked up a package from the zinc coaters. Another 93 parts ready for use, mostly for the engine (if i ever get it back
Tim
Here are a few pics of the small advances made recently
New bushes for the forks
Parts replaced in the engine (dont let it fool you theres about £400 worth of bits just in this picture!)
The re-chromed water pipes.
Also bought a new front paddock stand that holds the bike under the bottom yoke and of course none of the supplied pins fitted. So I made this one at work from SS.
Tim
Having got the engine back the next stage was to prep it redy for paint. So first of all I removed the water pump and split that down for refurb later (the one's with the keen eye will notice that I have already blasted and lacquered the water pump cover from the old one) and then changed the scratched clutch cover for a better one.
Then it was a case of throughly degreasing the whole thing, masking and rubbing down/keying all the surfaces for paint. Here are some pics just after I finished the masking.
Due to me losing the daylight and way too much moisture in the air painting it will have to wait for another day. Ah well least the hard bit is out of the way now.
Tim
Happy days, another hot weekend with perfect weather for painting. Although I've had a rather busy weekend with other bikes I still managed to find the time to put paint to the engine, also removed all the masking and changed some of the old bolts for the re-zinc'd ones.
In new paint (satin black)
Old bolts replaced along with the timing cover and dip-stick.
Now need to get on the phone for the mass order of new seals and o-rings etc from Honda.
Wahey the fork seal driver was waiting for me on my return home from work. So forth cracked on rebuilding the front RVF forks.
Banged the new seals in.
Put the cartridges back in and filled them up with the correct amount of oil using a 50ml syringe. Then carefully put them into the SES yokes. Because I have painted the fork lowers I ran a tap down the threads before inserting the bolts. Also put the spindle and titanium bolt into place and put the Ohlins stickers on.
Only a little update I'm afraid, still waiting on the the engine parts. Steering damper has arrived from Sweden though, mmm ohlinsy goodness.
140mm stroke damper and mount.
Been a while since I've had an update, mainly due to time and money, but the order from Honda has finally arrived meaning I can carry on with the engine build and hopefully get the engine in the frame soon.
It doesnt look like much, but theres £142 worth of stuff there.
Might have a free day sunday to work on it but its my birthday so half the family might turn up meaning I wont get in the garage.
Finally managed to get into the garage to work on the bike, had to shift some stuff around but I got the nc30 engine into the centre of the floor and laid out all the parts etc I would be using. Every old seal and gasket has been replaced with new. Sorry about some of the lame camera phone pics btw.
I then set about rebuilding everything,
here's the starter motor
Thermostat, temp sensor, pipes etc
Water pipes
Water pump, one bolt has eluded me for the moment
Rear exhaust manifold, mmmm shiny new nuts
This is the next job on the list, its not in too bad shape, just needs a good clean and 're-wrap'
Another productive day today, fixed my bro's and my car and cleaned and re-wrapped the loom. Because its about a million times easier to put the loom through the frame before the engine goes in, thats what I did. I bagged and cable tied the loom to stop it from moving and getting damaged/scratching somthing when the engine goes in. Also prepared what bolts would be needed.
Next thing on the job sheet, strip these for soda blasting
Stripped the new (2nd hand) carbs ready for the soda blaster, I took the slides and needles out so they would get damaged. Need to drop them off and get on the phone to Rick Oliver to order new jets and gaskets etc now. Also ordered new connecting rubbers from Honda as I had to ruin the old ones getting the carbs off the old engine.
Got the carbs back from the sida blaster today, fairly happy with the result. Some little bits I wish he had spent some more time on.
Took bloody ages to get them clean, that stuff gets everywhere! But they are in a dry built state ready for the new gaskets/spec check/modifications. Also got some new SS bolts for the caps.
Original old carbs and new ones
Just need to get on the blower to Rick Oliver and order those parts now.
I won those indicator rubbers btw, cheers BillingTZR
Have got the carbs fully rebuilt with all the little mods, have made sure that all the orifices and emulsion tubes are 100% clear too.
I have raised the needles 0.5mm, drilled out the slide vacuum orifices to 2.25mm, changed the main jets to 120 for the rear cylinders and 118 for the front cylinders and adjusted the pilot jets to 2.25 turns.
Using the SS bolts I bought earlier.
-
Tim400GB
- Site Supporter
- Reactions:
- Posts: 1168
- Joined: Mon Jan 04, 2010 7:24 pm
- Bike owned: 1 x NC30, 2 x NC32.5,
- Location: SE Greater London
Re: My Nc30 'BCF' build thread
Has been a while  .
.
The order parts from Honda have arrived so will hopefully be putting the carbs back on soon. Only problem is because of the snow the garage has literally no working space , dam cars!

The last little bits arrived from Honda

and I am finally better so off to the garage I went.
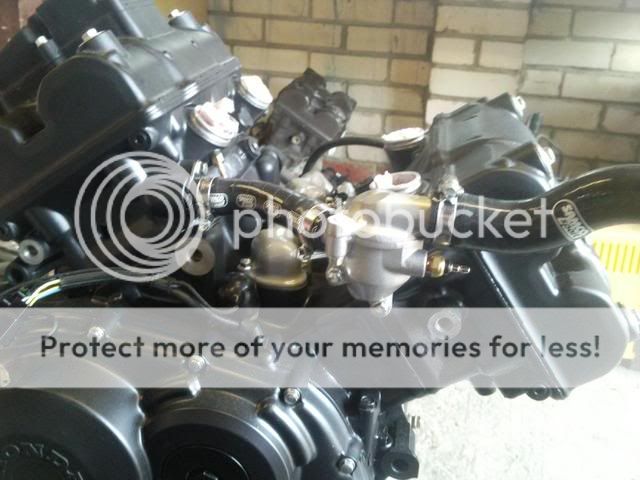
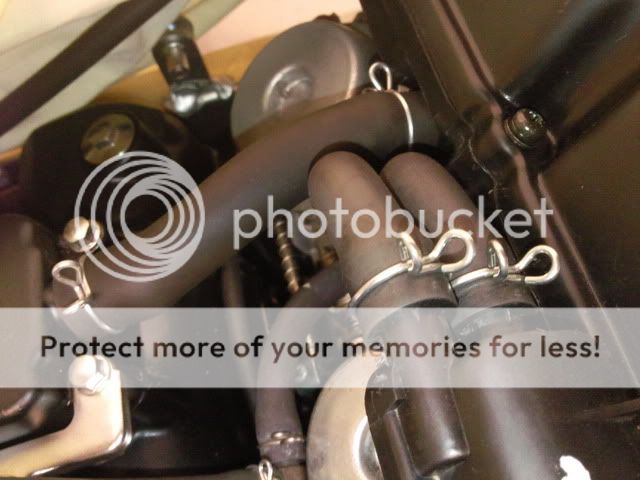
Got the carbs on with the new rubbers and clips as well as the new vac pipe for the fuel tap.

Then the frame was mounted and all torqued up.


Next was the swingarm.
Got my larger torque wrench so I could tighten the swingarm in properly and do a little more to the bike today.
Layed out the parts to be fitted. Namely the Kais modified Ohlins shock and the RVF linkages.


And here it is all fitted, aswell as some other little parts.


Didn't get around to cleaning the airbox yet, got distracted by shiny bits.
Also greased the headstock bearings and fitted the front end.

And got the bike up safe on the paddock stands.

Next on the agenda is not get the subframe and undertray sorted out. I drilled off all the metal clips from the undertray and then bead blasted them all along with the subframe and some other fittings.
Now all I have to do is drop it all off to be zinc coated. I know the subframe should really be painted to stay original but it'll not be seen and I could always paint it later.
Here are the parts I had to start with.


The next post should see them all come back lovely and shiney.
After taking the subframe as well as some other parts to the zinc coaters a few weeks back I was looking forward to getting some decent work done to the bike. However it was not meant to be, they hadn't even started my parts .
So I decided to trail fit the RC30 PVM magnesium wheels to make sure there were no problems. Sure enough they went straight on with no hassle. They will be coming back off to be painted in white.

Front

Rear

Titanium nut and bespoke anodised spacer.

Finally got all the zinc coated stuff back, don't why it took so long this time but everything has come back perfect. Even the helmet cable has been done. I was worried about the moving part on the seat latch mount seizing up due to the coating but thats all good too.
Couple of pics. Total 35 parts.


Got a good amount of work done today.
Started to clean the black plastics. Replaced the rusty staples and lock washers. Still need to finish cleaning it as well as the undertray.


Put the new sump on with new bolts, still need to get a new drain bolt.

Bought this filter clamp ages ago. Fitted and lock wired.


Got the newly coated subframe on and routed the rear loom with all its little black clips. Also mounted the pillion seat latch system.


Spent most of the day in the garage, got the undertray back on with all the little mounts rivetted back on. Did an awful lot of the little things all over the bike, like routing loom and mounts etc (as they all were from when I stripped it all apart). Stepped back to see the same bike, looked like I'd hardly done anything. Ah well, the devil is in the detail.
A few pics


Got some more bits done, some more obvious things and a lot of less obvious things. Got the clip ons on (using ss bolts) as well as the steering damper (might change the damper position later on). Also routed the loom around the front of the engine and rebuilt the choke lever, lubed the cable and mounted that too.
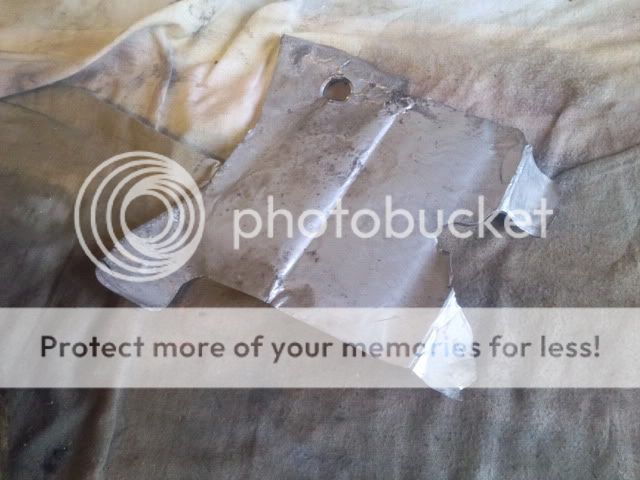
Also replaced the heat shield that covers the battery box section of the undertray. I had made a template of the old one before throwing it away.


Cleaned and mounted plastic guard. With renewed lock washers and staples

SES clip ons

and damper


Routed loom

An eagerly awaited package turned up today from Gavin at Jap4performance.

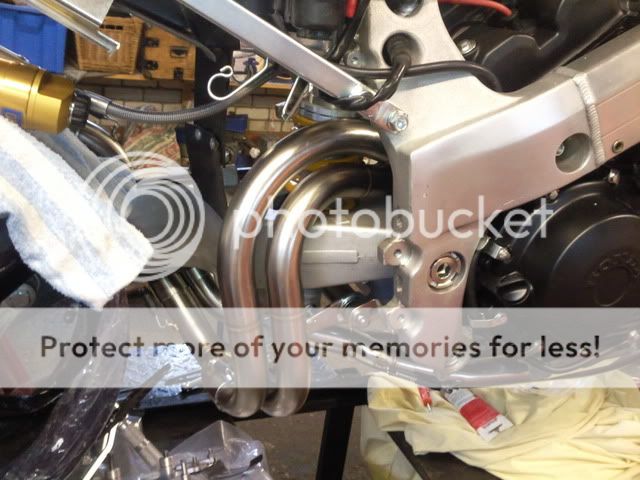
Managed to get the full stainless exhaust system fitted. Had to remove the standard nc30 rear exhaust manifold so it was a waste of time getting that zinc plated, ah well.
The system is all 100% done now and I trail fitted the Tyga rearsets.


Now waiting on a few more back order parts from Honda and Gavin.
Next on the imediate job list:
HRC QA throttle and cables
Finish airbox
Chain and sprockets
More bead blasting and zinc coating.
Tim
The helicopter tape arrived so I cut it to size and got it on the subframe.

Before


After


Here's all the parts I've collected to build the clocks

And here are the parts I will be using

More parts for the bead blaster and zinc coaters

Was mainly working on my brothers nc30 this weekend to get it ready for the IOM but I did manage to get the sprockets on.
As supplied from Talon.

Titanium sprocket bolts.
Front all torqued up (55Nm)

Rear is finger tight with SS untill the Ti nuts arrive.

Waiting on the Tyga meter stay to arrive so I can crack on with the clocks and a back order from David Silver to finish the airbox.
Mini update, got the new carbon hanger on today.

Another mini update.
Trail fitment of the Tyga front fender, it will be coming off again to get painted.

Got some more bead blasting done, lots more little bits as well as some of the larger parts for the clocks ready for zinc coating. I have a main mount in ally from tyga so the stock one may be for sale at a later date.
Still might paint the clock and fan mount black after being zinc'd, keep more of an OEM finish. Thoughts on it any one?


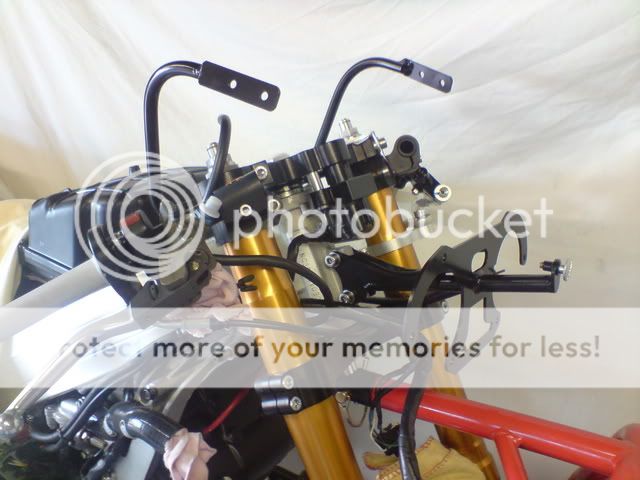
The HRC quick action throttle arrived from Rick Oliver

So that got trail fitted along with the switchgear and AP master cylinder. I'll fit them properly (drill the location holes etc) when the clocks etc are on just to make sure nothing fouls.

Got some more done.
Had a few packages waiting for me on my return from Sweden which meant I could finish the airbox.
Here are all the original parts.

Here's what it looks like close up

Here's all the new parts. OE air filter, 7 Bolts, 12 lock washers and some various hose clips.

All cleaned and fitted.

Close up

All done barring a few more hose clips I forgot to order .

Am going to paint these black.

These Tyga aluminium mounts are also going to get painted either silver or black, am undecided at the moment.

Few more bits from Honda arrived.

Mmmm, new clips.
Got all the mount etc painted today. Gave them all a thorough rubbing down, even the ally Tyga ones had quite a few tooling marks in them. Went for gloss black in the end, prefered the OE look.

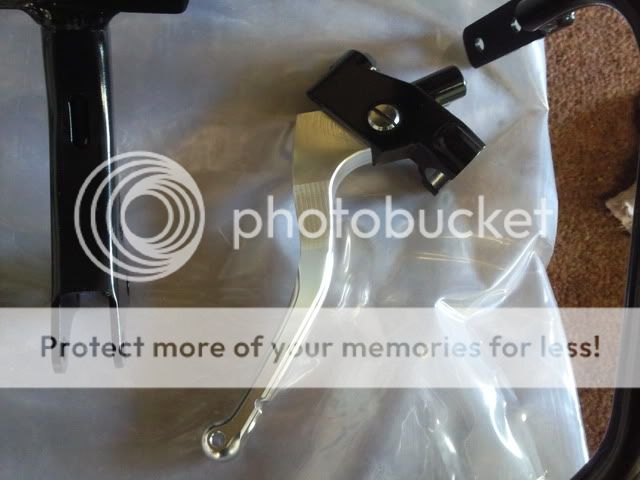
Put the new Tyga billet clutch lever onto its mount.
Ok so I got the dial mount back from the zinc coaters mid week but decided to paint them black anyway.
Here are all the parts I have ready. No lights, still need to get them.

Bolted the Tyga meter stay to the bike.
And bolted up everything else.


Arrived this morning from Lockwood, very swiftly.

Old face off, new face on.

All done and back together....again!

Think it looks a million times better than the sticker.
I got the indicators on, sort of. Just need to get the fixings blasted and coated. Along with the side stand.

Decided I was being far too slack on my project so cracked on stripping the pair of rear brakes I have to refurbish them. The best parts will go on my bike.
This is what I started with.

All apart. One of the calipers is in very good nick but the other will get painted.

All steel parts blasted for the zinc coater, as well as the side stand and its mounts.

All ally parts blasted and ready for paint.

Got all the parts back from the new zinc coaters, cheaper with a better finish, win. Means I can get on with painting the kick stand and rebuilding the rear caliper. Have got two to rebuild one with a black paint finish and the other a lacquer'd aluminium finish, then I will pick the one I prefer.

These arrived

Which meant I could do this

More soon hopefully.
Been doing alot of painting recently, lots of prep and organising parts but its slowly coming together....for the rear brake and kick stand.
The stand all rebuilt and mounted.


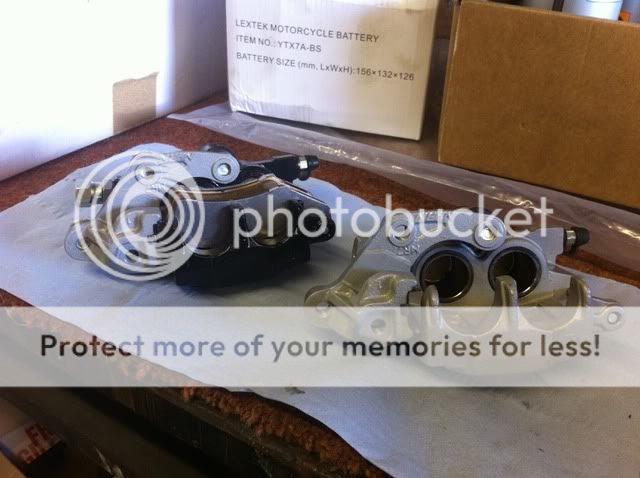
I am rebuilding two rear brake systems, one in grey and the other in black.

Definately think I prefer grey for the master cylinder, looks more OEM.

Just waiting on a back order from David Silver to finish the calipers.
Still waiting on a back order from DS to finish the rear caliper, but some other smaller parts did arrive.
The gear linkage arm, OEM regulator rectifier (£ 8O ) and the side stand rubber (plus spacer and bolt).

Gear linkage arm with Ti' rod

Side stand rubber.

Reg' rec'

This turned up at my door yesterday. :D

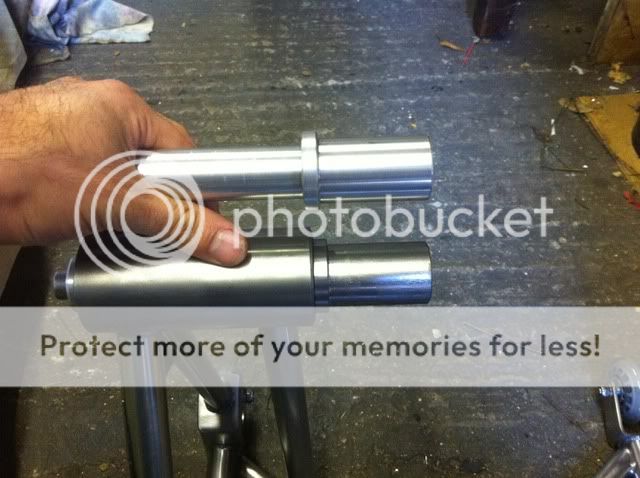
But I'm not at all happy with the fit of the bar to the bike (ID of the bike is 31.8 and the OD of the stand is 29.96), so I'm going to make a new SS bar to fit the stand.
Turned up a new SS shaft for the paddock stand, fits on the bike perfect now.
The last order arrived from DS today which meant i could finish the rear caliper. New plug, seals and OEM pads.

After everything being new or refreshed it all goes together so perfect. Pistons gliding into the bores.

Both calipers rebuilt, the chosen black one has the new seals etc. The silver one has been rebuilt from the best of the left overs.


All done and mounted on the bike, 27Nm for the bolts.


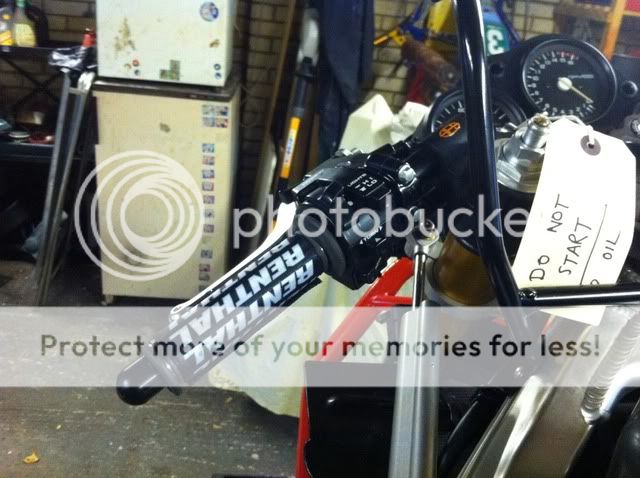
Decided to finish off the hand controls today, mainly because these had arrived during the week.
Renthal firm compound road/race grips and a pair of covers to keep any grease/dirt away.

Measured it all up, then drilled the one hole for the locating lug on the switch gear and then fitted it all, plus the ready prept clutch lever assembly.

Did the same with the other side except two holes had to be drilled. One for the HRC QA throttle and one for the switch gear.


The Ti race spec disc bolts also arrived. Should get the unsprung weight down a bit more.

All before I've had breakfast on a saturday morning, dam I'm hungry!
Wheels back from the painters

And fitted the new valves

Need to get the tyres now
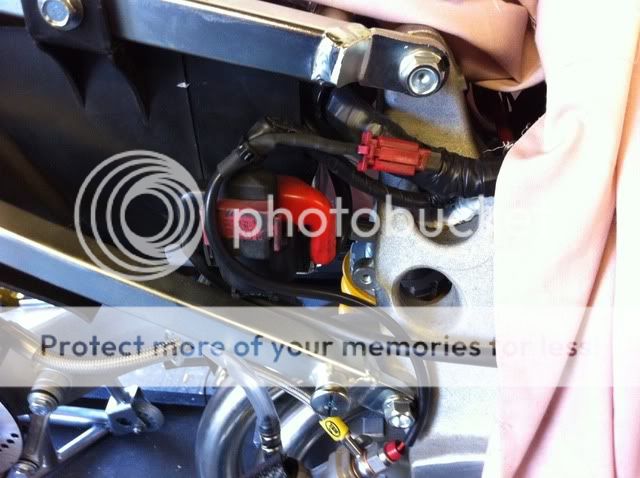
Finished making the mounts for the brake resevoirs, its only something small but I've spent time trying to make something that could be factory.
The parts I made from SS.

Welded together.

All mounted.


Rear mount.


Ok so not a huge update but here it is.
The new rear brake line had arrived (cheers Rick).

So I got it fitted.

Cut the brake light switch.

And soldered up the plug to the new pressure switch.
Am in the process of saving up for the new fairings, nearly there.
Got a few bits in before christmas so I could sneak away to the garage.
Namely some more bolts and a new chain link tool.

Out with the 'old' and in with the new.


Got the new chain on.

Cleaned up, re-pop revited and modified the guard for the new wheel.


Only another small update.
The Ti hub pinch bolt had arrived (cheers Kayla).

So I got that fitted

Few more bits from Honda, front wheel seals and a new horn.

So I got that fitted too.

Been a while but I've got an update for you all.
Bolts for the new front fender have arrived so they were dry fitted.

New discs


Fitted with Ti bolts

Lockwired

New seals

All ready for tyres

Tyres arrived, Pirelli Diablo Rosso Corsas 120/60R17 & 160/60R17

Fitted and balanced

Rear fitted, was worried that the wider tyre would foul the chain but it clears.

Fitted the front.... and the wheel is 1.25mm off centre, bugger. So its actually now back off until the new spacers are made.

Woohoo, after more fettling the silhouette endurance bodywork fits.

Ok, so finally the new wheels spacers are ready and rads are on order.
Fitted and everything torqued up and lock wired.


Got annoyed with looking at blue roll being used to bung the can, so for a bit of garage tart factor ...

Package arrived from Rick Oliver yesterday.
Oversize ally rad set (will have to wait until the new plugs arrive before pictures and fitting)
Stainless cap
Earth upgrade kit & new oem clutch cable

Wires (not pictured) and cable oil'd and fitted

Got some new plugs and some HRC bling in the form of a drilled sump plug.

Which then allowed me to fit the new rads

Which my reconditioned fan doesn't fit, balls! Spoke to Rick Oliver who said I may have inadvertently picked up a RVF fan, which have different mounting positions.


Still, the top rad went on ok. Had to trim the samco hose slightly.

With its new stainless cap

Got some calipers coming to me so I will rebuild those when they arrive and ..
Rick has sent me me a new lower rad and the fan now fits properly, happy days!

Fitted and piped up to the bike.


2003 CBR600RR calipers arrived and I'm quite happy with the condition of them but of course my brain wouldn't allow me to put them straight on the bike so ..... they are coming apart to be rebuilt with new seals and Ti bolts.
One caliper as recieved, the other half stripped

Here are the bodies with a quick clean, still got some stubborn stains that require more attention.


The sonic cleaner was a great idea, so I totally did not take the bodies into work and use it.
Somehow they do seem to be alot cleaner than yesterday

All wrapped up now till I get the rest of the parts to finish them.
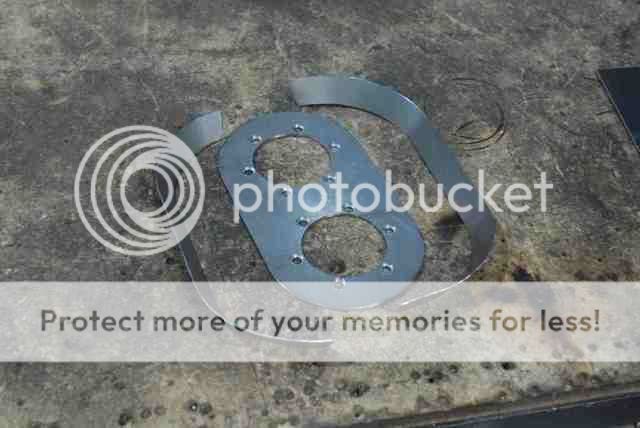
Still waiting for the brake parts to turn up and actually have some spare time I thought to crack on with the rad overflow bottle. Had already created the templates from card a few weeks ago.
I made two mounts, one for this bike and one for my race bike.

Wish more pictures were taken while I made them. Think they turned out ok? A good friend welded them up, cheers for that, did a blinding job. Its made from stainless steel and then bead blasted to get a matt finish.

New OEM pipe

All fitted

The last of the seals have come in now for the CBR callipers.
Hopefully have some time over the weekend to get them built.
Here's everything I've collected to get the job done
OEM anti-rattle clips
OEM nipple covers
OEM piston seals
OEM pads
Probolt Titanium race spec calliper mounting bolts
Probolt Titanium race spec pad pins
Probolt Titanium bleed nipples
Probolt Titanium calliper body bolts

Got the CBR600RR callipers both rebuilt today.
Mounted and lockwired up.


Been thinking about how I could get the brake lines made without making a mistake in the various different angles needed. Whats the best way? make a template of course! And they can be used over and over, just have to cut the correct length of pipe for my nc30 now.

Brake lines arrived from Hel, many thanks to Shaun who works there for getting it sorted for me. Along with the templates.

Both fitted.

Just need to wire in the plug for the brake light switch.

Got the front brake light switch wired up using the AMP water proof plug. Love these connectors, take ages to do but are the mutts nuts.

For my birthday I did get ..... a Harris front paddock stand :D

Hmmmm, matching

New exhaust arrived so I got that on, much more in keeping with the old endurance systems.
Been speaking to suppliers about getting my tank adapted for the quick fill fuel fillers. More on that later hopefully.
Heres the new can.

The endurance awesomeness has arrived from Newton Equipment, managed to deal direct with them.
1" quick fill filler and an Aero 300 filler cap. They have re-anodised the quick fill to match the same silver as the cap. Massive thanks to Kenny @ NE for idea and sorting it out for me.
Pics


Need to get the tank modified to fit them now, have been speaking to Racefit but describing them as expensive comes no where near close.
Here's the tank I bought a while ago, paint is no good but there aren't any dents. Will give you a general position of how the fillers are going to be mounted. They will be slightly raised on their own 'platform' to gain some more clearance inside the tank.


Got the seat recovered in alcantara, was going to do it myself until my staple gun just bounced off the plastic. Ah well.
Spare oem seat

Alcantara looks more like the racing foam used on the racebikes

The tank is now off to be modified for the Newton filler caps (cheers a million Matt), so eagerly awaiting for that to be done.
And I got round to fitting the RVF rear light to the seat unit. I made two mounts from stainless with a welded nut at one end of each, then shaped to fit. (Silhouette said to cut the ends off vfr rear light and cable tie in place - f**k that)

Some progress! Although I've still not found a painter that I'm comfortable with.
The chap who is modifying my fuel tank (Matt Bennett) has finished it and has kindly sent me some pictures. The plan is to travel the 150 miles to pick it up to save any damage and meet him in person, and maybe see some of his other work (it is amazing).
All marked out
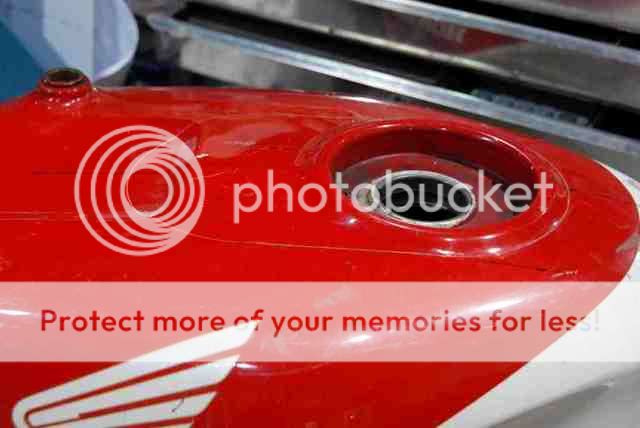
Cut

The sheet metal cut
Redundent drain hole brazed up

All done

And pressure tested

On this project I had somewhat of a setback. The paint on the PVM mag wheels was starting to lift and bubble in places , so if anyone wants a number for a painter who says they do a good job but in actual fact takes your pride and joy and turns it round for a quick buck, I have one.
So speaking to a few chaps I was turned to the direction of Ex Dymag Steve Turner of the now TPCS refurbs. The wheels were taken off the bike stripped and dropped off with him.
This brings me to the point of today, he sent me good news and pics of their current condition.
Stripped

Blasted

Crack tested with a pass
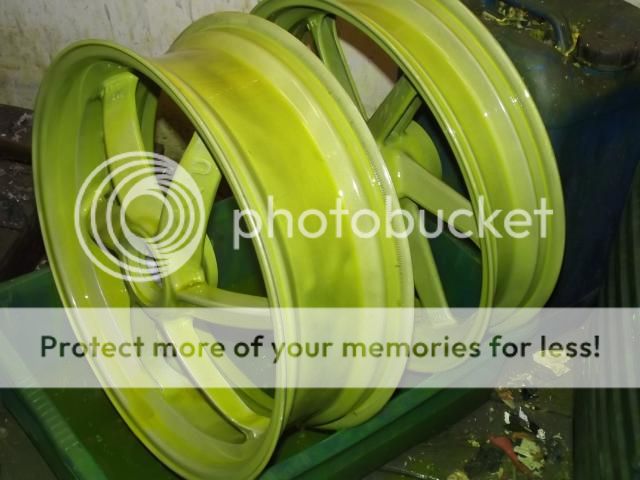
Chromated

Update:
Steve has sent me another email with finished pics of the wheels.
He looks to have done an outstanding job, just need to go pick them up now. At my request he did the hub seperately and put new bearings and bolts in.


The order parts from Honda have arrived so will hopefully be putting the carbs back on soon. Only problem is because of the snow the garage has literally no working space
The last little bits arrived from Honda
and I am finally better so off to the garage I went.
Got the carbs on with the new rubbers and clips as well as the new vac pipe for the fuel tap.
Then the frame was mounted and all torqued up.
Next was the swingarm.
Got my larger torque wrench so I could tighten the swingarm in properly and do a little more to the bike today.
Layed out the parts to be fitted. Namely the Kais modified Ohlins shock and the RVF linkages.
And here it is all fitted, aswell as some other little parts.
Didn't get around to cleaning the airbox yet, got distracted by shiny bits.
Also greased the headstock bearings and fitted the front end.
And got the bike up safe on the paddock stands.
Next on the agenda is not get the subframe and undertray sorted out. I drilled off all the metal clips from the undertray and then bead blasted them all along with the subframe and some other fittings.
Now all I have to do is drop it all off to be zinc coated. I know the subframe should really be painted to stay original but it'll not be seen and I could always paint it later.
Here are the parts I had to start with.
The next post should see them all come back lovely and shiney.
After taking the subframe as well as some other parts to the zinc coaters a few weeks back I was looking forward to getting some decent work done to the bike. However it was not meant to be, they hadn't even started my parts
So I decided to trail fit the RC30 PVM magnesium wheels to make sure there were no problems. Sure enough they went straight on with no hassle. They will be coming back off to be painted in white.
Front
Rear
Titanium nut and bespoke anodised spacer.
Finally got all the zinc coated stuff back, don't why it took so long this time but everything has come back perfect. Even the helmet cable has been done. I was worried about the moving part on the seat latch mount seizing up due to the coating but thats all good too.
Couple of pics. Total 35 parts.
Got a good amount of work done today.
Started to clean the black plastics. Replaced the rusty staples and lock washers. Still need to finish cleaning it as well as the undertray.
Put the new sump on with new bolts, still need to get a new drain bolt.
Bought this filter clamp ages ago. Fitted and lock wired.
Got the newly coated subframe on and routed the rear loom with all its little black clips. Also mounted the pillion seat latch system.
Spent most of the day in the garage, got the undertray back on with all the little mounts rivetted back on. Did an awful lot of the little things all over the bike, like routing loom and mounts etc (as they all were from when I stripped it all apart). Stepped back to see the same bike, looked like I'd hardly done anything. Ah well, the devil is in the detail.
A few pics
Got some more bits done, some more obvious things and a lot of less obvious things. Got the clip ons on (using ss bolts) as well as the steering damper (might change the damper position later on). Also routed the loom around the front of the engine and rebuilt the choke lever, lubed the cable and mounted that too.
Also replaced the heat shield that covers the battery box section of the undertray. I had made a template of the old one before throwing it away.
Cleaned and mounted plastic guard. With renewed lock washers and staples
SES clip ons
and damper
Routed loom
An eagerly awaited package turned up today from Gavin at Jap4performance.
Managed to get the full stainless exhaust system fitted. Had to remove the standard nc30 rear exhaust manifold so it was a waste of time getting that zinc plated, ah well.
The system is all 100% done now and I trail fitted the Tyga rearsets.
Now waiting on a few more back order parts from Honda and Gavin.
Next on the imediate job list:
HRC QA throttle and cables
Finish airbox
Chain and sprockets
More bead blasting and zinc coating.
Tim
The helicopter tape arrived so I cut it to size and got it on the subframe.
Before
After
Here's all the parts I've collected to build the clocks
And here are the parts I will be using
More parts for the bead blaster and zinc coaters
Was mainly working on my brothers nc30 this weekend to get it ready for the IOM but I did manage to get the sprockets on.
As supplied from Talon.
Titanium sprocket bolts.
Front all torqued up (55Nm)
Rear is finger tight with SS untill the Ti nuts arrive.
Waiting on the Tyga meter stay to arrive so I can crack on with the clocks and a back order from David Silver to finish the airbox.
Mini update, got the new carbon hanger on today.
Another mini update.
Trail fitment of the Tyga front fender, it will be coming off again to get painted.
Got some more bead blasting done, lots more little bits as well as some of the larger parts for the clocks ready for zinc coating. I have a main mount in ally from tyga so the stock one may be for sale at a later date.
Still might paint the clock and fan mount black after being zinc'd, keep more of an OEM finish. Thoughts on it any one?
The HRC quick action throttle arrived from Rick Oliver
So that got trail fitted along with the switchgear and AP master cylinder. I'll fit them properly (drill the location holes etc) when the clocks etc are on just to make sure nothing fouls.
Got some more done.
Had a few packages waiting for me on my return from Sweden which meant I could finish the airbox.
Here are all the original parts.
Here's what it looks like close up
Here's all the new parts. OE air filter, 7 Bolts, 12 lock washers and some various hose clips.
All cleaned and fitted.
Close up
All done barring a few more hose clips I forgot to order
Am going to paint these black.
These Tyga aluminium mounts are also going to get painted either silver or black, am undecided at the moment.
Few more bits from Honda arrived.
Mmmm, new clips.
Got all the mount etc painted today. Gave them all a thorough rubbing down, even the ally Tyga ones had quite a few tooling marks in them. Went for gloss black in the end, prefered the OE look.
Put the new Tyga billet clutch lever onto its mount.
Ok so I got the dial mount back from the zinc coaters mid week but decided to paint them black anyway.
Here are all the parts I have ready. No lights, still need to get them.
Bolted the Tyga meter stay to the bike.
And bolted up everything else.
Arrived this morning from Lockwood, very swiftly.
Old face off, new face on.
All done and back together....again!
Think it looks a million times better than the sticker.
I got the indicators on, sort of. Just need to get the fixings blasted and coated. Along with the side stand.
Decided I was being far too slack on my project so cracked on stripping the pair of rear brakes I have to refurbish them. The best parts will go on my bike.
This is what I started with.
All apart. One of the calipers is in very good nick but the other will get painted.
All steel parts blasted for the zinc coater, as well as the side stand and its mounts.
All ally parts blasted and ready for paint.
Got all the parts back from the new zinc coaters, cheaper with a better finish, win. Means I can get on with painting the kick stand and rebuilding the rear caliper. Have got two to rebuild one with a black paint finish and the other a lacquer'd aluminium finish, then I will pick the one I prefer.
These arrived
Which meant I could do this
More soon hopefully.
Been doing alot of painting recently, lots of prep and organising parts but its slowly coming together....for the rear brake and kick stand.
The stand all rebuilt and mounted.
I am rebuilding two rear brake systems, one in grey and the other in black.
Definately think I prefer grey for the master cylinder, looks more OEM.
Just waiting on a back order from David Silver to finish the calipers.
Still waiting on a back order from DS to finish the rear caliper, but some other smaller parts did arrive.
The gear linkage arm, OEM regulator rectifier (£ 8O ) and the side stand rubber (plus spacer and bolt).
Gear linkage arm with Ti' rod
Side stand rubber.
Reg' rec'
This turned up at my door yesterday. :D
But I'm not at all happy with the fit of the bar to the bike (ID of the bike is 31.8 and the OD of the stand is 29.96), so I'm going to make a new SS bar to fit the stand.
Turned up a new SS shaft for the paddock stand, fits on the bike perfect now.
The last order arrived from DS today which meant i could finish the rear caliper. New plug, seals and OEM pads.
After everything being new or refreshed it all goes together so perfect. Pistons gliding into the bores.
Both calipers rebuilt, the chosen black one has the new seals etc. The silver one has been rebuilt from the best of the left overs.
All done and mounted on the bike, 27Nm for the bolts.
Decided to finish off the hand controls today, mainly because these had arrived during the week.
Renthal firm compound road/race grips and a pair of covers to keep any grease/dirt away.
Measured it all up, then drilled the one hole for the locating lug on the switch gear and then fitted it all, plus the ready prept clutch lever assembly.
Did the same with the other side except two holes had to be drilled. One for the HRC QA throttle and one for the switch gear.
The Ti race spec disc bolts also arrived. Should get the unsprung weight down a bit more.
All before I've had breakfast on a saturday morning, dam I'm hungry!
Wheels back from the painters
And fitted the new valves
Need to get the tyres now
Finished making the mounts for the brake resevoirs, its only something small but I've spent time trying to make something that could be factory.
The parts I made from SS.
Welded together.
All mounted.
Rear mount.
Ok so not a huge update but here it is.
The new rear brake line had arrived (cheers Rick).
So I got it fitted.
Cut the brake light switch.
And soldered up the plug to the new pressure switch.
Am in the process of saving up for the new fairings, nearly there.
Got a few bits in before christmas so I could sneak away to the garage.
Namely some more bolts and a new chain link tool.
Out with the 'old' and in with the new.
Got the new chain on.
Cleaned up, re-pop revited and modified the guard for the new wheel.
Only another small update.
The Ti hub pinch bolt had arrived (cheers Kayla).
So I got that fitted
Few more bits from Honda, front wheel seals and a new horn.
So I got that fitted too.
Been a while but I've got an update for you all.
Bolts for the new front fender have arrived so they were dry fitted.
New discs
Fitted with Ti bolts
Lockwired
New seals
All ready for tyres
Tyres arrived, Pirelli Diablo Rosso Corsas 120/60R17 & 160/60R17
Fitted and balanced
Rear fitted, was worried that the wider tyre would foul the chain but it clears.
Fitted the front.... and the wheel is 1.25mm off centre, bugger. So its actually now back off until the new spacers are made.
Woohoo, after more fettling the silhouette endurance bodywork fits.
Ok, so finally the new wheels spacers are ready and rads are on order.
Fitted and everything torqued up and lock wired.
Got annoyed with looking at blue roll being used to bung the can, so for a bit of garage tart factor ...
Package arrived from Rick Oliver yesterday.
Oversize ally rad set (will have to wait until the new plugs arrive before pictures and fitting)
Stainless cap
Earth upgrade kit & new oem clutch cable
Wires (not pictured) and cable oil'd and fitted
Got some new plugs and some HRC bling in the form of a drilled sump plug.
Which then allowed me to fit the new rads
Which my reconditioned fan doesn't fit, balls! Spoke to Rick Oliver who said I may have inadvertently picked up a RVF fan, which have different mounting positions.
Still, the top rad went on ok. Had to trim the samco hose slightly.
With its new stainless cap
Got some calipers coming to me so I will rebuild those when they arrive and ..
Rick has sent me me a new lower rad and the fan now fits properly, happy days!
Fitted and piped up to the bike.
2003 CBR600RR calipers arrived and I'm quite happy with the condition of them but of course my brain wouldn't allow me to put them straight on the bike so ..... they are coming apart to be rebuilt with new seals and Ti bolts.
One caliper as recieved, the other half stripped
Here are the bodies with a quick clean, still got some stubborn stains that require more attention.
The sonic cleaner was a great idea, so I totally did not take the bodies into work and use it.
Somehow they do seem to be alot cleaner than yesterday
All wrapped up now till I get the rest of the parts to finish them.
Still waiting for the brake parts to turn up and actually have some spare time I thought to crack on with the rad overflow bottle. Had already created the templates from card a few weeks ago.
I made two mounts, one for this bike and one for my race bike.
Wish more pictures were taken while I made them. Think they turned out ok? A good friend welded them up, cheers for that, did a blinding job. Its made from stainless steel and then bead blasted to get a matt finish.
New OEM pipe
All fitted
The last of the seals have come in now for the CBR callipers.
Hopefully have some time over the weekend to get them built.
Here's everything I've collected to get the job done
OEM anti-rattle clips
OEM nipple covers
OEM piston seals
OEM pads
Probolt Titanium race spec calliper mounting bolts
Probolt Titanium race spec pad pins
Probolt Titanium bleed nipples
Probolt Titanium calliper body bolts
Got the CBR600RR callipers both rebuilt today.
Mounted and lockwired up.
Been thinking about how I could get the brake lines made without making a mistake in the various different angles needed. Whats the best way? make a template of course! And they can be used over and over, just have to cut the correct length of pipe for my nc30 now.
Brake lines arrived from Hel, many thanks to Shaun who works there for getting it sorted for me. Along with the templates.
Both fitted.
Just need to wire in the plug for the brake light switch.
Got the front brake light switch wired up using the AMP water proof plug. Love these connectors, take ages to do but are the mutts nuts.
For my birthday I did get ..... a Harris front paddock stand :D
Hmmmm, matching
New exhaust arrived so I got that on, much more in keeping with the old endurance systems.
Been speaking to suppliers about getting my tank adapted for the quick fill fuel fillers. More on that later hopefully.
Heres the new can.
The endurance awesomeness has arrived from Newton Equipment, managed to deal direct with them.
1" quick fill filler and an Aero 300 filler cap. They have re-anodised the quick fill to match the same silver as the cap. Massive thanks to Kenny @ NE for idea and sorting it out for me.
Pics
Need to get the tank modified to fit them now, have been speaking to Racefit but describing them as expensive comes no where near close.
Here's the tank I bought a while ago, paint is no good but there aren't any dents. Will give you a general position of how the fillers are going to be mounted. They will be slightly raised on their own 'platform' to gain some more clearance inside the tank.
Got the seat recovered in alcantara, was going to do it myself until my staple gun just bounced off the plastic. Ah well.
Spare oem seat
Alcantara looks more like the racing foam used on the racebikes
The tank is now off to be modified for the Newton filler caps (cheers a million Matt), so eagerly awaiting for that to be done.
And I got round to fitting the RVF rear light to the seat unit. I made two mounts from stainless with a welded nut at one end of each, then shaped to fit. (Silhouette said to cut the ends off vfr rear light and cable tie in place - f**k that)
Some progress! Although I've still not found a painter that I'm comfortable with.
The chap who is modifying my fuel tank (Matt Bennett) has finished it and has kindly sent me some pictures. The plan is to travel the 150 miles to pick it up to save any damage and meet him in person, and maybe see some of his other work (it is amazing).
All marked out
Cut
The sheet metal cut
Redundent drain hole brazed up
All done
And pressure tested
On this project I had somewhat of a setback. The paint on the PVM mag wheels was starting to lift and bubble in places
So speaking to a few chaps I was turned to the direction of Ex Dymag Steve Turner of the now TPCS refurbs. The wheels were taken off the bike stripped and dropped off with him.
This brings me to the point of today, he sent me good news and pics of their current condition.
Stripped
Blasted
Crack tested with a pass
Chromated
Update:
Steve has sent me another email with finished pics of the wheels.
He looks to have done an outstanding job, just need to go pick them up now. At my request he did the hub seperately and put new bearings and bolts in.
-
marcus57
- Site Supporter
- Reactions:
- Posts: 2304
- Joined: Sun Jul 04, 2010 1:21 pm
- Bike owned: nc30, nc35, gsxr750
- Location: Taunton
Re: My Nc30 'BCF' build thread
Very very nice build , love those pvm's
-
jim157

- Admin NWAA

- Reactions:
- Posts: 1924
- Joined: Mon May 17, 2010 7:15 pm
- Bike owned: A few small ones
- Location: Norwich
Re: My Nc30 'BCF' build thread
Wow, you're doing an amazing job there. So you're painting it in the R/W/B scheme?
AUTOEXEC.TWAT
-
Tim400GB
- Site Supporter
- Reactions:
- Posts: 1168
- Joined: Mon Jan 04, 2010 7:24 pm
- Bike owned: 1 x NC30, 2 x NC32.5,
- Location: SE Greater London
Re: My Nc30 'BCF' build thread
Cheers chaps. No it's going to have a endurance scheme on it.
Still looking for a painter I trust.
Still looking for a painter I trust.
-
micpec

- Site Supporter
- Reactions:
- Posts: 2138
- Joined: Sat May 03, 2008 9:11 pm
- Bike owned: NC35’s, NC30 sold, MC34 many
- Location: The Netherlands
Re: My Nc30 'BCF' build thread
Very nice build, Timon. I like it. Keep it coming 
"Action without Philosophy is a lethal weapon; Philosophy without action is worthless"
-
Zippy

- Site Supporter
- Reactions:
- Posts: 1333
- Joined: Tue Mar 24, 2009 1:41 pm
- Location: South West
Re: My Nc30 'BCF' build thread
I'm going to read this again just to re motivate my RVF build.
-
skinnydog0_0

- NWAA Supporter

- Reactions:
- Posts: 1866
- Joined: Tue Apr 20, 2010 9:07 pm
- Bike owned: Penny Farthing
- Location: Pembrokeshire West Wales
Re: My Nc30 'BCF' build thread
Cracking thread mate!!
Did you have to do anything else to get the PVM RC30 wheels to fit (other than getting the bespoke spacer made)?
Love the forks, that coating looks the dogs
Did you have to do anything else to get the PVM RC30 wheels to fit (other than getting the bespoke spacer made)?
Love the forks, that coating looks the dogs
An NC is for life, not just for Christmas!
-
Tim400GB
- Site Supporter
- Reactions:
- Posts: 1168
- Joined: Mon Jan 04, 2010 7:24 pm
- Bike owned: 1 x NC30, 2 x NC32.5,
- Location: SE Greater London
Re: My Nc30 'BCF' build thread
Cheers
Had to get the rear disk bolts to sit flush in the axle. You have to do the same with most mag wheels
Had to get the rear disk bolts to sit flush in the axle. You have to do the same with most mag wheels
-
marcus57
- Site Supporter
- Reactions:
- Posts: 2304
- Joined: Sun Jul 04, 2010 1:21 pm
- Bike owned: nc30, nc35, gsxr750
- Location: Taunton
Re: My Nc30 'BCF' build thread
What rear disc bolts did you use , I'm after a set or two for my bikes