GPI Radiators and hoses installation & review - pics
Forum rules
Please can you post items for sale or wanted in the correct For Sale section. Items / bikes for sale here will be removed without warning. Reasons for this are in the FAQ. Thanks
Please can you post items for sale or wanted in the correct For Sale section. Items / bikes for sale here will be removed without warning. Reasons for this are in the FAQ. Thanks
-
StrayAlien
- Familiar Member
- Posts: 361
- Joined: Sun Jan 15, 2012 9:27 am
- Bike owned: NC30, Dukes, Hog
- Location: Melbourne, Straya
GPI Radiators and hoses installation & review - pics
Okay. The GPI 'racing' radiator and hoses for the NC30 have arrived.
My bike has no fans etc - all gone to save weight.
Buuuutttt ... it overheats like crazy and constantly leaks when it does so. I am guessing the seal of the radiator cap is no longer any good and it just can't hold its water. The bloody cap ejected itself around turn 7 at Phillip Island last week. Most embarrassing and I had some explaining to do to marshalls and other riders.
I'd love a mega set of curved larger-than-texas rads but alas they cost too much.
So. I thought I'd give the GPI guys a go and their hoses as well.
You've all seen what the rads look like. Here are their hoses:
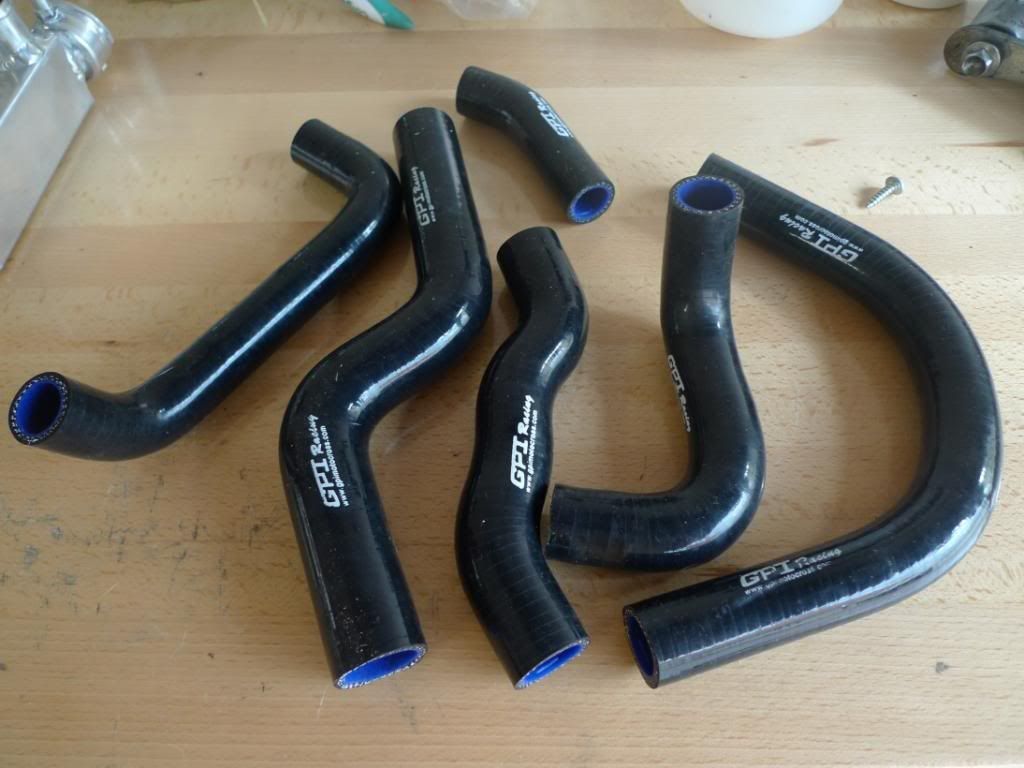
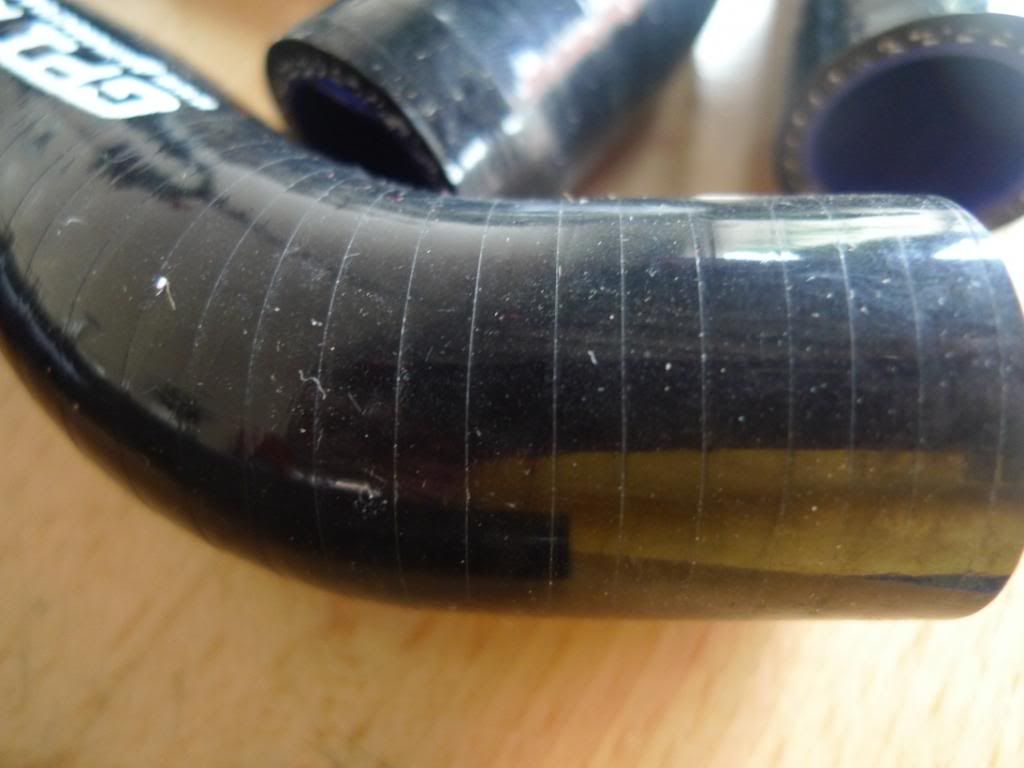
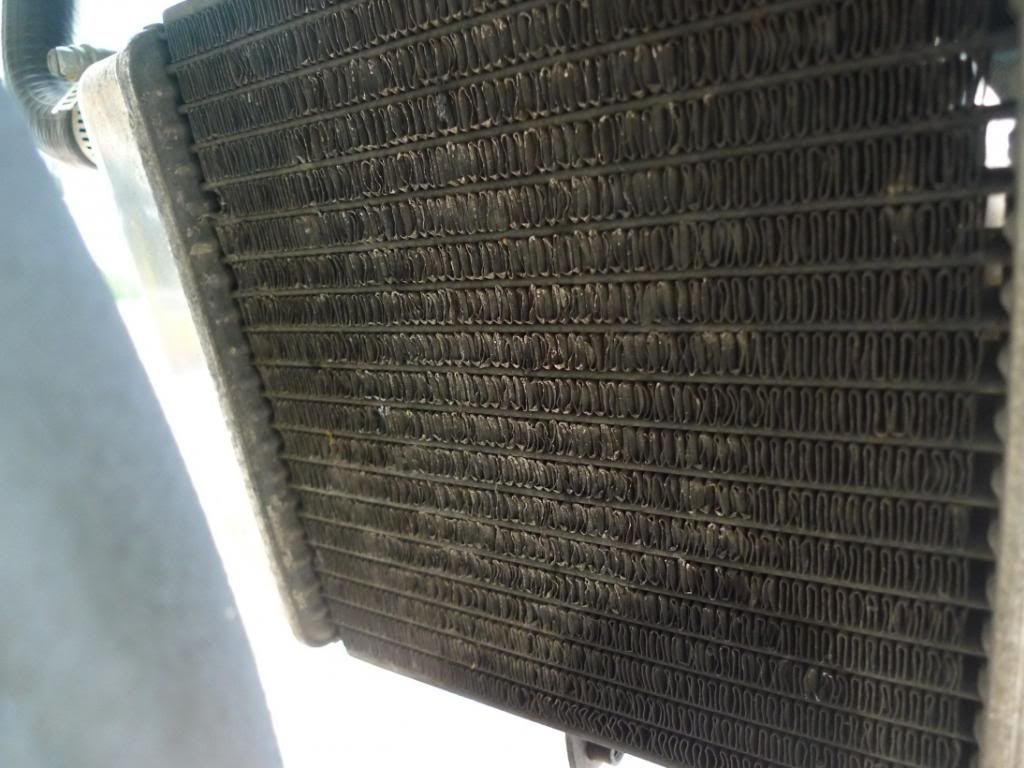
Cross Section:

Surface:
Okay, before we get going.
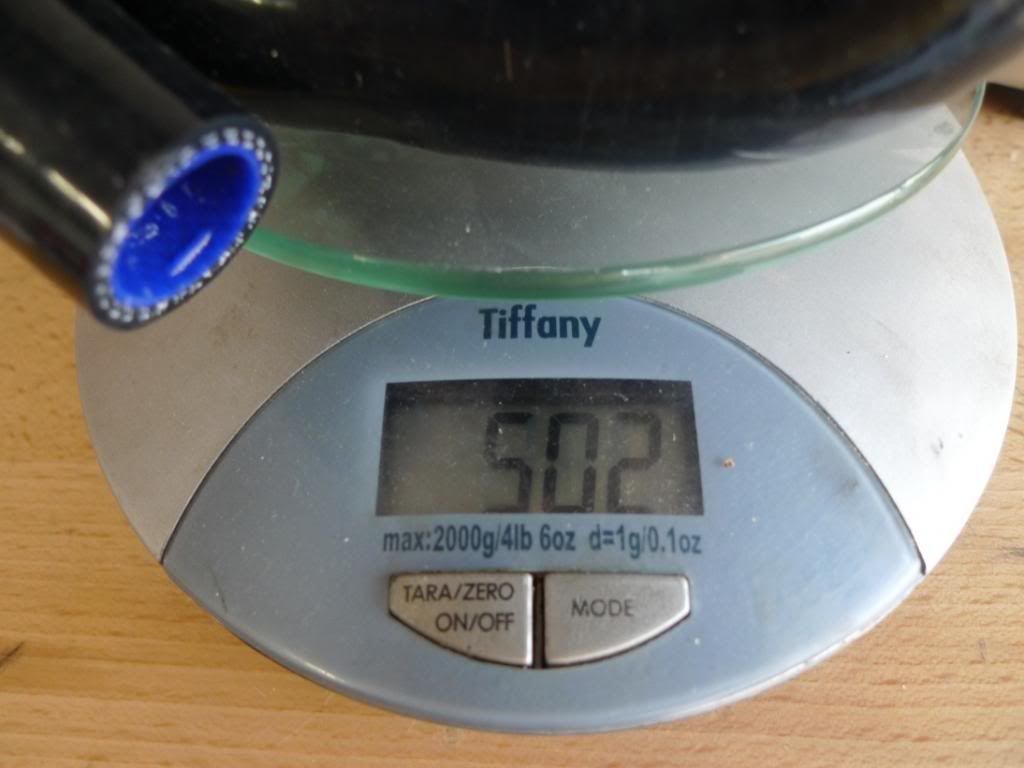
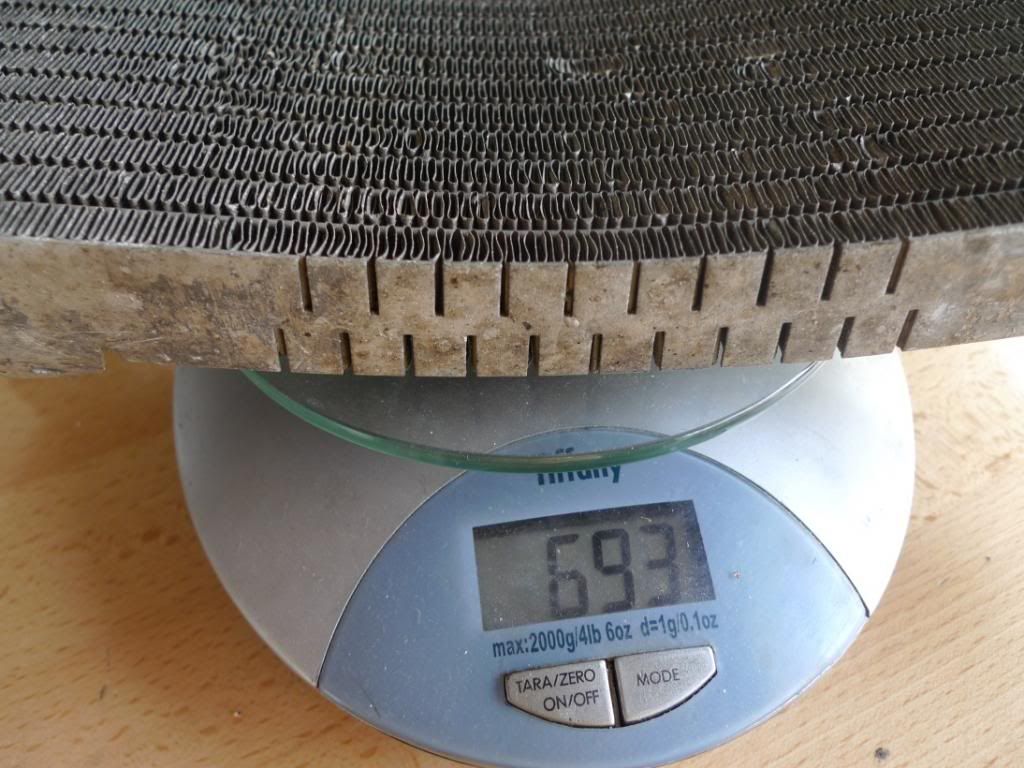
GPI pipes weight:
OEM pipes weight:

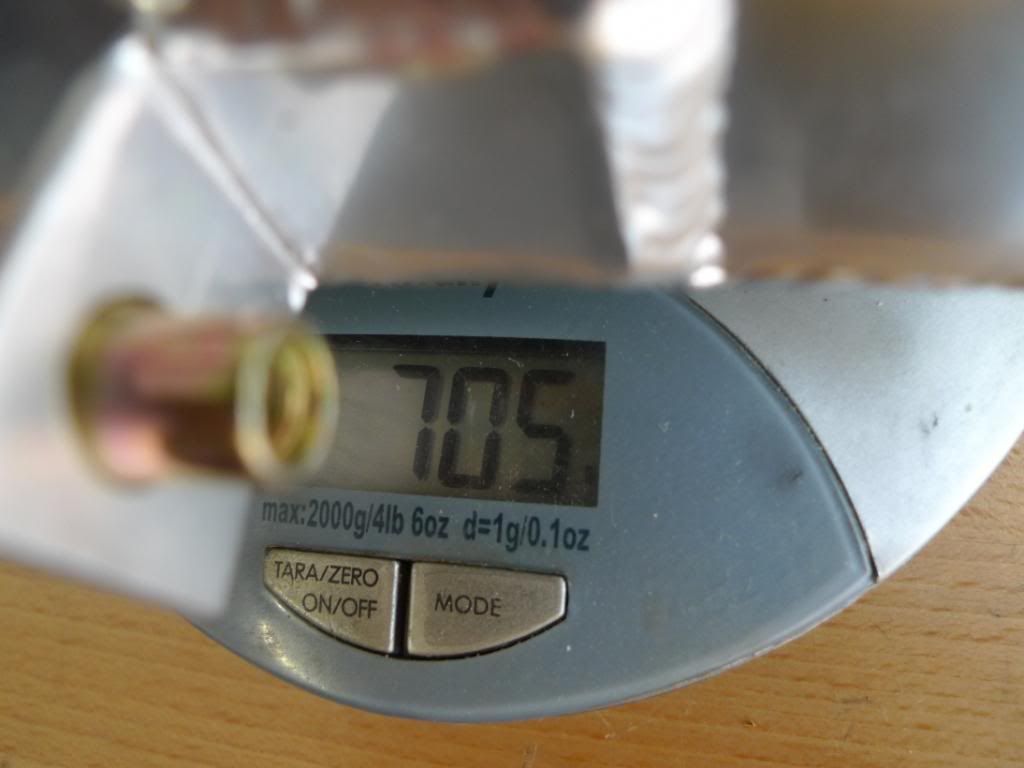
GPI lower rad weight:
EOM lower rad weight :
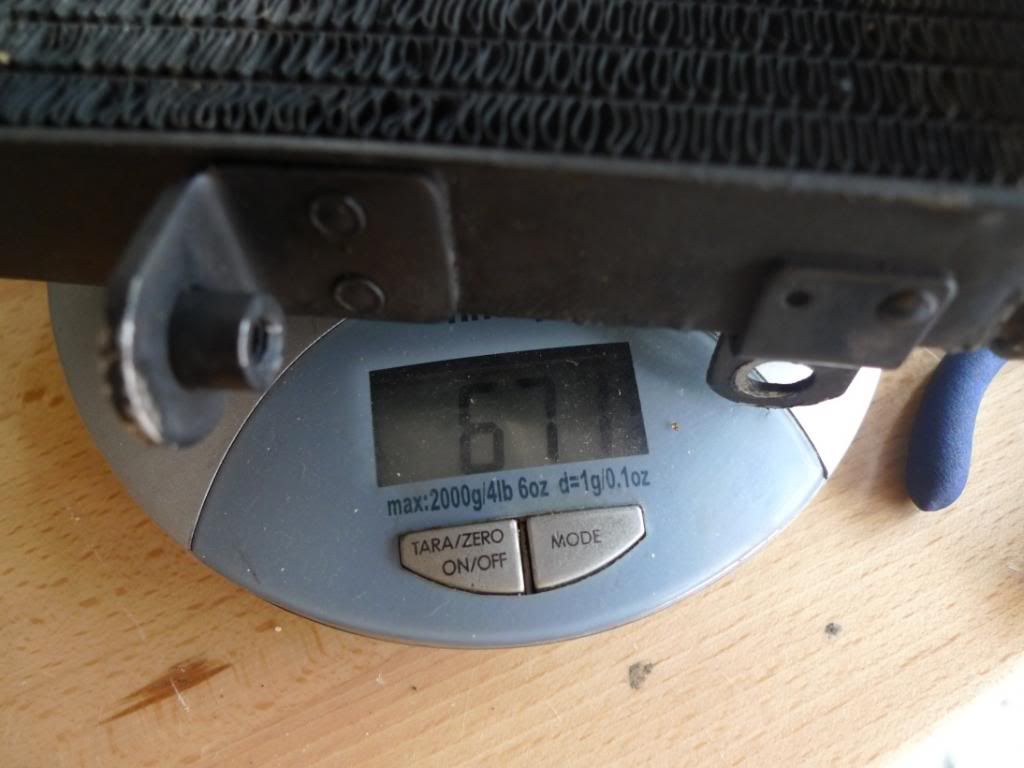
GPI upper rad weight:

OEM upper rad weight:
Not pretty, but lets hope they work:

The guys being replaced:
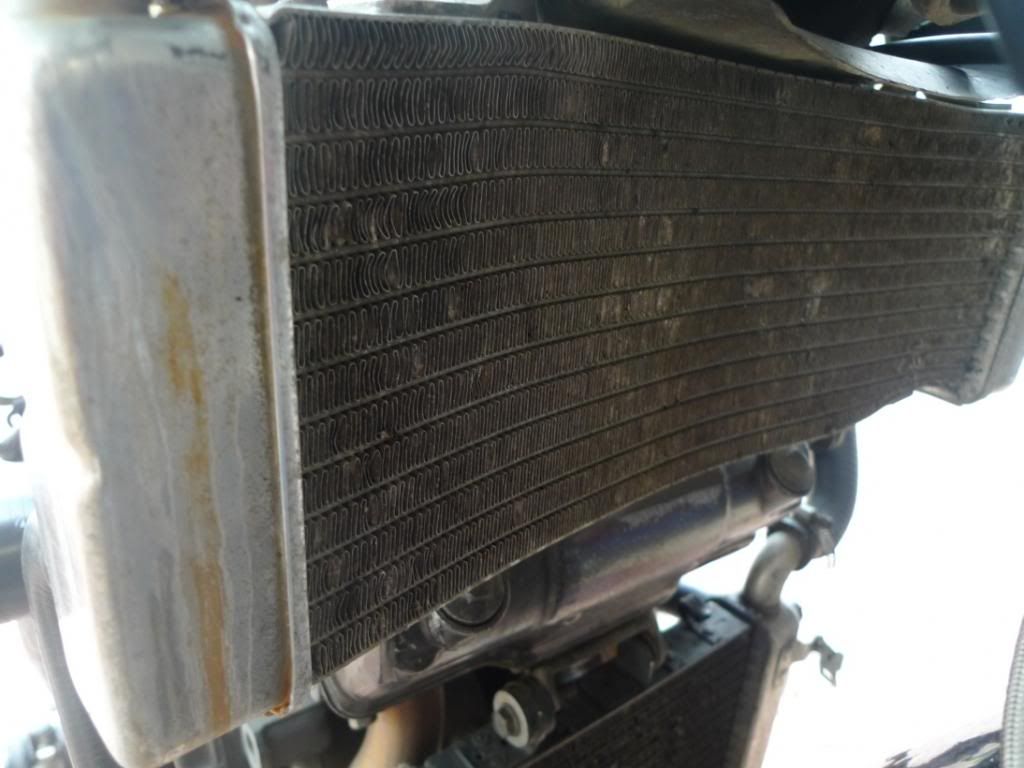
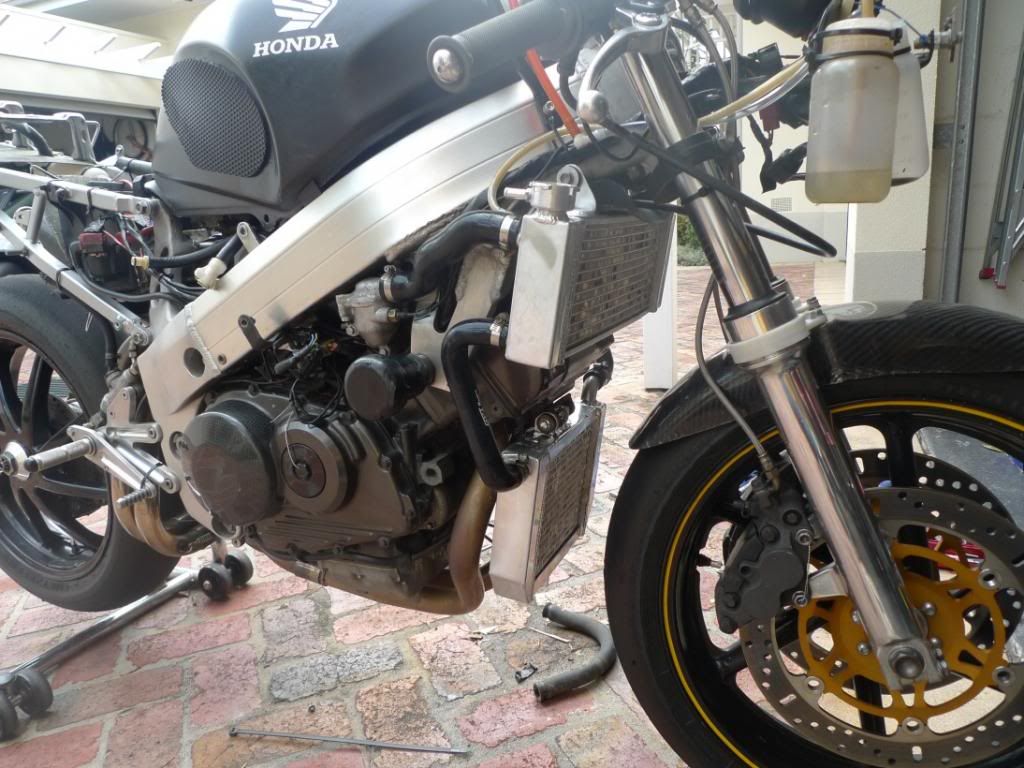
Okay, test fitment of upper. Yes, real evidence of overheating still there in my radiator overflow bottle. This is all for real folks.
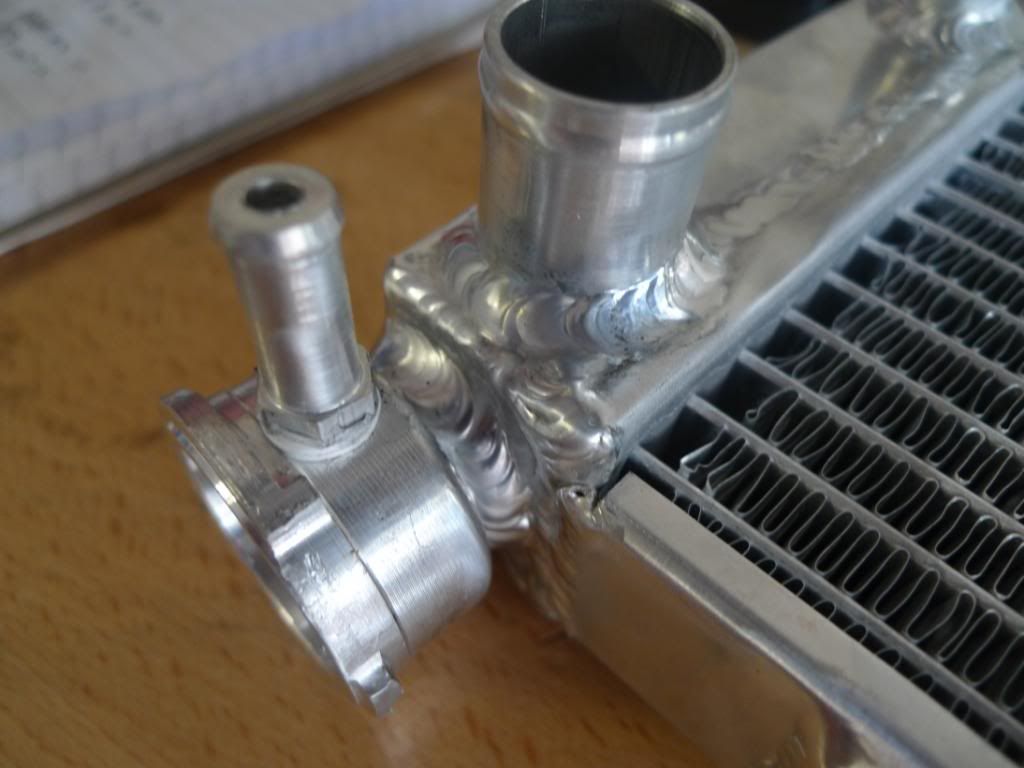
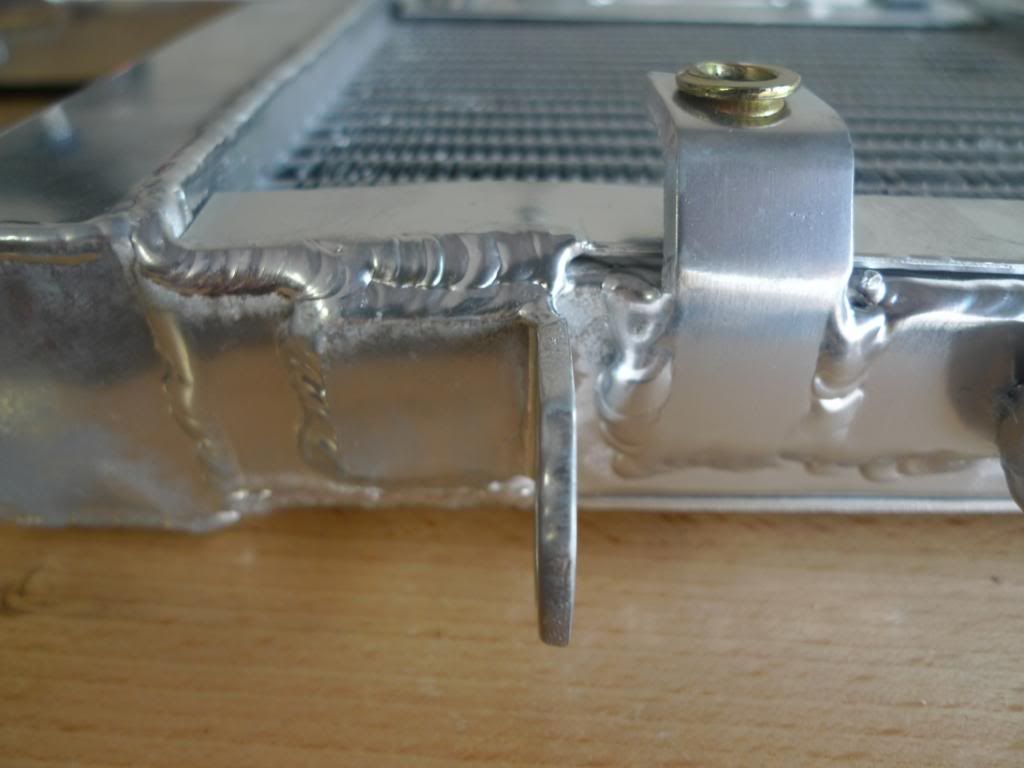
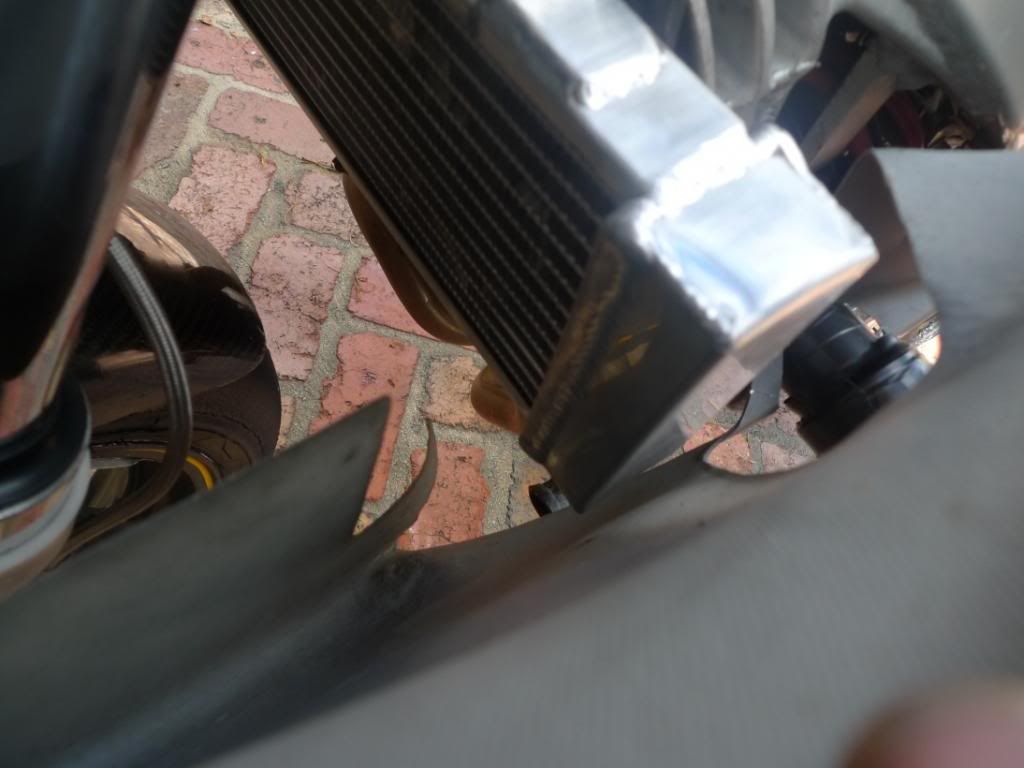
Bad Thing: Not quite the right size:
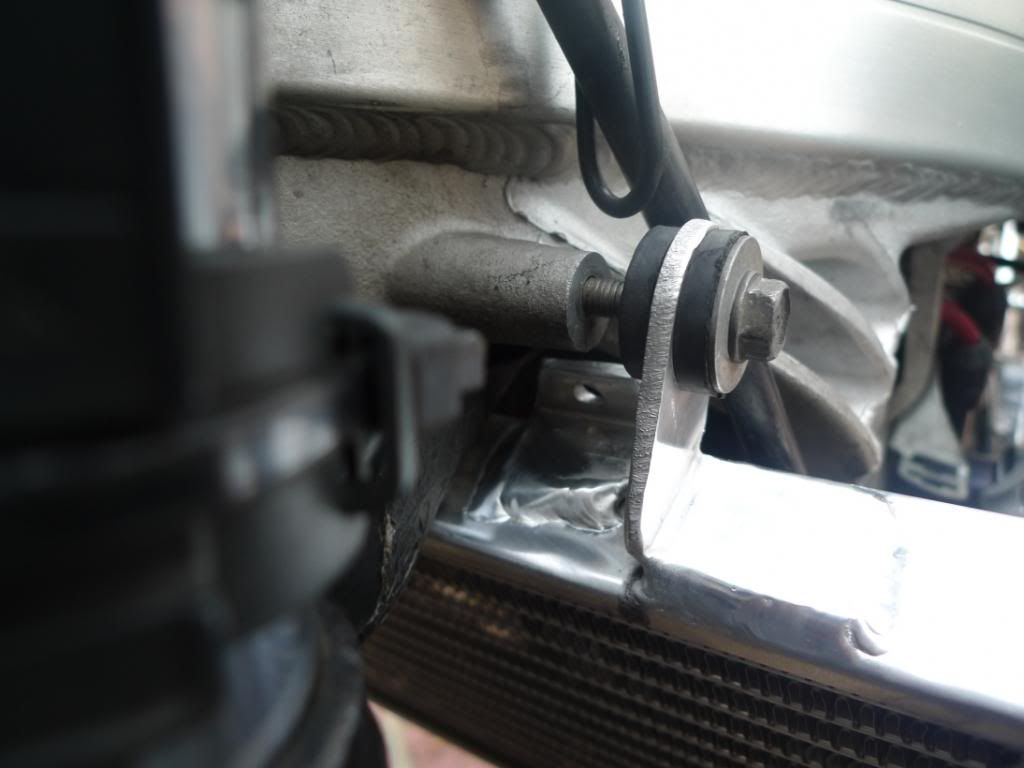
Bad thing: This doesn't look great either. This lower mount on the upper rad is not positioned correctly:
Bad thing: Look at this lower brackety thing (I guess they are for fans). I had to bend them to get things fitting - in the end I dremeled them off:
Bad thing: The lower mounts are nowhere near right:

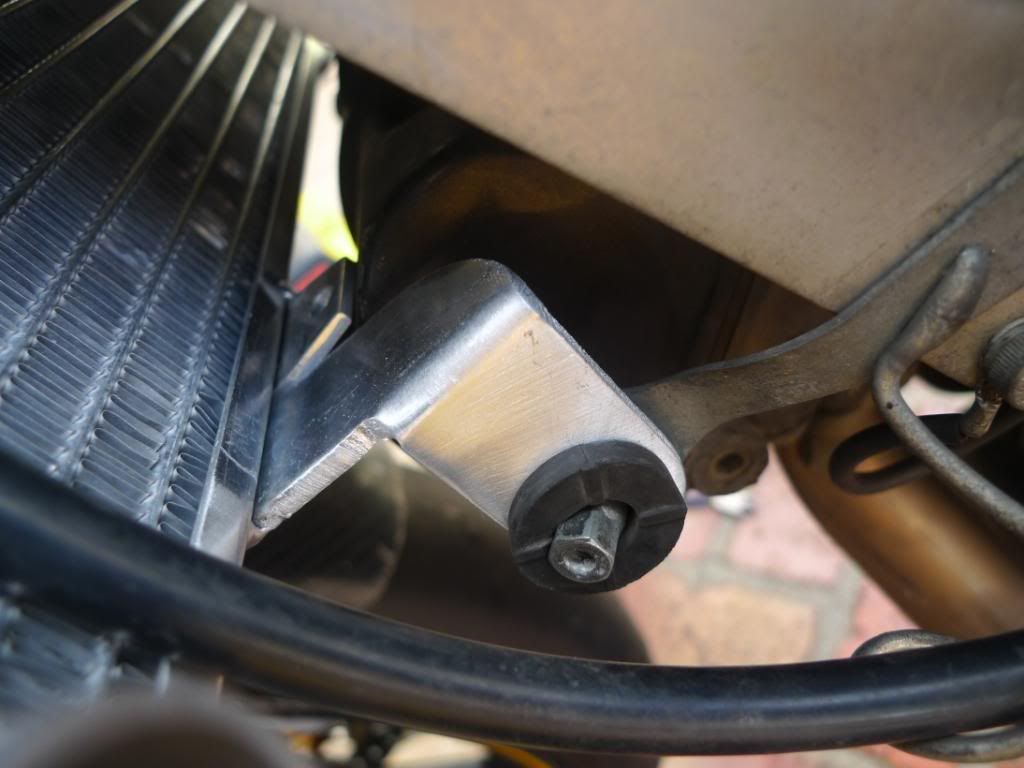
I had to dremel welds for the 'plug' on the right hand side off so I bold it on with a spacer. This is how it ended up - a bit sad really:

So, all in all, a bit shite ....
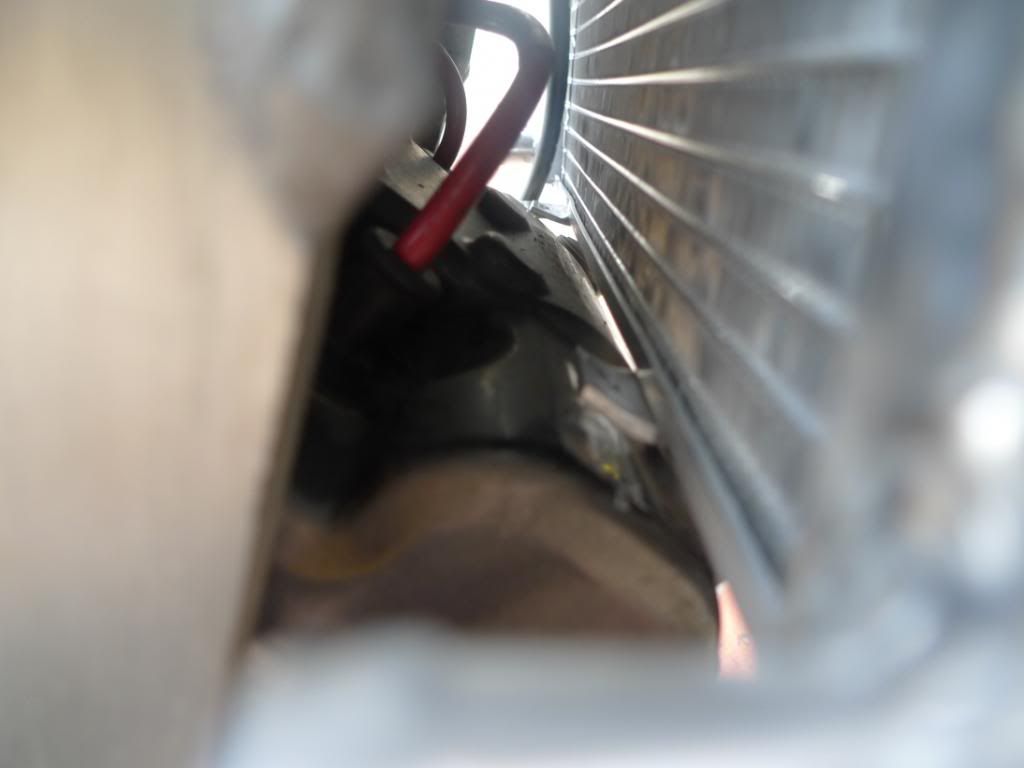
And then test fit of fairing. Left side okay. Right side not. BOLLOCKS! Bad thing:
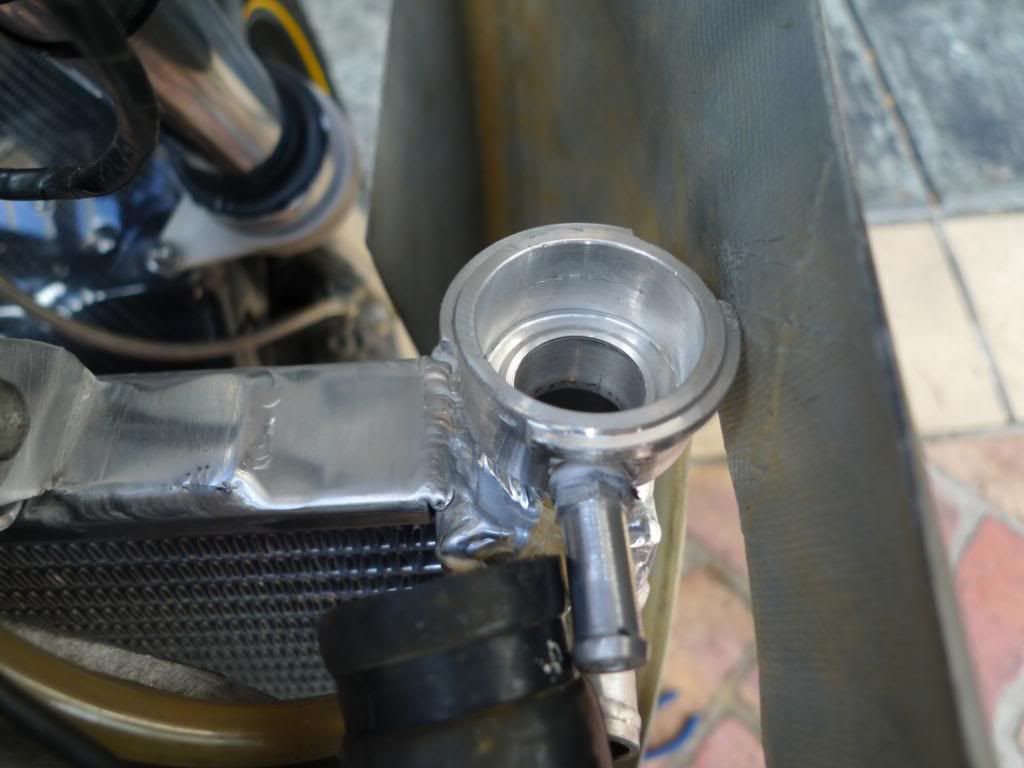
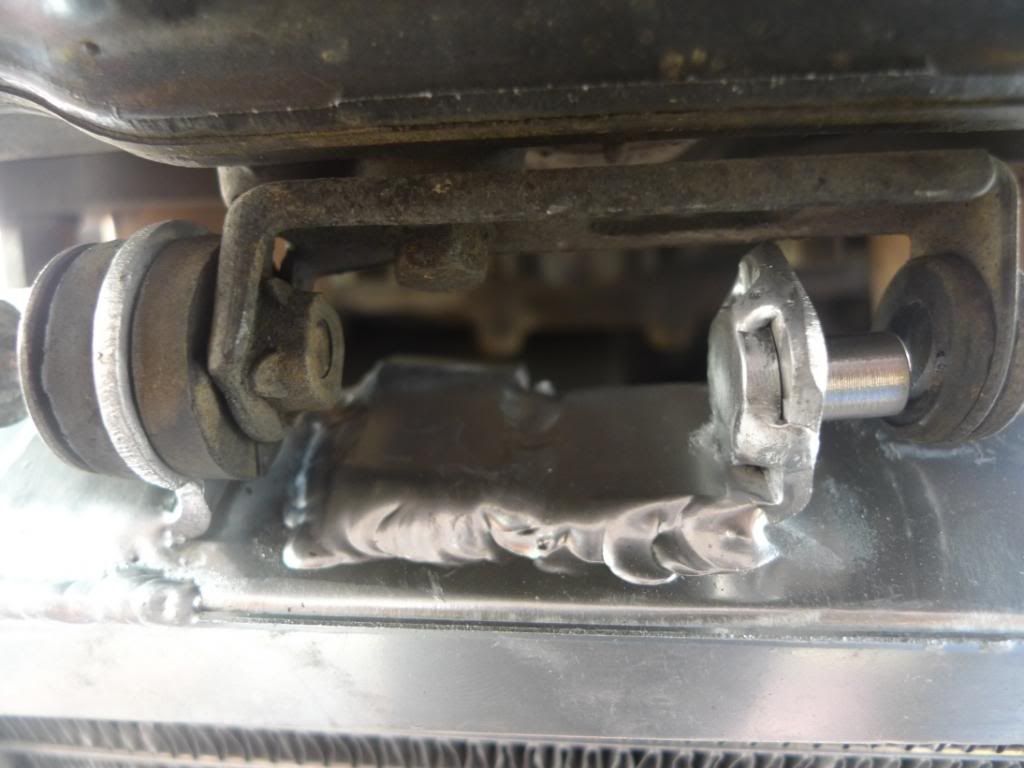
And then the GENIUSES decided to weld the tap cap neck on in such a way that the 'ears' on the cap are lateral - thus increasing the width of something already too wide. BOLLOCKS! This is going to be tough to get the fairing on. Nice.

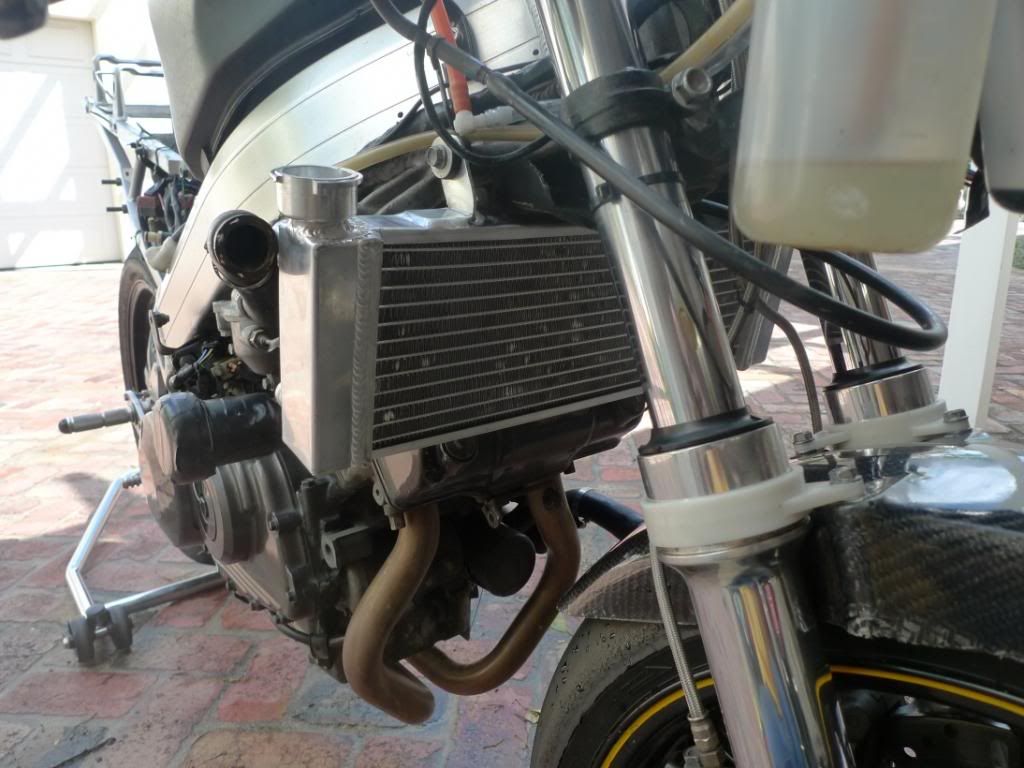
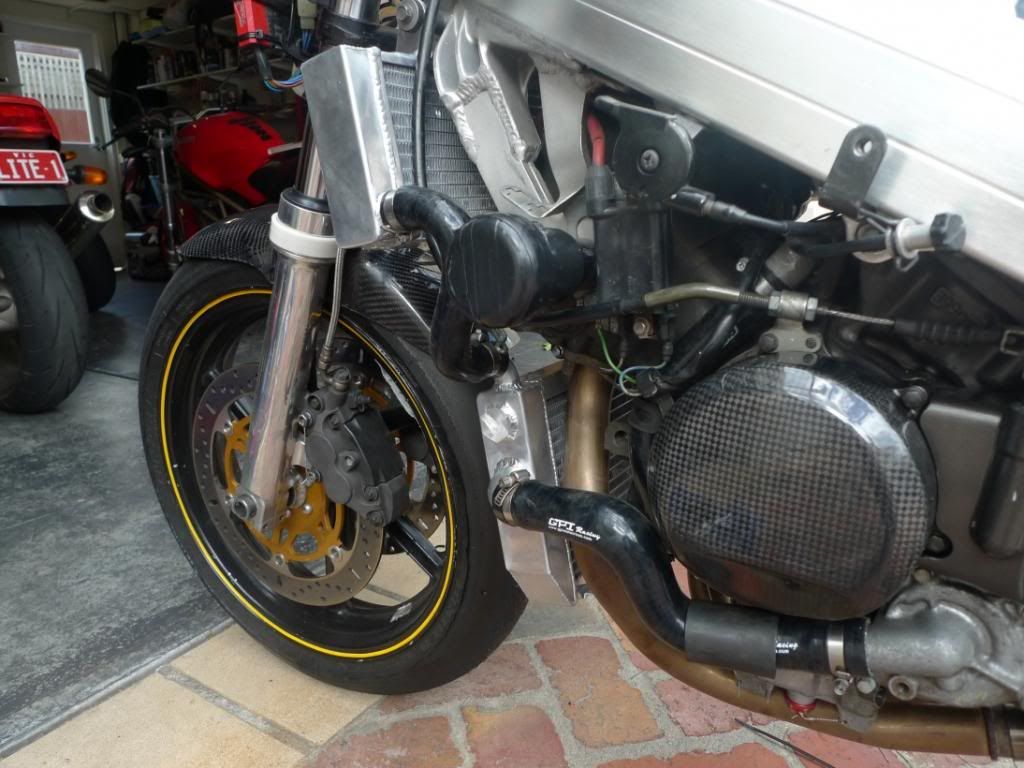
Okay. On with the hoses. Here is how it looks.
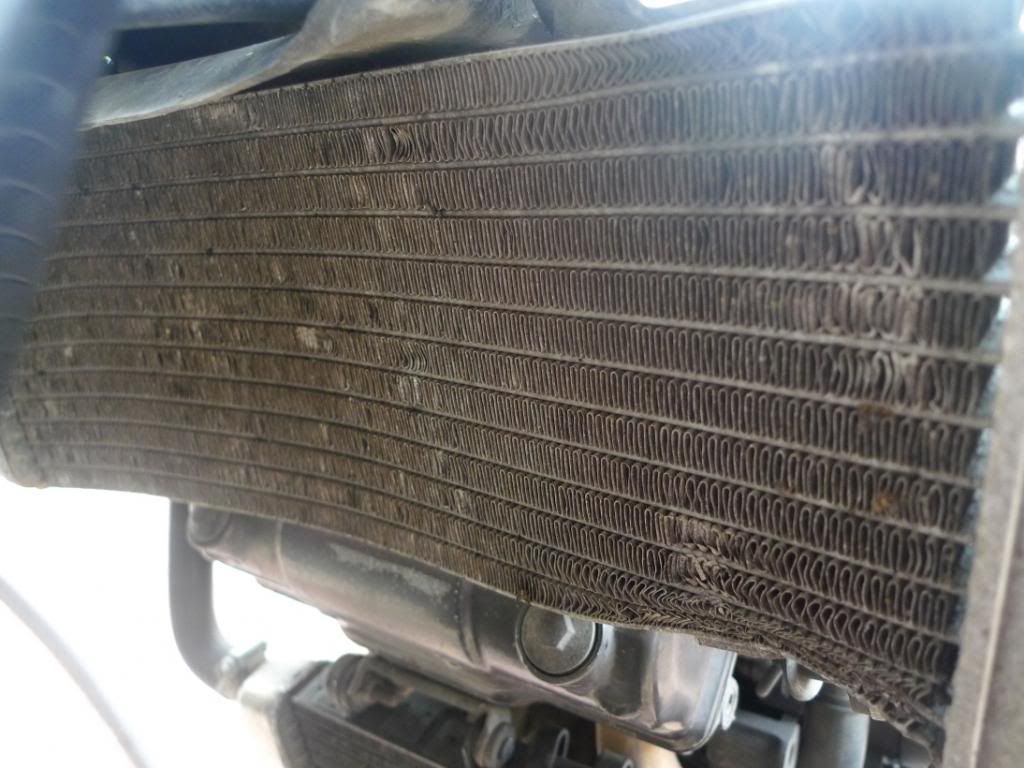
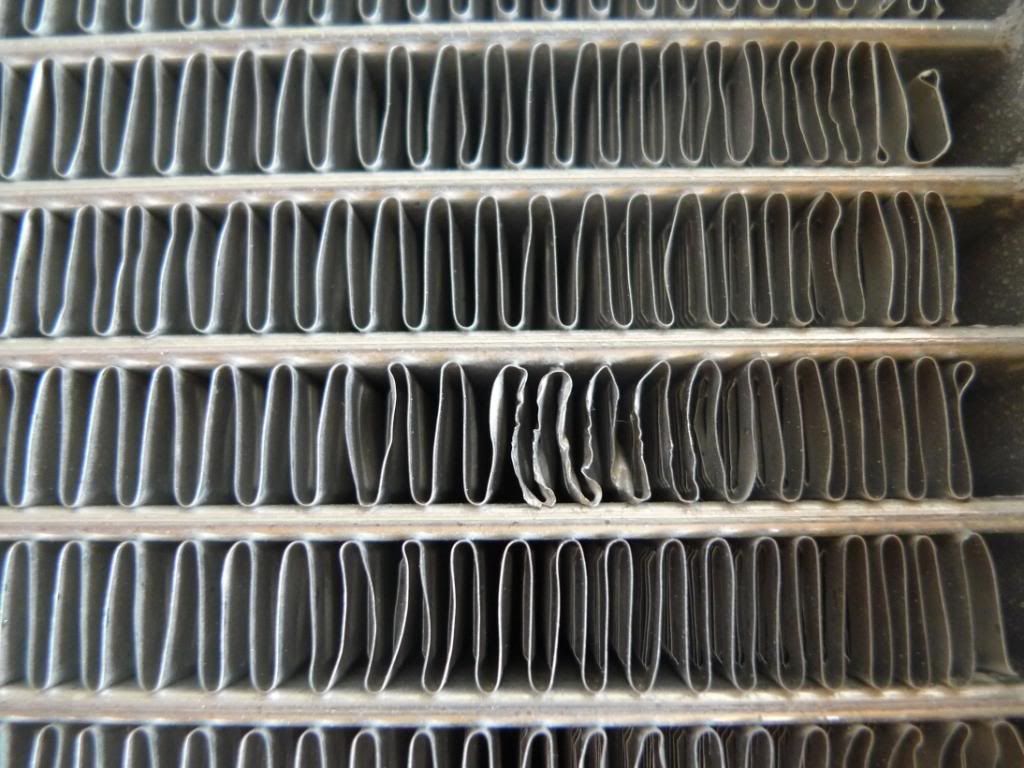
The material they use for the cooling fins is REALLY soft. I mean brush it with your finger and it folds over. I hope that translates into better cooling because it'll be hard to keep these little guys all lined up:
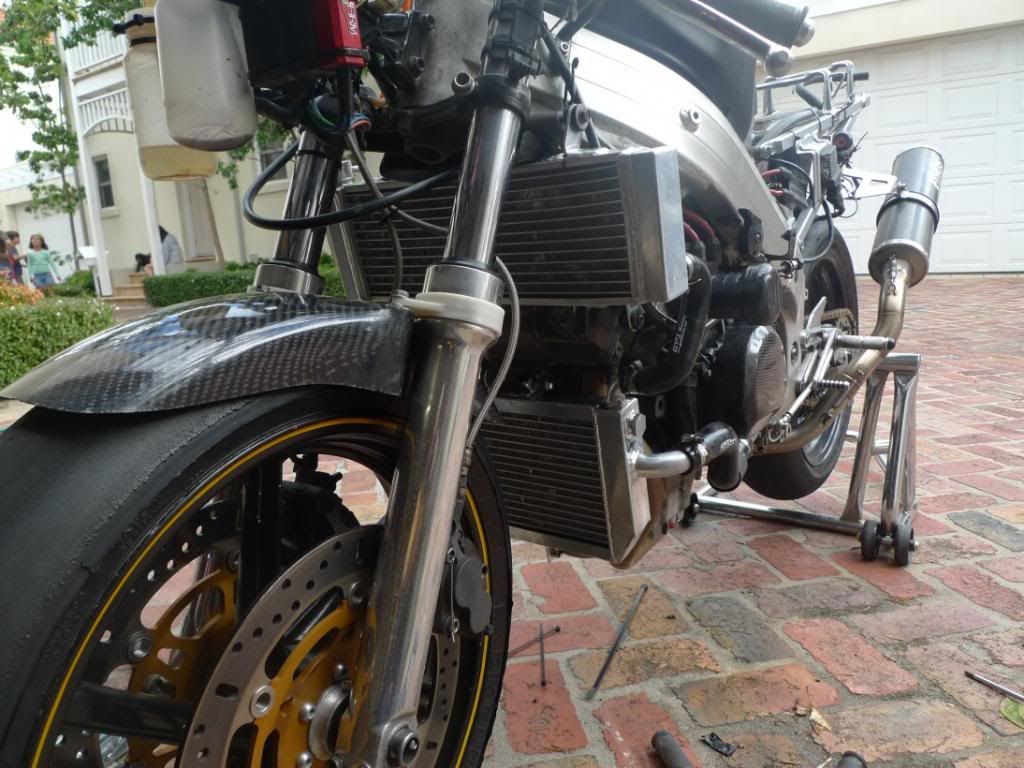
After fitment I started the bike and got it to 104 degrees Celsius and there was not a hint of leakage so that is a good sign - previously, at that temperature it would have leaked in a nasty way. That there is a good thing.
Conclusion (so far). On the bad side they really are a bit shite. The top is too wide and made worse with the lateral knobs on the tank cap. The mounts are pretty far off the mark. The fins feel like butter, the brackets for mounting fans seem to foul with the heads.
On the plus side, they are cheap and certainly are thicker than OEM and the side tanks are also larger so I am anticipating some better cooling. Well I certainly I hope so!
Oh, and re the hoses. All went well there. Everything fitted perfectly so no complaints at all.
My bike has no fans etc - all gone to save weight.
Buuuutttt ... it overheats like crazy and constantly leaks when it does so. I am guessing the seal of the radiator cap is no longer any good and it just can't hold its water. The bloody cap ejected itself around turn 7 at Phillip Island last week. Most embarrassing and I had some explaining to do to marshalls and other riders.
I'd love a mega set of curved larger-than-texas rads but alas they cost too much.
So. I thought I'd give the GPI guys a go and their hoses as well.
You've all seen what the rads look like. Here are their hoses:
Cross Section:
Surface:
Okay, before we get going.
GPI pipes weight:
OEM pipes weight:
GPI lower rad weight:
EOM lower rad weight :
GPI upper rad weight:
OEM upper rad weight:
Not pretty, but lets hope they work:
The guys being replaced:
Okay, test fitment of upper. Yes, real evidence of overheating still there in my radiator overflow bottle. This is all for real folks.
Bad Thing: Not quite the right size:
Bad thing: This doesn't look great either. This lower mount on the upper rad is not positioned correctly:
Bad thing: Look at this lower brackety thing (I guess they are for fans). I had to bend them to get things fitting - in the end I dremeled them off:
Bad thing: The lower mounts are nowhere near right:
I had to dremel welds for the 'plug' on the right hand side off so I bold it on with a spacer. This is how it ended up - a bit sad really:
So, all in all, a bit shite ....
And then test fit of fairing. Left side okay. Right side not. BOLLOCKS! Bad thing:
And then the GENIUSES decided to weld the tap cap neck on in such a way that the 'ears' on the cap are lateral - thus increasing the width of something already too wide. BOLLOCKS! This is going to be tough to get the fairing on. Nice.
Okay. On with the hoses. Here is how it looks.
The material they use for the cooling fins is REALLY soft. I mean brush it with your finger and it folds over. I hope that translates into better cooling because it'll be hard to keep these little guys all lined up:
After fitment I started the bike and got it to 104 degrees Celsius and there was not a hint of leakage so that is a good sign - previously, at that temperature it would have leaked in a nasty way. That there is a good thing.
Conclusion (so far). On the bad side they really are a bit shite. The top is too wide and made worse with the lateral knobs on the tank cap. The mounts are pretty far off the mark. The fins feel like butter, the brackets for mounting fans seem to foul with the heads.
On the plus side, they are cheap and certainly are thicker than OEM and the side tanks are also larger so I am anticipating some better cooling. Well I certainly I hope so!
Oh, and re the hoses. All went well there. Everything fitted perfectly so no complaints at all.
-
alexwitham

- Site Supporter

- Posts: 1340
- Joined: Wed May 20, 2009 10:04 pm
- Bike owned: 675R, GSXR6, NC30
- Location: Norwich
Re: GPI Radiators and hoses installation & review - pics
Good work, nice review.
I use similar radiators from abroad and they've lasted well, coping with track days and road use.
I use similar radiators from abroad and they've lasted well, coping with track days and road use.
-
bollo
- Settled in member
- Posts: 61
- Joined: Sat Dec 01, 2012 10:34 am
Re: GPI Radiators and hoses installation & review - pics
check out RB imports they have a large top r ad custom made in Australia yeah $500 is not cheap but it a work of art & guaranteed of a perfect fit , they told me that changing out the bottom rad to a bigger one didn't make any difference hence they recommend just the top
my top rad is not to good but being a race bike i'll wait to see how it holds up as it is working as far as i know
also good work on the review very thorough
my top rad is not to good but being a race bike i'll wait to see how it holds up as it is working as far as i know
also good work on the review very thorough
-
Dynamohum
- Site Supporter
- Posts: 780
- Joined: Sun May 04, 2008 9:07 am
- Location: glasgow
Re: GPI Radiators and hoses installation & review - pics
good review thanks . a few of us have bought these rads and to be fair for the price would expect fitment issues of some sort yours look well out of alignment might just be the luck of the draw regarding this as some seem to go on with minor tweaking of the bracketry .
-
Neosophist
- Moderators

- Posts: 8172
- Joined: Fri Jul 04, 2008 1:01 pm
- Bike owned: CBR954
Re: GPI Radiators and hoses installation & review - pics
Your original radiators actually look pretty good, a new rad cap is probably all you needed (they don't last forever)
But anyway you have new ones now.
Have you checked the water-pump isn't disintrgated? It can also cause over-heating and cooling issues and always wise to check it
But anyway you have new ones now.
Have you checked the water-pump isn't disintrgated? It can also cause over-heating and cooling issues and always wise to check it
xivlia wrote:i dont go fast on this bike so really do not need a rear brake.. /
vic-vtrvfr wrote:Ask xivlia for help, he's tackled just about every problem u could think of...
-
StrayAlien
- Familiar Member
- Posts: 361
- Joined: Sun Jan 15, 2012 9:27 am
- Bike owned: NC30, Dukes, Hog
- Location: Melbourne, Straya
Re: GPI Radiators and hoses installation & review - pics
Thank guys,
Re RB Imports: yes, I had heard they had a good one ... but $500 is on the steep side for me.
re new cap: Actually, I have tried two new caps. Same results. I think the leaking was a result of the cap not being able to seal well any more as its seat in the radiator neck was not a bit rough - I tried smoothing it out but no luck. Also the tangs on the radiator neck that the cap hangs on with had become quite worn. Even some modification to the cap and a bit of filing on the neck didn't solve it (it made it better - but it still leaked).
I wish it were just the cap, then I could have saved $300 and a day or agro getting them on! :-)
-
VtypeV4
- Settled in member
- Posts: 220
- Joined: Sat Jun 27, 2009 10:57 pm
- Bike owned: FJ1200 3CV, NC30, CX500
Re: GPI Radiators and hoses installation & review - pics
Shame you had bad luck with your rads, mine fitted with little drama or alignment issues..
-
alexwitham
- Site Supporter
- Posts: 1340
- Joined: Wed May 20, 2009 10:04 pm
- Bike owned: 675R, GSXR6, NC30
- Location: Norwich
Re: GPI Radiators and hoses installation & review - pics
As above, but I use Silhouette bodywork which appears wider.
-
Cru Jones

- Site Supporter
- Posts: 199
- Joined: Wed Nov 10, 2010 9:47 pm
- Bike owned: NC35
- Location: California
- Contact:
Re: GPI Radiators and hoses installation & review - pics
I'm often surprised by the fitment issues with things like this in this day and age. I mean how hard is it for them to order a brand new set and just run some program to scan them and then properly import into some sort of program for them to make a proper set of jigs? Seems like very basic QC that's lacking.
...2T bikes exist and are ready to meet your 4T challengers. - ToraTora
-
venom51
- Settled in member
- Posts: 150
- Joined: Wed Apr 30, 2008 8:11 pm
- Location: Cumming, GA USA
- Contact:
Re: GPI Radiators and hoses installation & review - pics
You are assuming the folks making these have access to any of the type of equipment. That however isn't an excuse for not having a simple ruler or tape measure.Cru Jones wrote:I'm often surprised by the fitment issues with things like this in this day and age. I mean how hard is it for them to order a brand new set and just run some program to scan them and then properly import into some sort of program for them to make a proper set of jigs? Seems like very basic QC that's lacking.