V4 Carb Sync Guide
Posted: Sat Feb 09, 2013 7:28 pm
Mods please feel free to sticky if acceptable or delete if necessary.
Disclaimer: I am not responsible for any harm or damage caused to you or your motorcycle or anyone else when you use this guide. Use this guide at your own risk, if you mess your bike up, injure yourself or anyone else it is NOT my fault.
Things you will NEED for the carb balance:
One set of vacuum gauges for a 4 cylinder engine.
Allen key set.
10mm spanner.
8mm spanner.
Long number 2 phillips head screwdriver.
Stubby number 2 phillips head screwdriver.
13mm socket and ratchet.
Pliers, snipe nose or bull nose will do.
Right angle screwdriver OR 7mm socket.
Piece of 2x4 wood to lever carbs up or similar.
Things you may WANT for the carb balance:
Auxiliary fuel tank.
Pair of rubber gloves. (You probably will need these)
I advise that you sync your carbs AFTER you re-jet, adjust float heights, change needle washers and check valve clearances or you may have to do it again.
Firstly remove your tail unit, inspection panels and lowers. (Lowers not necessary but helps with space)
Next remove tank,
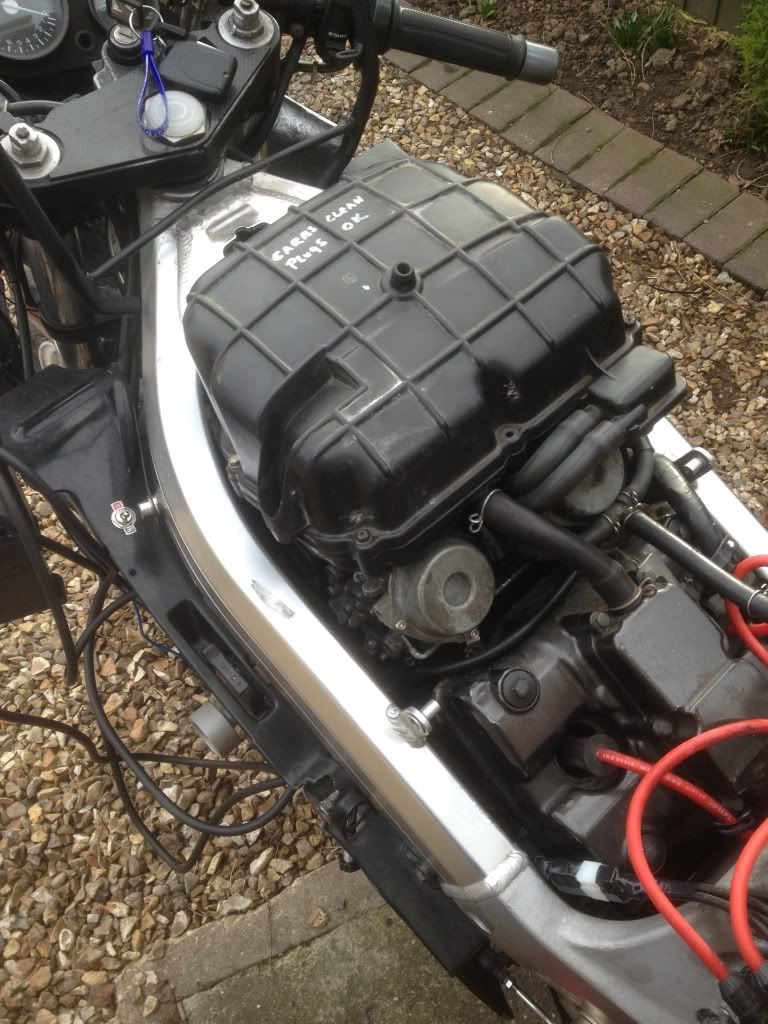
airbox,
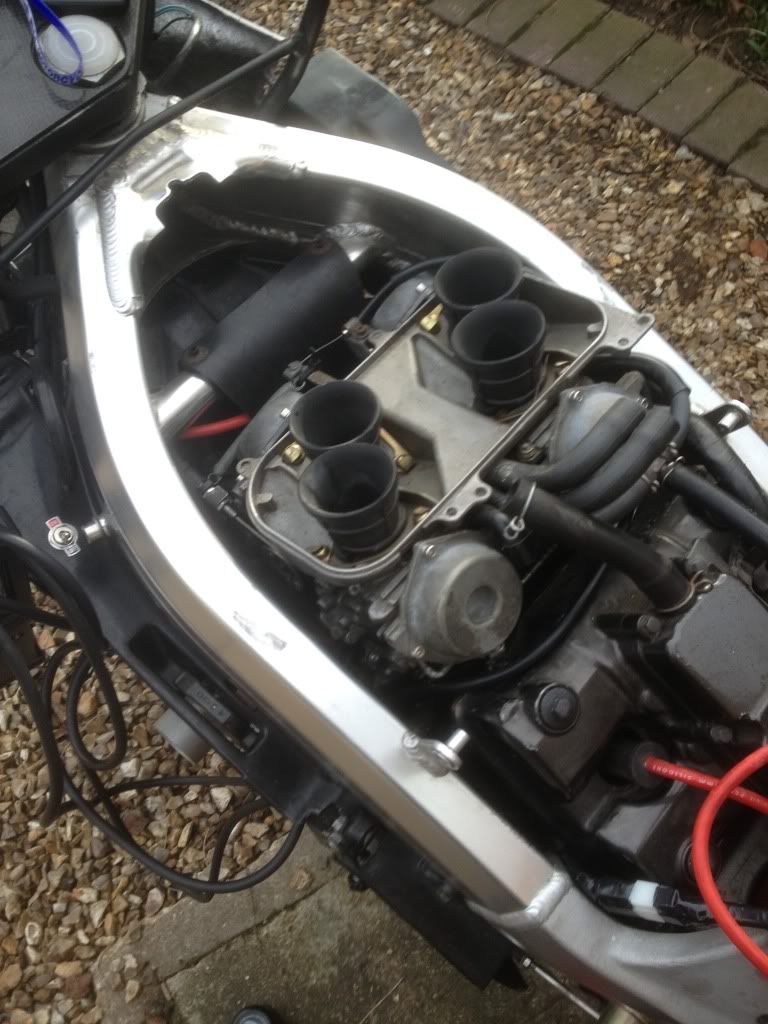
carbs,
and to make things much easier, carb rubbers.
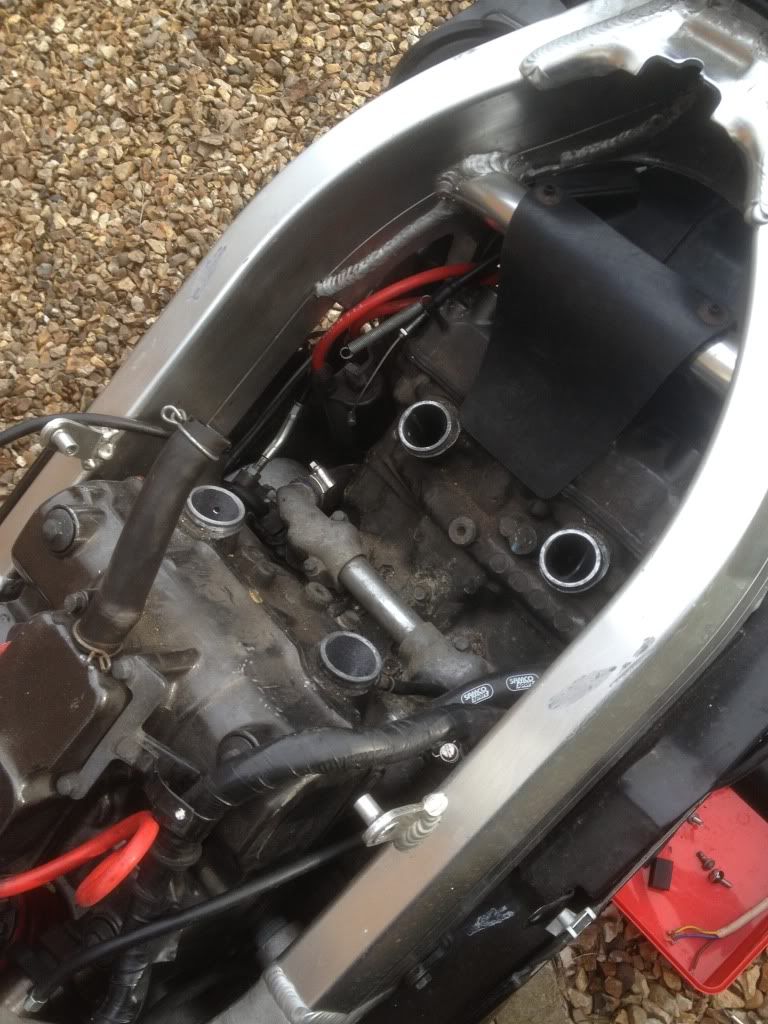
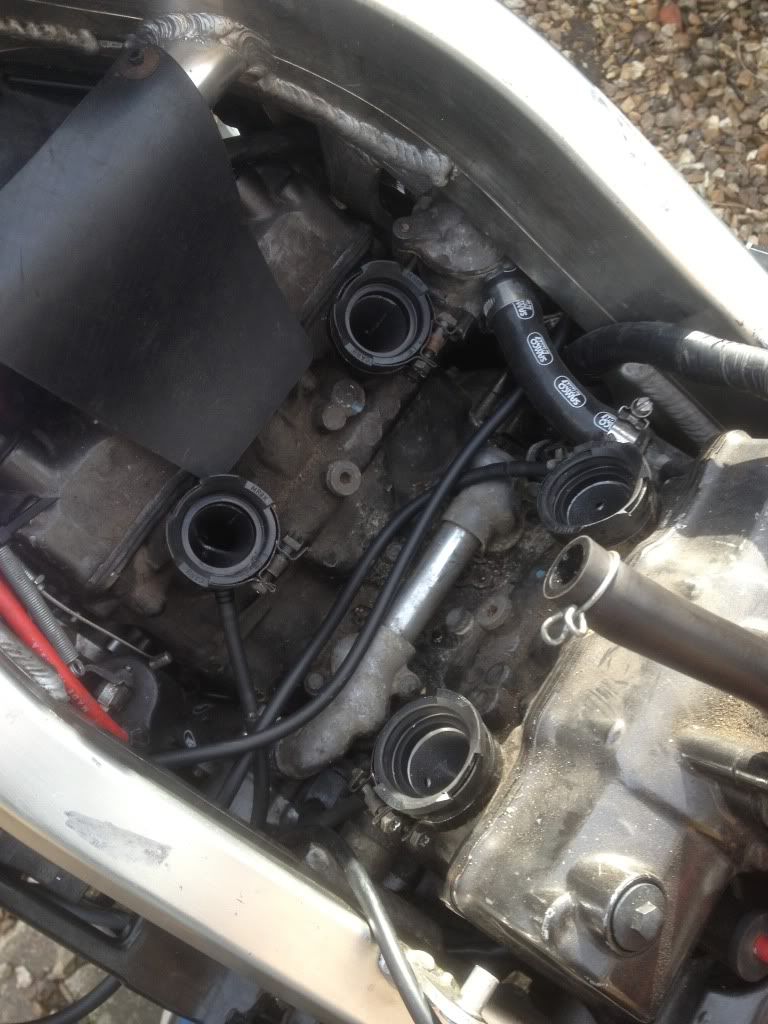
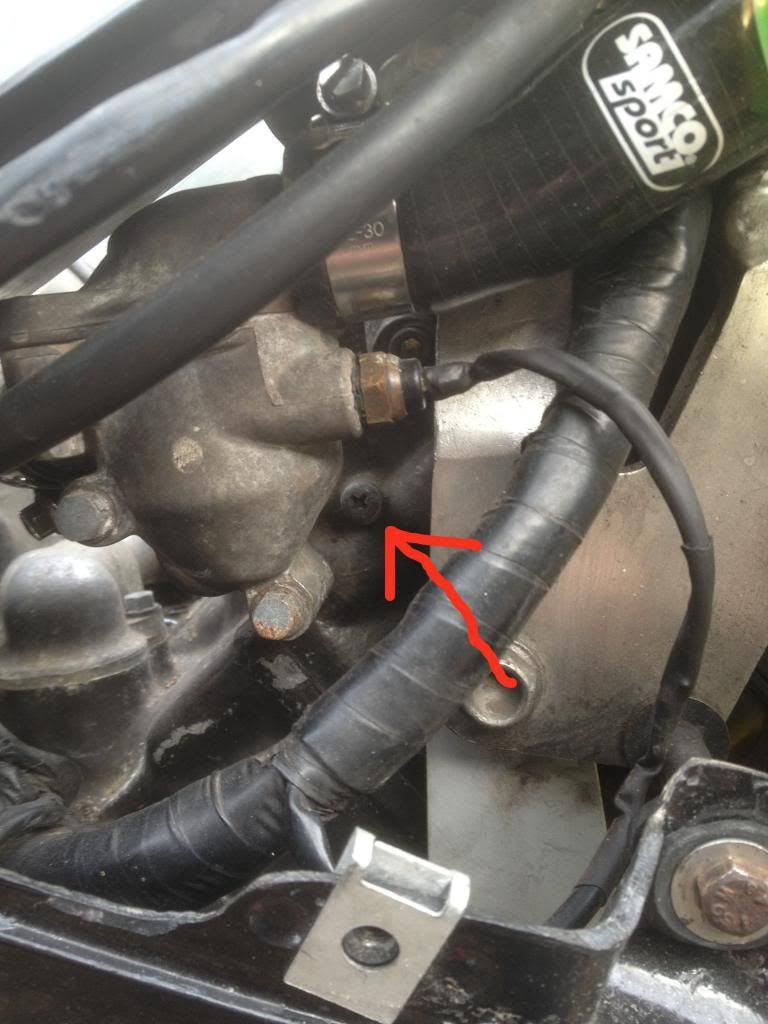
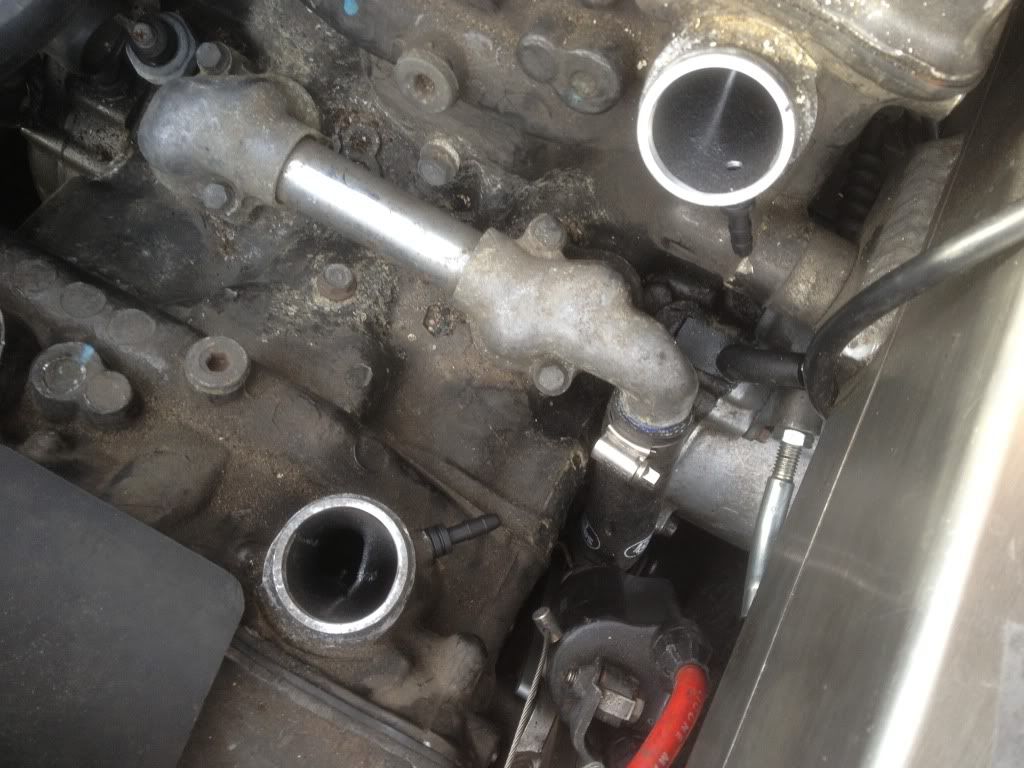
Next you need to remove the blanking screws and the vacuum hose take-off for the fuel tap. The blanking screw for cylinder 4 is accessed next to the thermostat housing here:
Then screw in the adapters from your carb balancing kit and attach the hoses.

Connect up the hoses to the vacuum gauges making sure you do it so cylinders 1-4 go from left to right on the gauges.
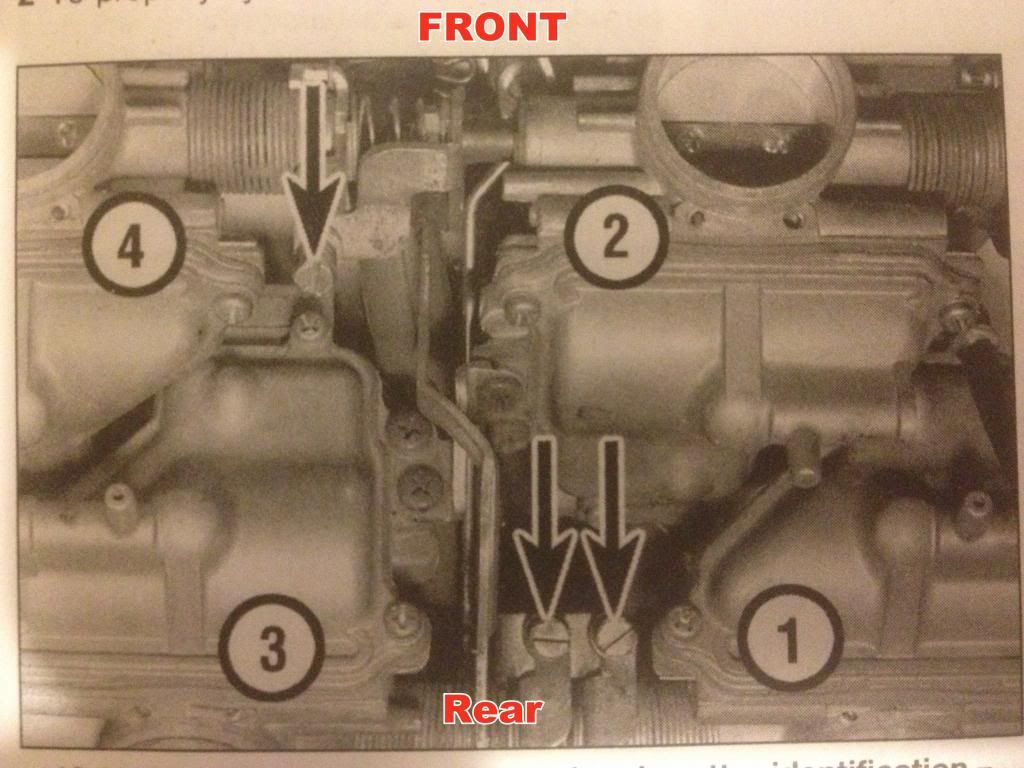
Cylinder config:
Front
2 4
1 3
Rear
After this stick back on your carbs and airbox. Then put back on your tank or connect up your auxiliary fuel tank. (If using your standard tank you'll need to apply a vacuum to the tap if the tap is not modified. If you cannot sustain a vacuum on the tap then apply a vacuum and seal the hose somehow)
Now here comes the tricky, fiddly and potentially painful bit. Depending on how you adjust the carb sync screws.
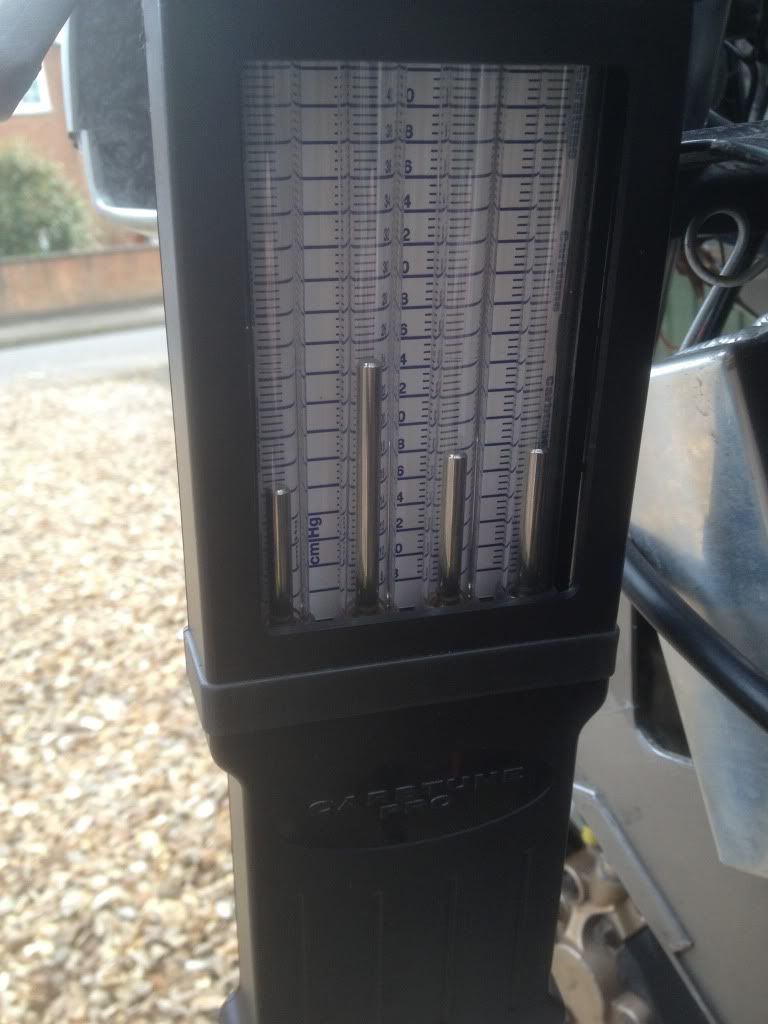
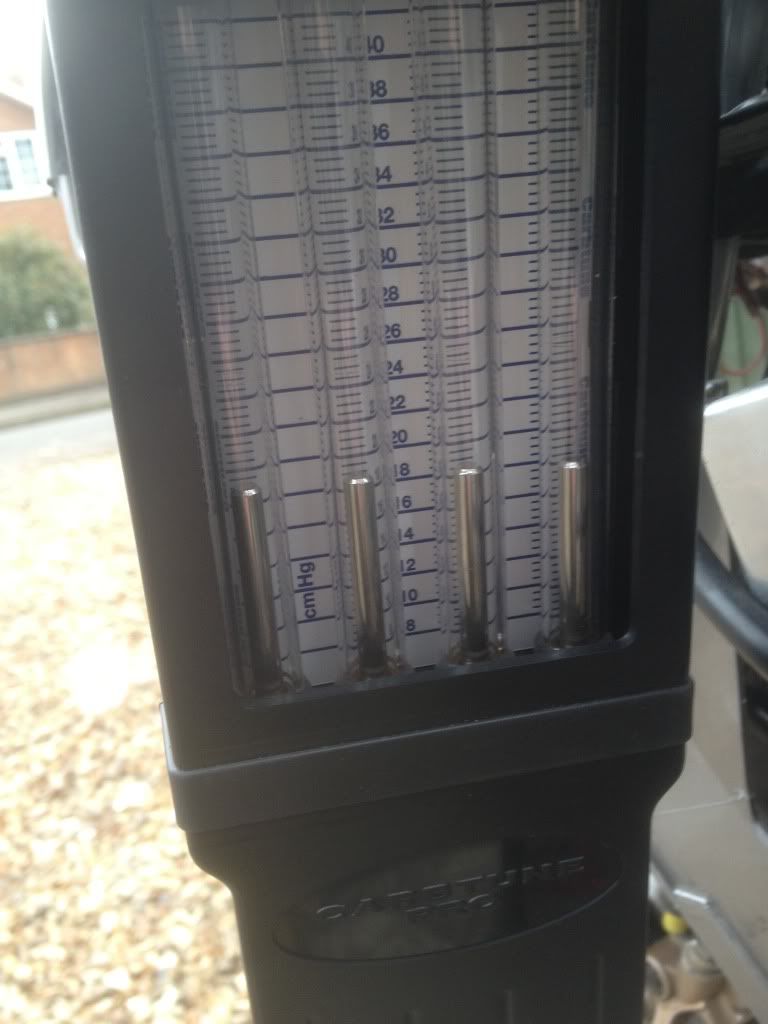
Start the bike and adjust the idle a little higher than standard, say 1500 rpm - 1700 rpm and let the bike warm slightly. You should see something like this:
If you are using a right angle screwdriver then simply insert the driver into the vee from the left side of the bike and use to turn the adjusters in or out depending on which way you need the level in the gauge to go.
If you don't have a fancy right angle screwdriver or can't get on with it then you'll be using a 7mm socket and a pair of rubber gloves. With the rubber gloves on and socket in hand put your hand into the vee and locate the sync screws with the socket and adjust as appropriate. Be very careful as the longer the engine runs the hotter it will get and could burn your hand even with the gloves on. (Again I take no responsibility for injury, that is your own fault)
Don't press on the screws or it will act like the throttle and increase or decrease the revs and you will get a false reading.
When synchronising the carbs first sync no.4 carb to no.2 carb (master carb). Carb no.4 screw is the only screw at the front of the carbs. Adjust carb no. 4 to match carb no. 2 as close as possible.
Then sync no.1 carb to no.3 carb using the rear screw that is next to carb no.1 (closest screw to you as you enter the vee from the left side of the bike). Again adjust as close as possible to each other.
Finally sync the rear carbs (1 and 3) using the screw that is next to carb no.3 (furthest screw from you as you enter the vee from the left side of the bike). Adjust as close as possible to carbs no. 2 and 4.
(Yes I have done what you think I have there....)
You should now have something that looks like this on your vacuum gauges:
When everything is sync'd then give the throttle a little blip to settle the linkage and re-adjust where necessary. Then turn back your idle speed to the spec and turn off the bike.
After that all you need to do is rip everything apart again, remove the hoses and adapters, re-fit the blanking screws and vacuum take-off and re-assemble the lot!
Disclaimer: I am not responsible for any harm or damage caused to you or your motorcycle or anyone else when you use this guide. Use this guide at your own risk, if you mess your bike up, injure yourself or anyone else it is NOT my fault.
Things you will NEED for the carb balance:
One set of vacuum gauges for a 4 cylinder engine.
Allen key set.
10mm spanner.
8mm spanner.
Long number 2 phillips head screwdriver.
Stubby number 2 phillips head screwdriver.
13mm socket and ratchet.
Pliers, snipe nose or bull nose will do.
Right angle screwdriver OR 7mm socket.
Piece of 2x4 wood to lever carbs up or similar.
Things you may WANT for the carb balance:
Auxiliary fuel tank.
Pair of rubber gloves. (You probably will need these)
I advise that you sync your carbs AFTER you re-jet, adjust float heights, change needle washers and check valve clearances or you may have to do it again.
Firstly remove your tail unit, inspection panels and lowers. (Lowers not necessary but helps with space)
Next remove tank,
airbox,
carbs,
and to make things much easier, carb rubbers.
Next you need to remove the blanking screws and the vacuum hose take-off for the fuel tap. The blanking screw for cylinder 4 is accessed next to the thermostat housing here:
Then screw in the adapters from your carb balancing kit and attach the hoses.
Connect up the hoses to the vacuum gauges making sure you do it so cylinders 1-4 go from left to right on the gauges.
Cylinder config:
Front
2 4
1 3
Rear
After this stick back on your carbs and airbox. Then put back on your tank or connect up your auxiliary fuel tank. (If using your standard tank you'll need to apply a vacuum to the tap if the tap is not modified. If you cannot sustain a vacuum on the tap then apply a vacuum and seal the hose somehow)
Now here comes the tricky, fiddly and potentially painful bit. Depending on how you adjust the carb sync screws.
Start the bike and adjust the idle a little higher than standard, say 1500 rpm - 1700 rpm and let the bike warm slightly. You should see something like this:
If you are using a right angle screwdriver then simply insert the driver into the vee from the left side of the bike and use to turn the adjusters in or out depending on which way you need the level in the gauge to go.
If you don't have a fancy right angle screwdriver or can't get on with it then you'll be using a 7mm socket and a pair of rubber gloves. With the rubber gloves on and socket in hand put your hand into the vee and locate the sync screws with the socket and adjust as appropriate. Be very careful as the longer the engine runs the hotter it will get and could burn your hand even with the gloves on. (Again I take no responsibility for injury, that is your own fault)
Don't press on the screws or it will act like the throttle and increase or decrease the revs and you will get a false reading.
When synchronising the carbs first sync no.4 carb to no.2 carb (master carb). Carb no.4 screw is the only screw at the front of the carbs. Adjust carb no. 4 to match carb no. 2 as close as possible.
Then sync no.1 carb to no.3 carb using the rear screw that is next to carb no.1 (closest screw to you as you enter the vee from the left side of the bike). Again adjust as close as possible to each other.
Finally sync the rear carbs (1 and 3) using the screw that is next to carb no.3 (furthest screw from you as you enter the vee from the left side of the bike). Adjust as close as possible to carbs no. 2 and 4.
(Yes I have done what you think I have there....)
You should now have something that looks like this on your vacuum gauges:
When everything is sync'd then give the throttle a little blip to settle the linkage and re-adjust where necessary. Then turn back your idle speed to the spec and turn off the bike.
After that all you need to do is rip everything apart again, remove the hoses and adapters, re-fit the blanking screws and vacuum take-off and re-assemble the lot!