after few days of making some more mods to my project bike, here's one i did recently; installing a projector headlamp with angel eyes to tyga-performance kit!!!
i've been dreaming this project for a long time. since this was my first time working on headlight, this was not an easy task for me since i don't have any reference how to fit a car projector headlamps to a motorcycle headlights.
before i was planning to fit a projector headlamp of 02 yamaha r6 to tyga's headlight, but after carefully looking on R6 headlamps it will take a lot of mods to make it fit. and one big challenge to me is even to find locally an angel eyes the size of the R6 projectors!
so, i went to our local auto parts shop and got these kits.....
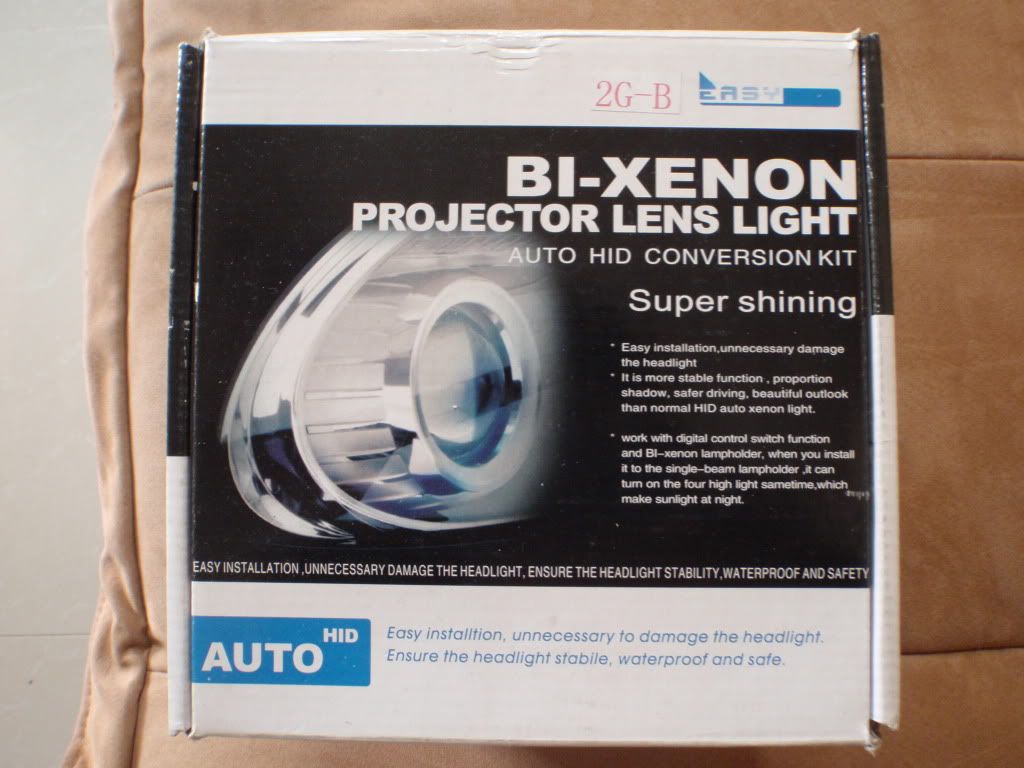
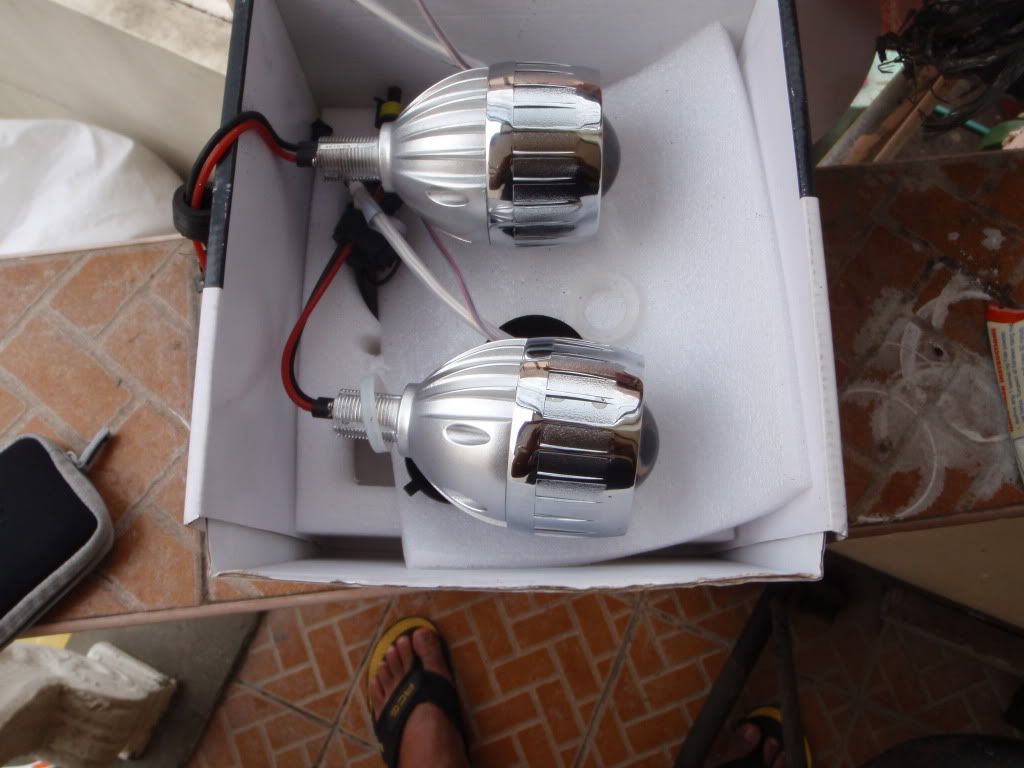
the kit consist of the ballast, wirings, projector headlamp assembly, and some washers and nuts.
since i don't have any oven nor gun heater to bake the headlights to make the gum-like-adhesive on the headlight melt ( i only have a microwave oven, and it would probably explode my oven) , i went to my sister's closet and got a HAIR DRYER!!!! hehehe! But, was amazed how easy the adhesive to melt on a hair dryer!
while the gum-adhesive (i dont know whats the proper name for it) still hot and soft, carefully remove the headlight cover by using a screw driver. since i dont have any assistant around, i duct-tape the hair dryer to a chair and used my both hands to work on the headlights.
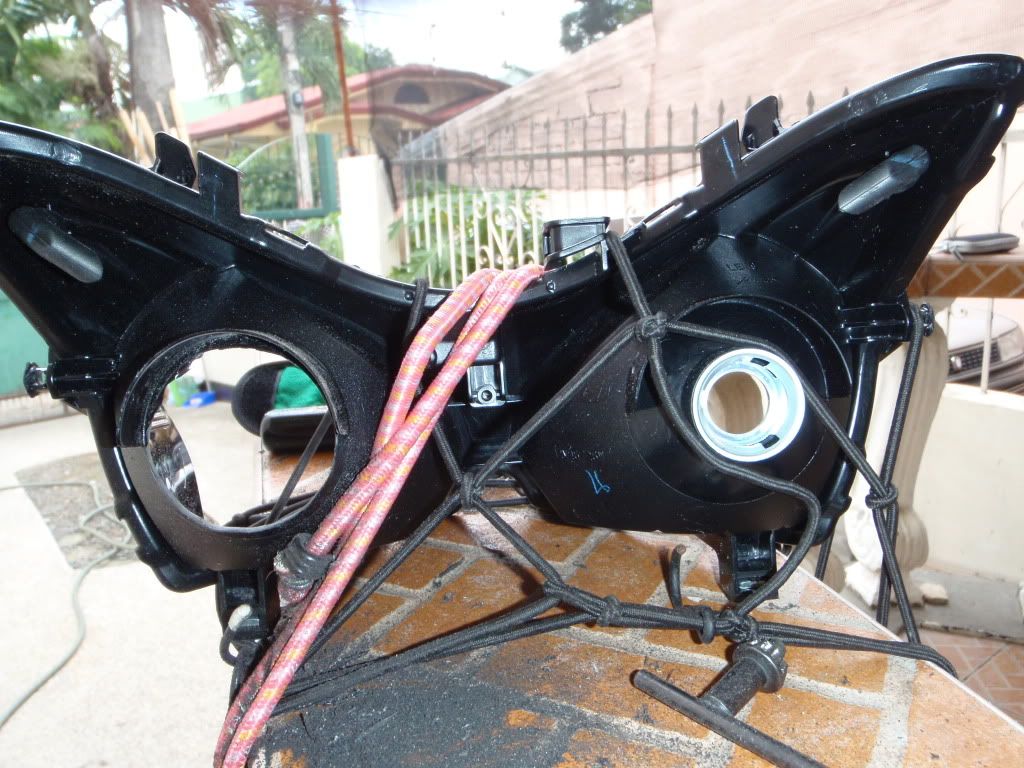
after removing the cover, i have to make a big hole at the back to accommodate the lens.
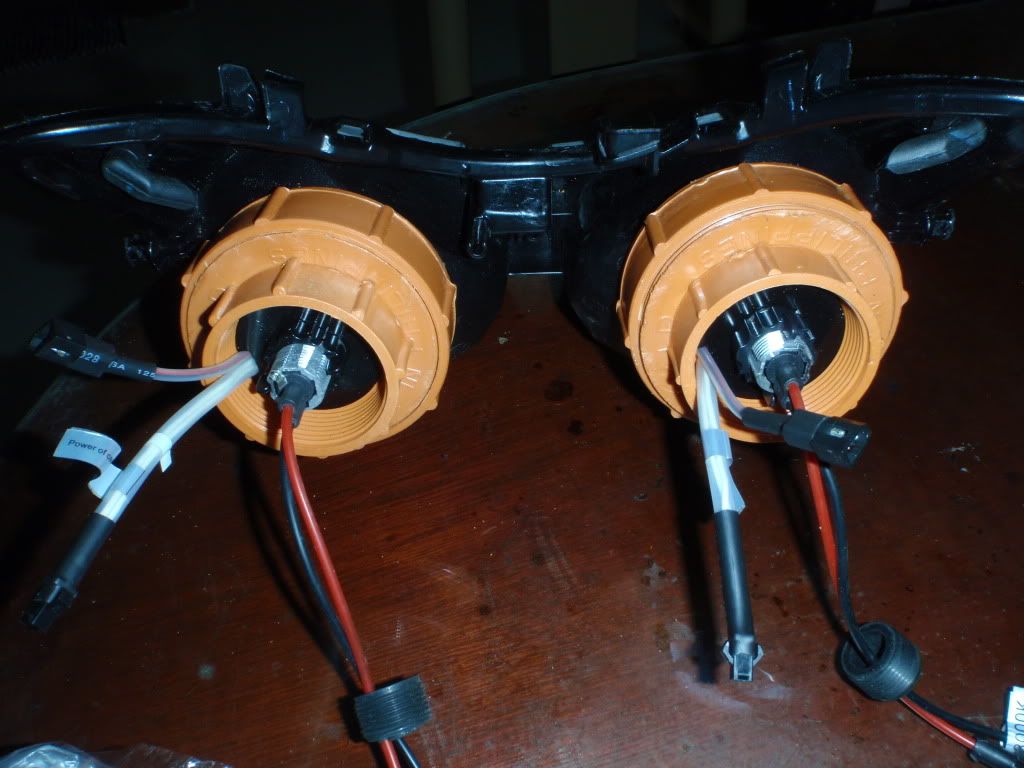
you need also these kind of pvc pipe fittings, i forgot the sizes, but i think these are size 4 " and 2". remove the square portion of the two fittings, make a hole fit enough for the smaller pvc fitting in place. secure with a pvc pipe adhesive or any adhesive strong enough not to make it move.

luckily, the 2" pvc fitting fit perfectly to the washers of the projector lenses.

you have two option for the reflector of the headlight, one is to keep the original style and second is to paint it with black ( you can use a flat black or gloss black acrylic paint, but the disadvantages of black reflector once your headlight have moist inside its too visible.).
if you want to keep the original reflector, make sure not to scratch the reflector! but as soon as you a hole in the reflector, small pieces will stick on reflector and make it impossible to remove. here's what i did, i took a soft brush of my dslr lens (dont use an ordinary paint brush, it will leave a very fine scratches on the reflector) and carefully remove the plastic debris. but as soon as you remove almost of the debris in the reflector, you'll see some stains and that will be easy to remove by using a soft cloth (i used my washable dslr lens cleaning cloth) with some little bit of alcohol ( i used isoprophyl alcohol since i dont have any liquor in my house, hehehe!). and viola, your reflector will be clean and shiny like you opened it before. NOTE, dont wash your reflector with soap and water, it will blur you reflector ok?
if you want to make your reflector black, rub the reflector with a sand paper and spray it with an acrylic paint.
fit the projector headlamp assembly to your pvc fitting and secure it with the washers and nut and it will look something like this....
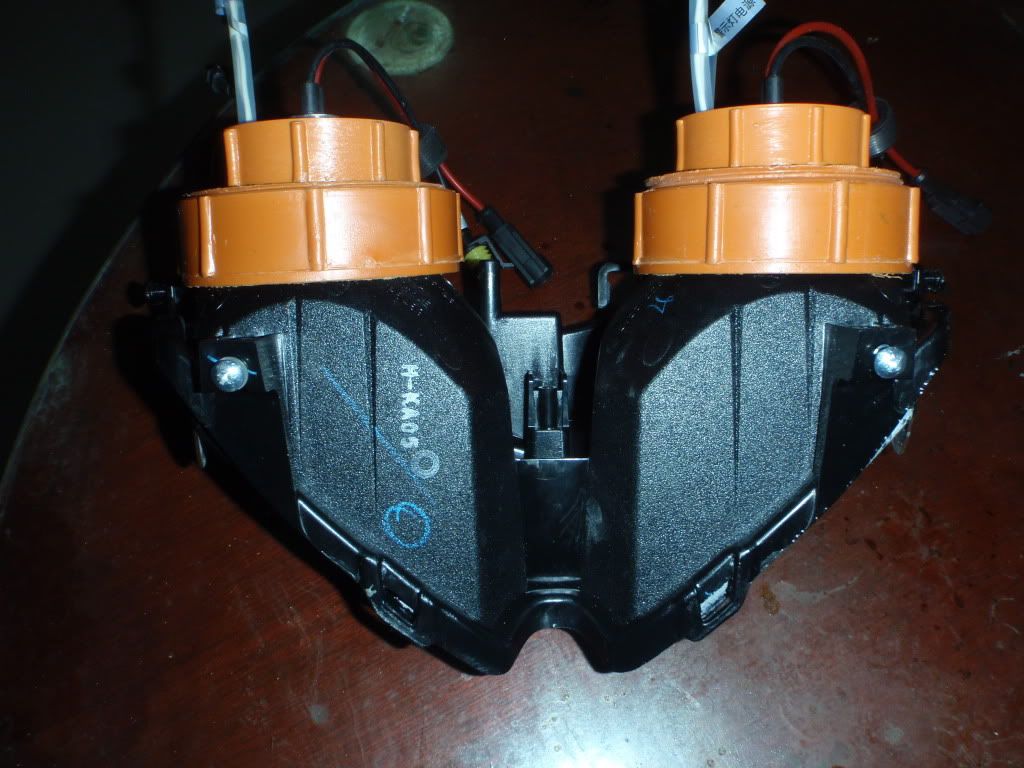
put again your headlight cover and secure it with silicone adhesive to prevent water from coming in. heat again the headlight with your sister or wifes hair dryer (if you have one thats good too) to make sure that the adhesive combined again.
by the way, secure also your pcv fittings with silicone adhesive, or any adhesive to prevent moist air to get in.
remember the part that you removed from the tyga headlights mounting, you have to drill, put some screws and secure it with pvc adhesive so you can use the tyga headlights rubber cover for the headlights to the 2" pvc fitting cover. (sorry forgot to get some pics)
you may ask, how you can fit the headlight projector lens correctly on its proper height so you'll have a good light at dark? well, you can fit the headlight to the front cowl and carefully adjust the pvc fitting (not yet secured with adhesive to the back of the headlamp).
after securing everything to the headlamp, paint the back with black.
the wiring of the ballast is very easy, no need to worry. the only challenge is to fit the wiring harness everything in the tyga's front cowl. good thing it has of plenty of space for messy wirings like mine! hehehe!
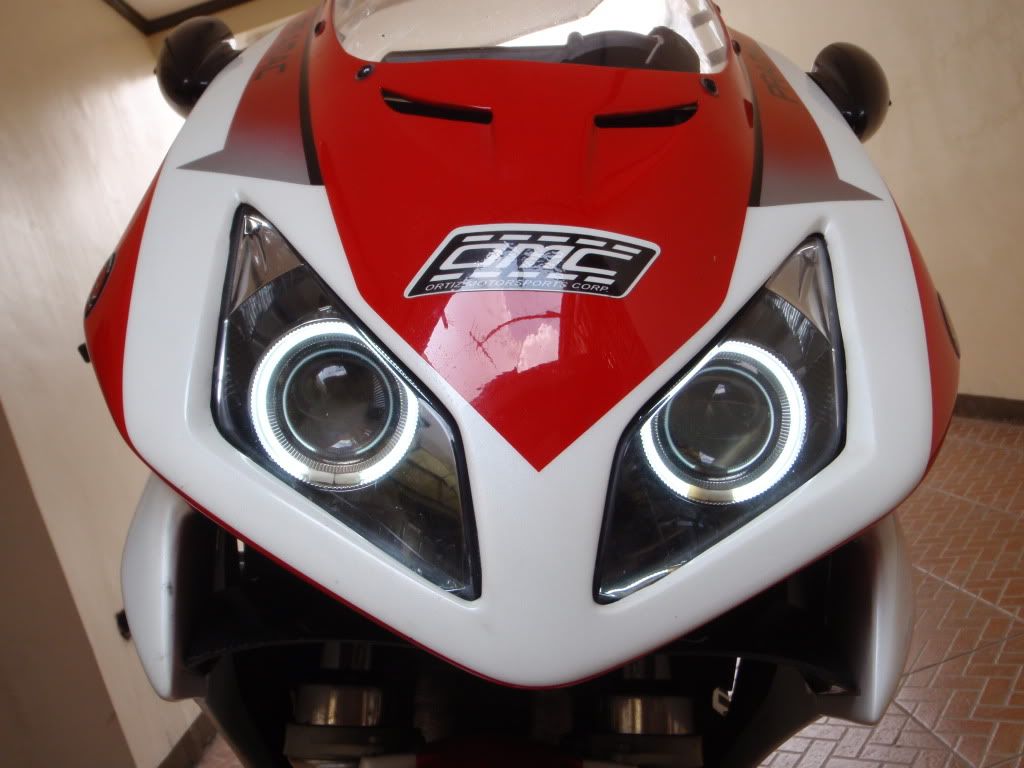
so after securing, and connecting the projector heres the final pic...

here's the reference video....
http://www.youtube.com/watch?v=UN4I2vtABCk
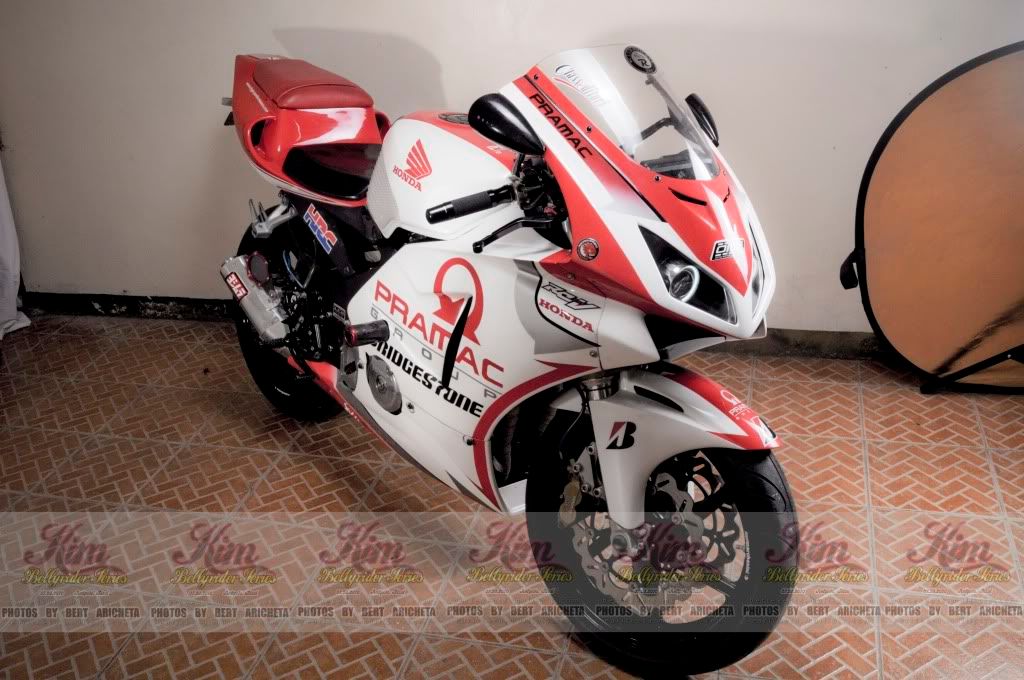
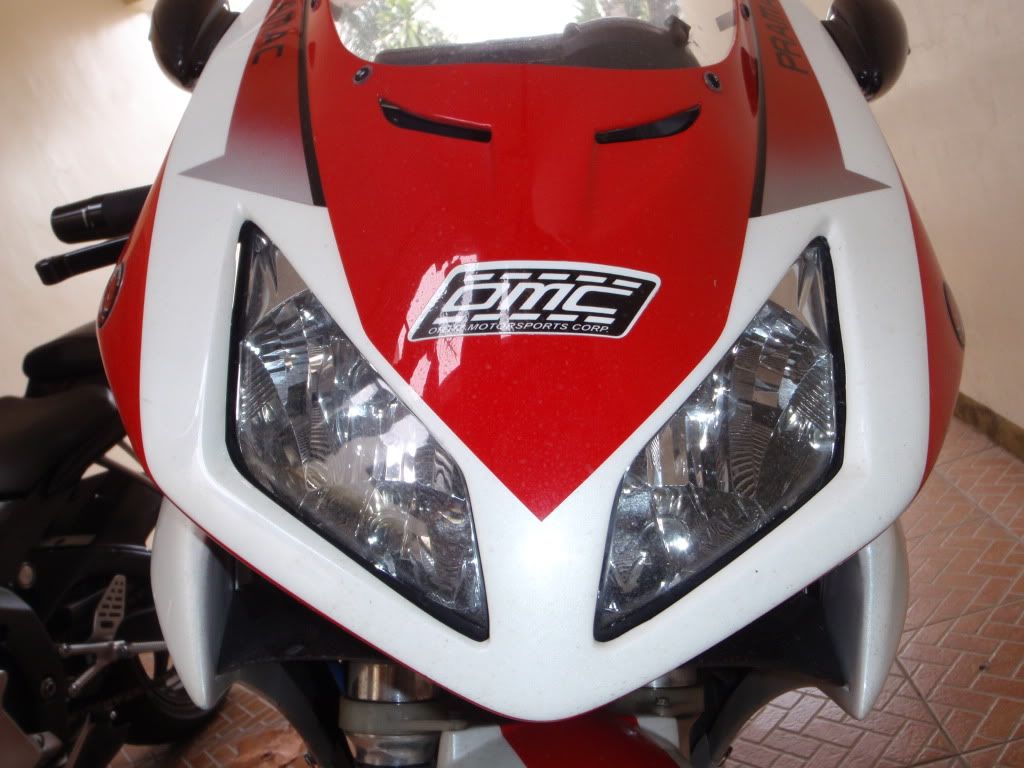
before....
after.....
since i used two headlamps, one is black and the other is the keeping the original reflector, i used the original one. im thinking of making my black reflector cover into a smoked-colored-cover or a mirror effect, and that will probably make the tyga headlamps more cool.
thats all folks!!! CIAO!!!!
.