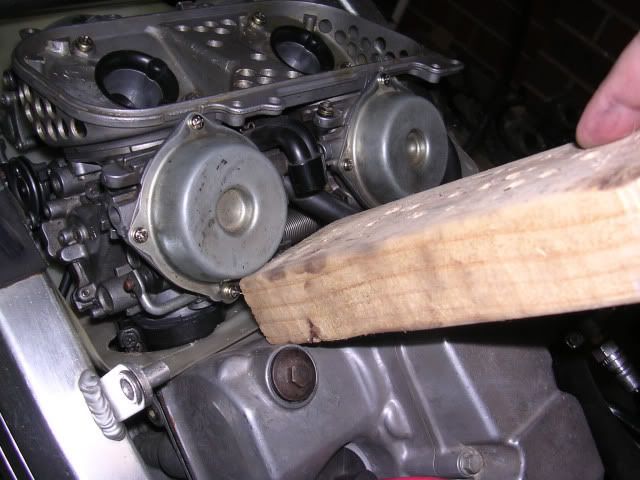
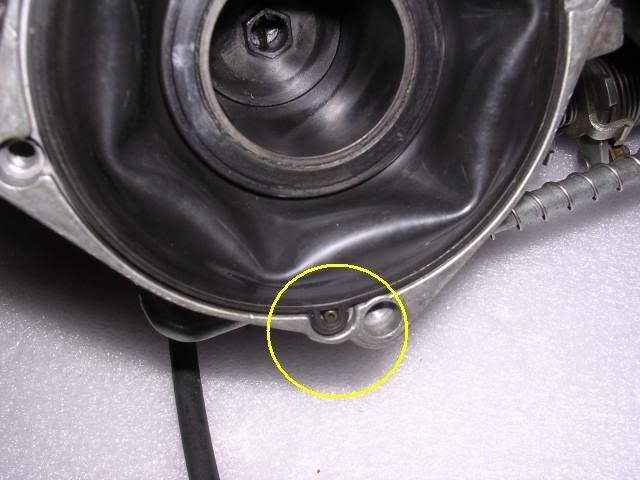
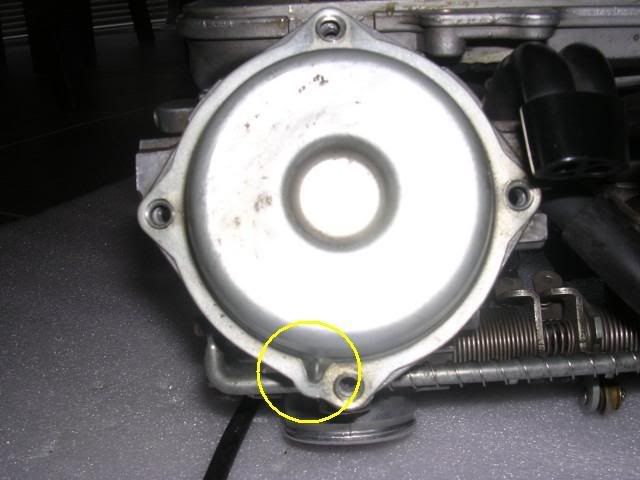
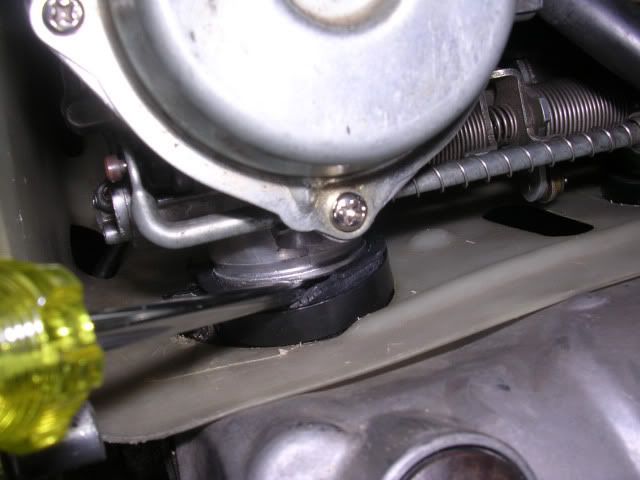
Firstly, drain the fuel from them (the float bowls will likely be full of fuel). These are the flat head screws on the very bottom of the float bowls near the drain nipple. (As standard they’re on the outside face of the carbs, but your screws might be on the inside if someone before you has mixed them up with other carbs!). Undo them a couple of turns, and fuel should start to come out. Shake them a round a bit to get most of the fuel out. I sit the carbs over a bucket to do this:
When all float bowls are drained do the drain screws back up tightly.
Now we can get some work done to the carbs.
Rule: Work on only 1 carb at a time. I can’t stress this enough! This is what we’ll do here. (this isn’t always possible if you find wrong parts in any carb - label them if you take more than one apart at a time!).
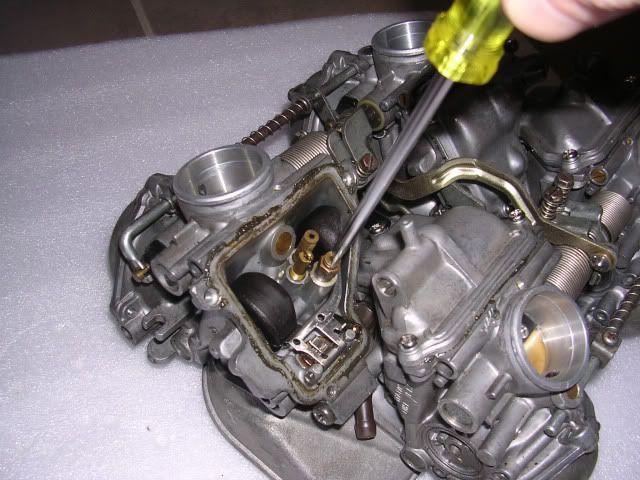
Turn the carbs upside down (bet you’re glad you drained them now!) and remove the float bowl cover (3 screws).
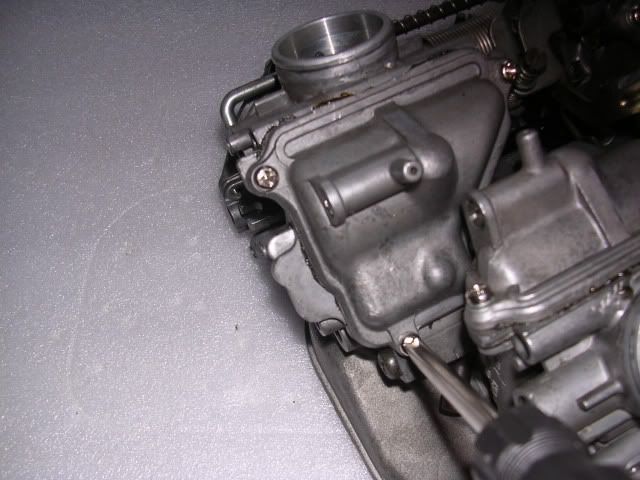
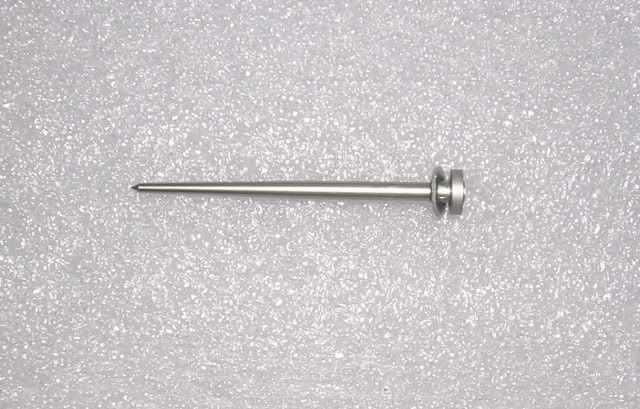
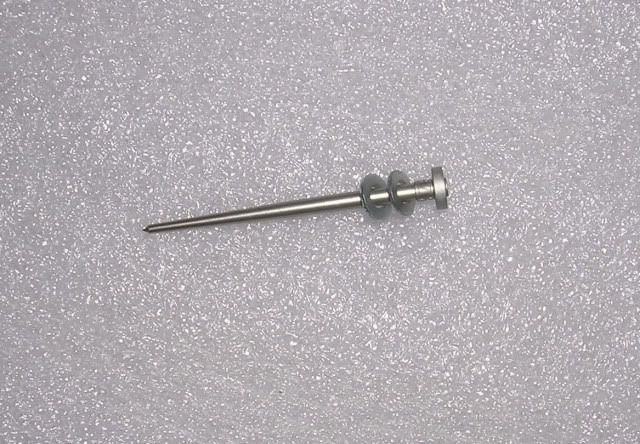
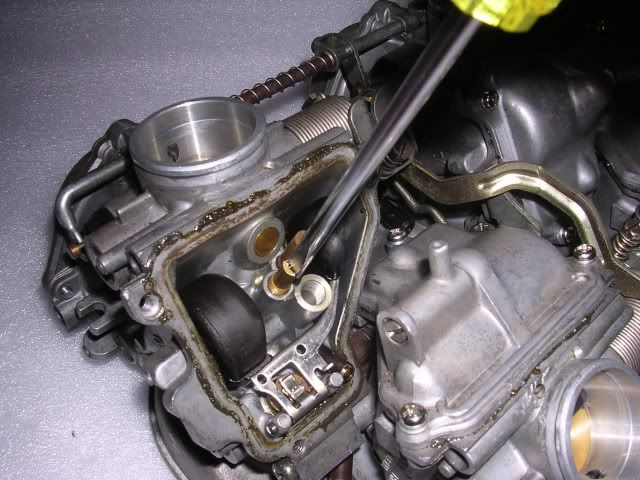
These are the parts you will see:
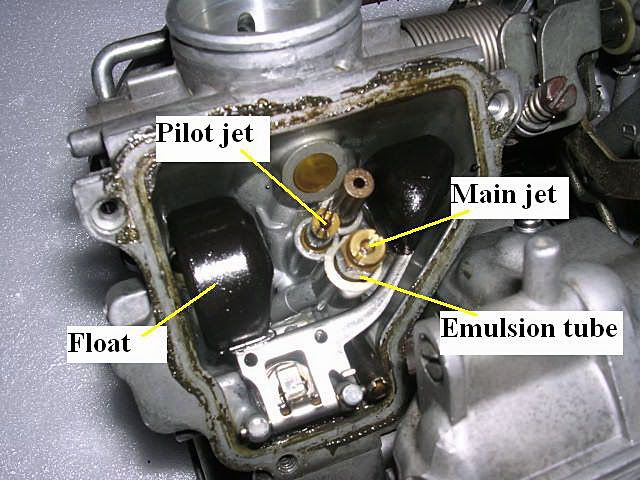
Unscrew the main jet with a flat head screwdriver. Be very gentle when taking out the brass parts (main jet, emulsion tube, pilot jet). The brass can become very soft over time, and clumsy hands will wreck them easily.
Check (and record on your paper) each main jet size, it will be stamped into the side of the part.
Standard jet sizes are: 1989 Jap model (4 x 110), all other year Jap models (2 x 115f, 2x 118r), all UK bikes (2 x 120f, 2 x 122r). 1989 Jap bikes run very lean from the factory, best to rejet as a precaution. Other year Jap bikes will need rejetting if you run any non-standard parts (pipe etc).
Main jet sizes: If you run a nice sounding aftermarket exhaust and/or pipe, then the common consensus is to run 118 size front and 120 size rear (often referred to as 118/120). If you run a very high flowing/loud exhaust or full exhaust system then you may wish to consider running 120f/122r size main jets.
Note: If you have a modified induction system (aftermarket filter, removed rubber flaps, modified snorkel etc) then this jet size guide is NOT applicable to you. NC30 jet size hugely depends on your induction/filter setup. I strongly suggest only running the standard induction setup on a road bike, there are little gains and more rideability losses to be had by running a different setup! I return all road NC30’s that I work on to standard induction setups, most often with better results. Modify at own risk…
You can buy main jets from any Keihin dealer/supplier, most dyno tuners (google one near you) or NC30 parts stockists. The part numbers you need to order are 99101-393-###0 (e.g. for a 118 size jet: 99101-393-1180). Simple. These are exactly the same jets that Honda uses in their carbied road bikes.
If you are just checking yours and not replacing them, then make sure they are unblocked by holding them up to a light and looking through them, making sure the passage is clear. If there is any doubt, clean them in some kerosene/paraffin or carby cleaner (I clean them using an old toothbrush) and recheck them.
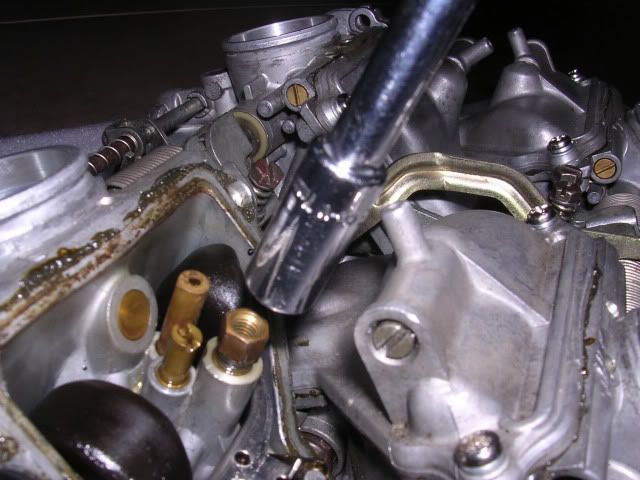
Next job: Check emulsion tubes. These are the brass tubes that the main jets were screwed into. It’s easiest to remove these by using a 7mm sized socket (or alternatively a 7mm spanner).
We need to make sure all the holes are unblocked and that the correct tubes are in the correct carbs (I’ve found that previous owners can easily get them mixed up!). Remove them:
The FRONT carbs use 4-hole emulsion tubes.
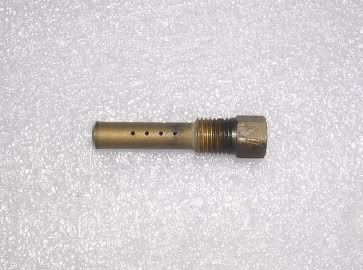
The REAR carbs use 5-hole emulsion tubes.
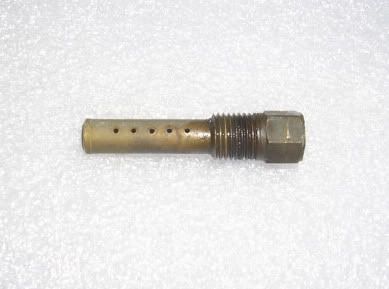
All holes in the emulsion tubes (side holes, and straight through passage) must be free from any blockage. If any are holes are blocked, unblock them by washing in kerosene/paraffin/carby cleaner/petrol and use an old toothbrush. Compressed air and very fine wire (old fashioned household fuse wire works well) will help here also.
If the emulsion tubes aren’t in the correct carbs, then put them aside for when you open up the other carbs.
Pilot jets: Remove them by using a flat head screwdriver. Standard size is #35 on all 4 carbs (size is stamped on the side), there is no need to change from this setting on a road bike. Just as you did with the emulsion tubes, make sure all holes are free and unblocked. The lengthwise passage through the pilot jets is very small (the diameter of this is what the size refers to), make sure it’s not blocked by holding it up to a light and looking through it. If it is blocked clean it out. When clean, fit it back into the carb.
Once everything is correct in the carb, replace the float bowl cover (3 screws). The Haynes recommends using new float bowl gaskets each time, I don’t do this (whoops!).
Important: It’s best to make sure that the float bowl cover goes back onto the carb that it came off, or else the gasket surface may not mate up properly and the carb will leak badly when you start the bike.
Rick Oliver sells gasket sets cheaply (I need to get some Rick!). I use a thin smear of petrol resistant gasket goo over my old gaskets which seal them well. The choice is up to you.
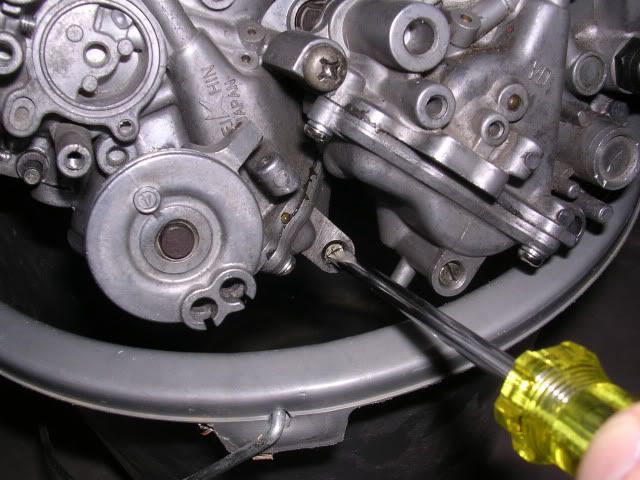
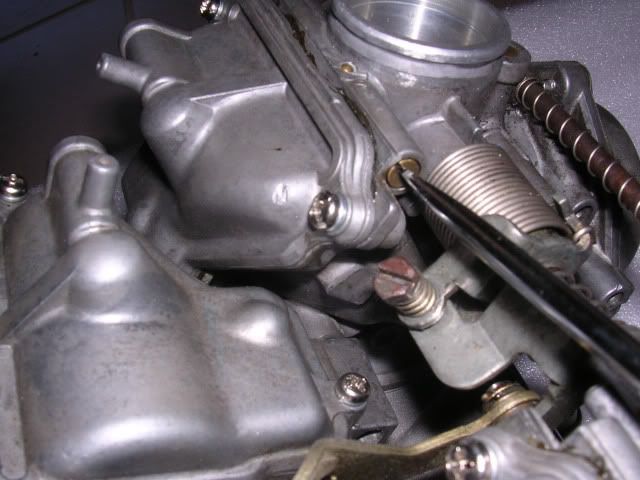
Adjusting pilot screw settings: This can be critical to how the bike idles and runs off idle. You can adjust them with a flat head screwdriver.
Count how many full (360 degree) turns it takes to wind them fully in from where they are now. Write down this setting (to the nearest quarter turn).
Time to set them: If your bike is standard, set all four to 2 (two) turns out from fully in. If your bike has an aftermarket exhaust or pipe (most NC30’s), set all four to 2.25 (two and a quarter) turns out. Done.
We are now done with the underside of the carbs. This is what we have done so far:
- Check/clean/install main jets
- Check/clean emulsion tubes
- Check/adjust pilot screw settings
- Check pilot jets
And how easy it all was!!