Fixing my broken seat unit tabs
Forum rules
Please can you post items for sale or wanted in the correct For Sale section. Items / bikes for sale here will be removed without warning. Reasons for this are in the FAQ. Thanks
Please can you post items for sale or wanted in the correct For Sale section. Items / bikes for sale here will be removed without warning. Reasons for this are in the FAQ. Thanks
-
matt74
- Settled in member
- Reactions:
- Posts: 17
- Joined: Sat Dec 24, 2011 11:10 am
Fixing my broken seat unit tabs
My seat unit was barely hanging on as most of the fixing points had been damaged over the years so I had a go at fixing them and thought I’d share the results in case useful to anyone.
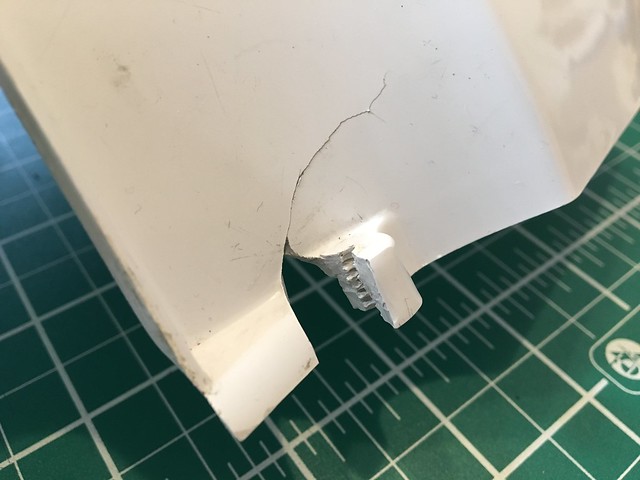
This is what they looked like plus the one by the seat was missing but I didn’t get a pic of this. As you can see, a bit of a useless mess.
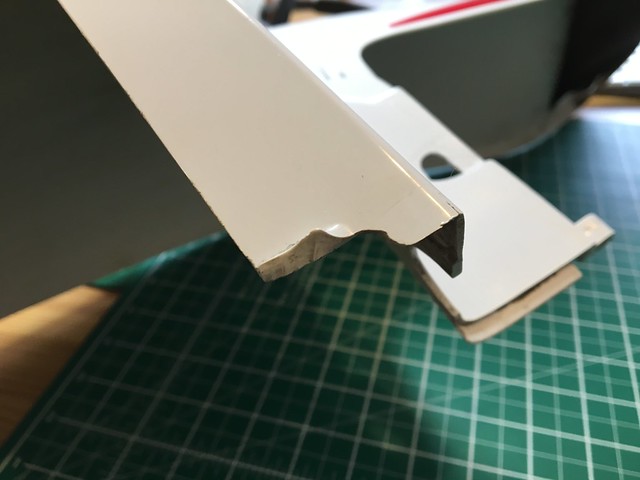
I hacked off the broken parts and created square, straight edges to slot in some new plastic.
I bought some plain white ABS sheet from eBay and layered it up, bonding each layer to create thick enough blocks of plastic.
I then used the tabs I still had as templates to mark up the plastic and then cut and filed the new parts to shape.
The parts were bonded in using a glue I made from melting ABS in pure acetone, actually Lego left in a jar of 100% acetone nail varnish remover. Yep, Lego. The mix is quite thick but can be thinned further with more liquid.
I painted each side of the part in acetone first to get it to melt a little then applied the Lego mix, put it in place and left it a few days to cure.
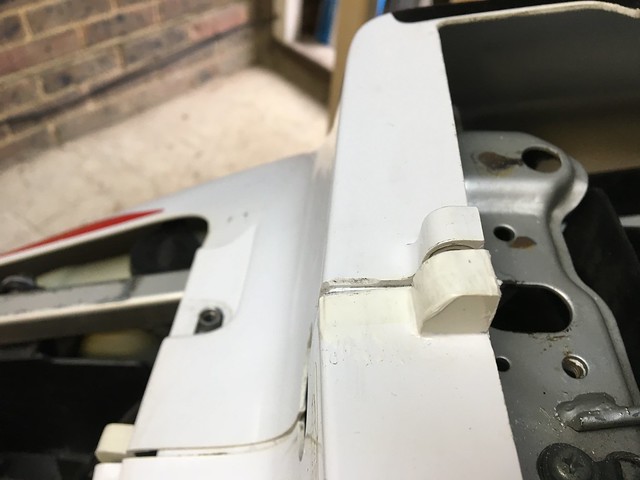
I’ve yet to completely smooth off the new parts and I might paint them as they are a bit off-white but I’ve screwed it all together and so far nothing has broken.
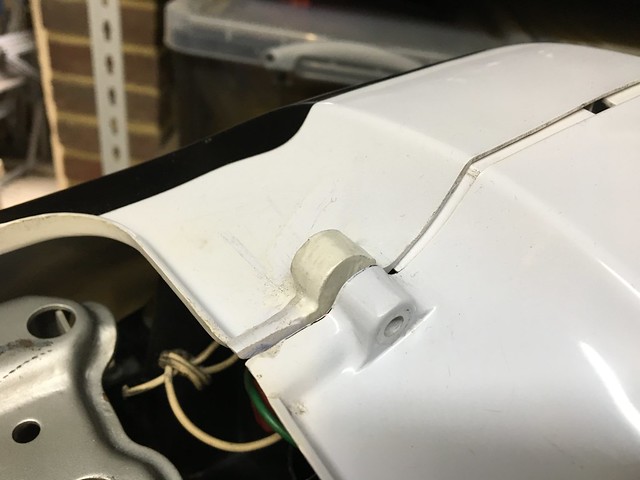
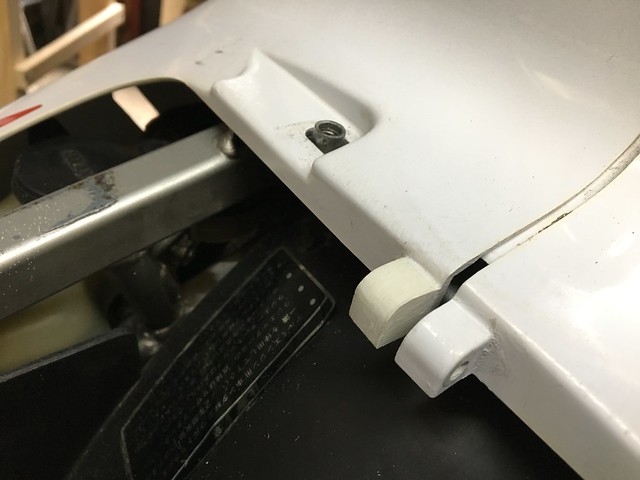
New tabs in place but not drilled or fastened together (though I’ve since done this without breaking them).
I’ll update the post if the whole lot has snapped off by morning
This is what they looked like plus the one by the seat was missing but I didn’t get a pic of this. As you can see, a bit of a useless mess.
I hacked off the broken parts and created square, straight edges to slot in some new plastic.
I bought some plain white ABS sheet from eBay and layered it up, bonding each layer to create thick enough blocks of plastic.
I then used the tabs I still had as templates to mark up the plastic and then cut and filed the new parts to shape.
The parts were bonded in using a glue I made from melting ABS in pure acetone, actually Lego left in a jar of 100% acetone nail varnish remover. Yep, Lego. The mix is quite thick but can be thinned further with more liquid.
I painted each side of the part in acetone first to get it to melt a little then applied the Lego mix, put it in place and left it a few days to cure.
I’ve yet to completely smooth off the new parts and I might paint them as they are a bit off-white but I’ve screwed it all together and so far nothing has broken.
New tabs in place but not drilled or fastened together (though I’ve since done this without breaking them).
I’ll update the post if the whole lot has snapped off by morning